
When you compose a push notification from the Push Notifications Hub, you can attach a piece of content to it — a news item, a resource, a form, or an event. Members who tap the notification land directly on that content inside the app instead of on a generic message.
An attachment is optional. A notification with no attachment still delivers normally; it just doesn’t take the member anywhere in particular.
What You Can Attach
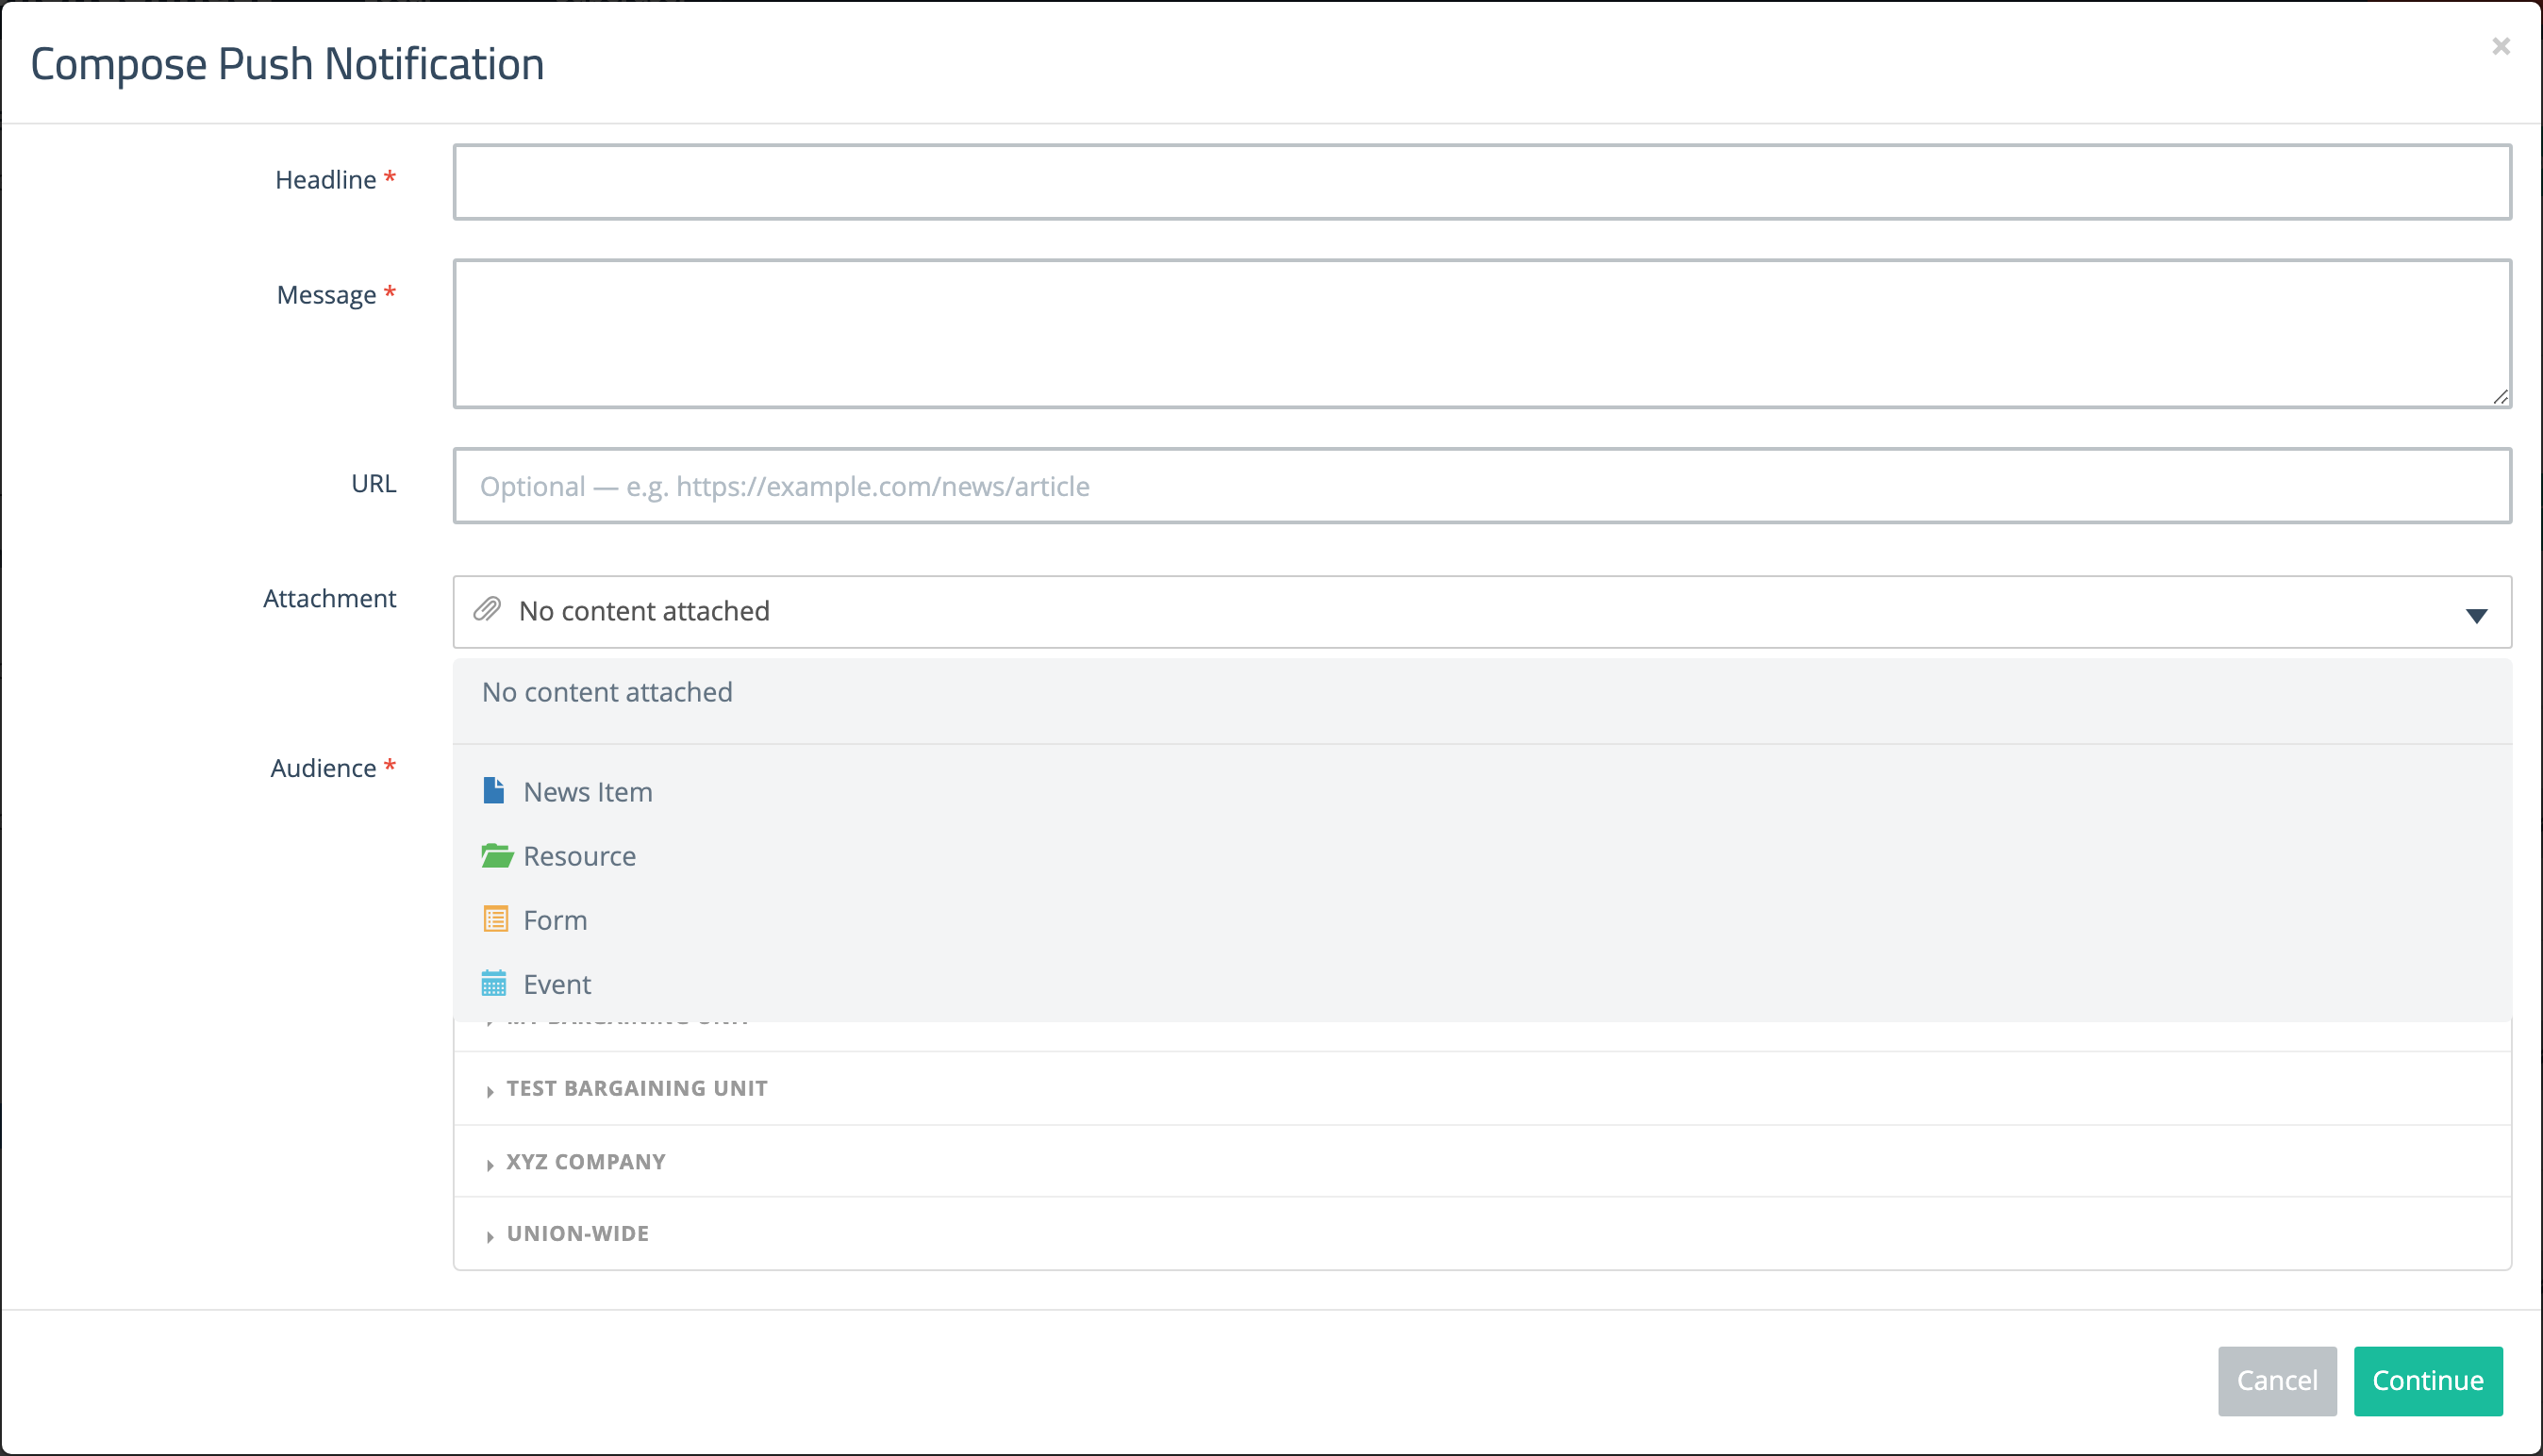
The Attachment dropdown offers four types:
- News Item — an article, newest first
- Resource — a document or link from Info & Resources, including ones filed inside a category
- Form — a custom form, quiz, or contract survey
- Event — an upcoming event, soonest first. Only events from today forward are listed, since there is nothing useful to send a member to on a past one.
You can attach one item per notification.
Attaching Content
- Log in to the app manager.
- In the sidebar under Union-Wide Resources, click Push Notifications.
- Click the Compose button in the top right.
- Click the Attachment dropdown — the one with the paperclip that reads No content attached — and choose the type of content you want to attach.
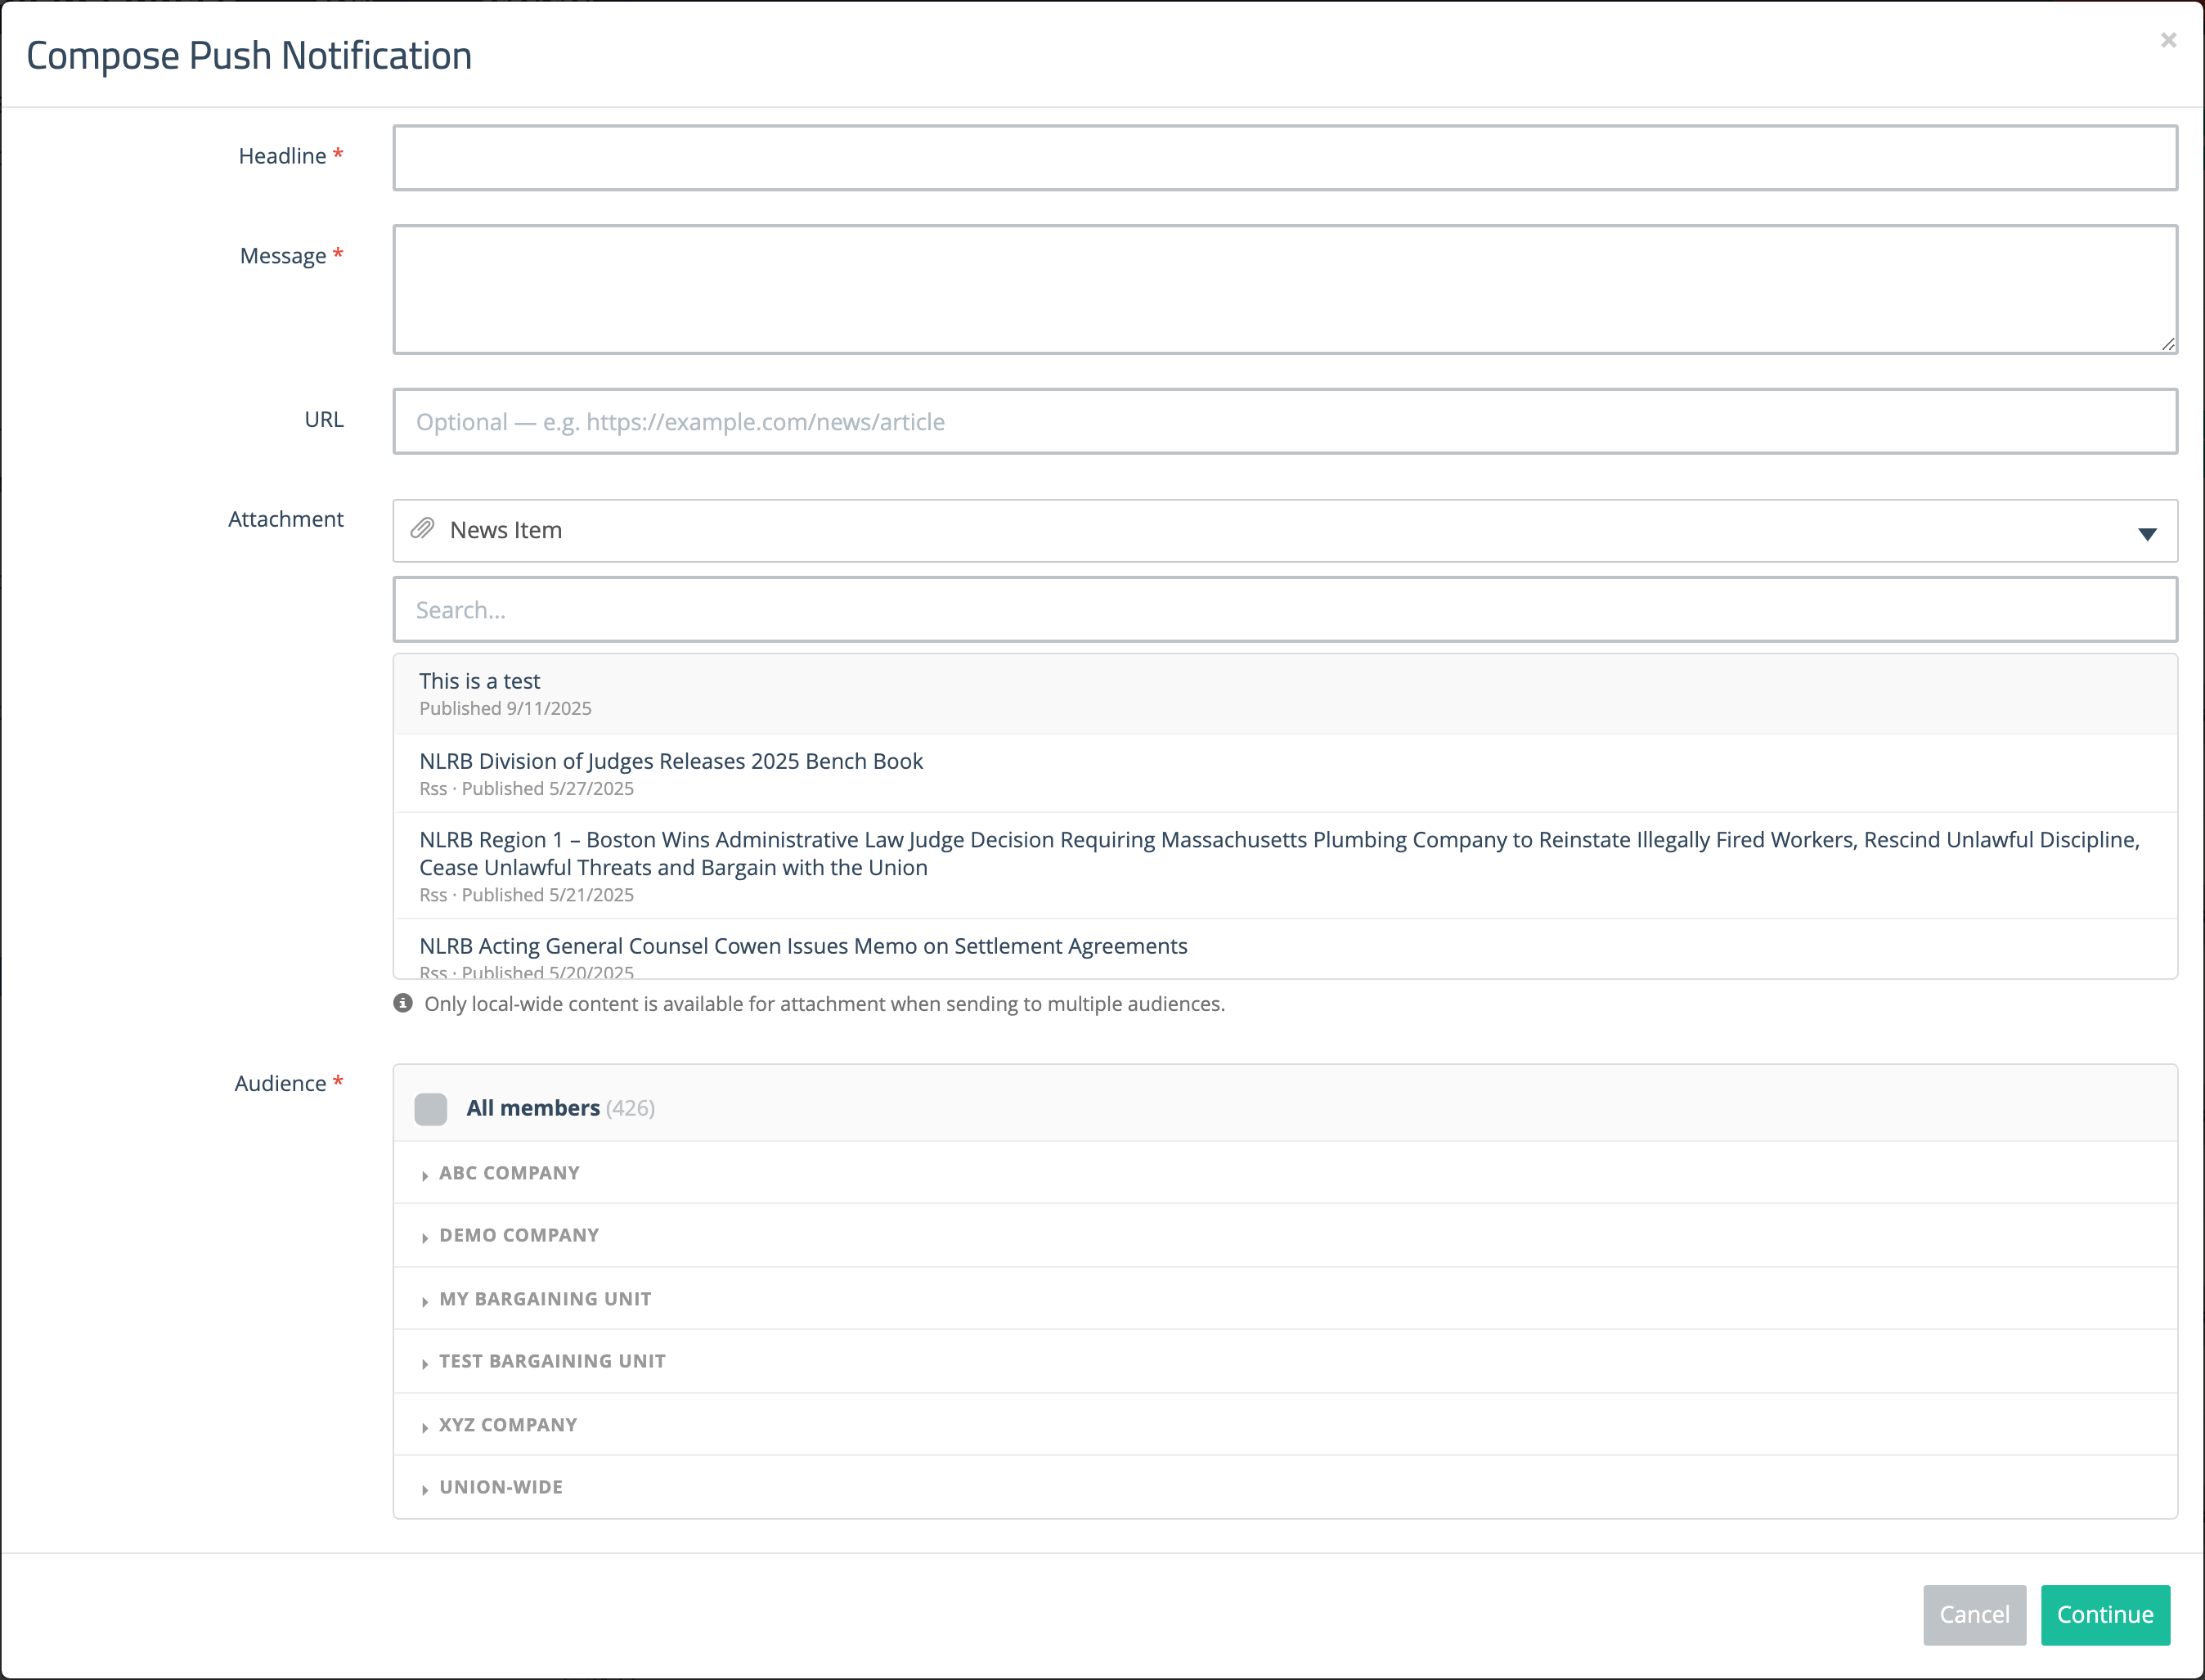
- A list of matching content appears below the dropdown. Each entry shows its title and a short detail line — a publication date for news items and resources, the start date and place for events, or the form type and whether it is active.
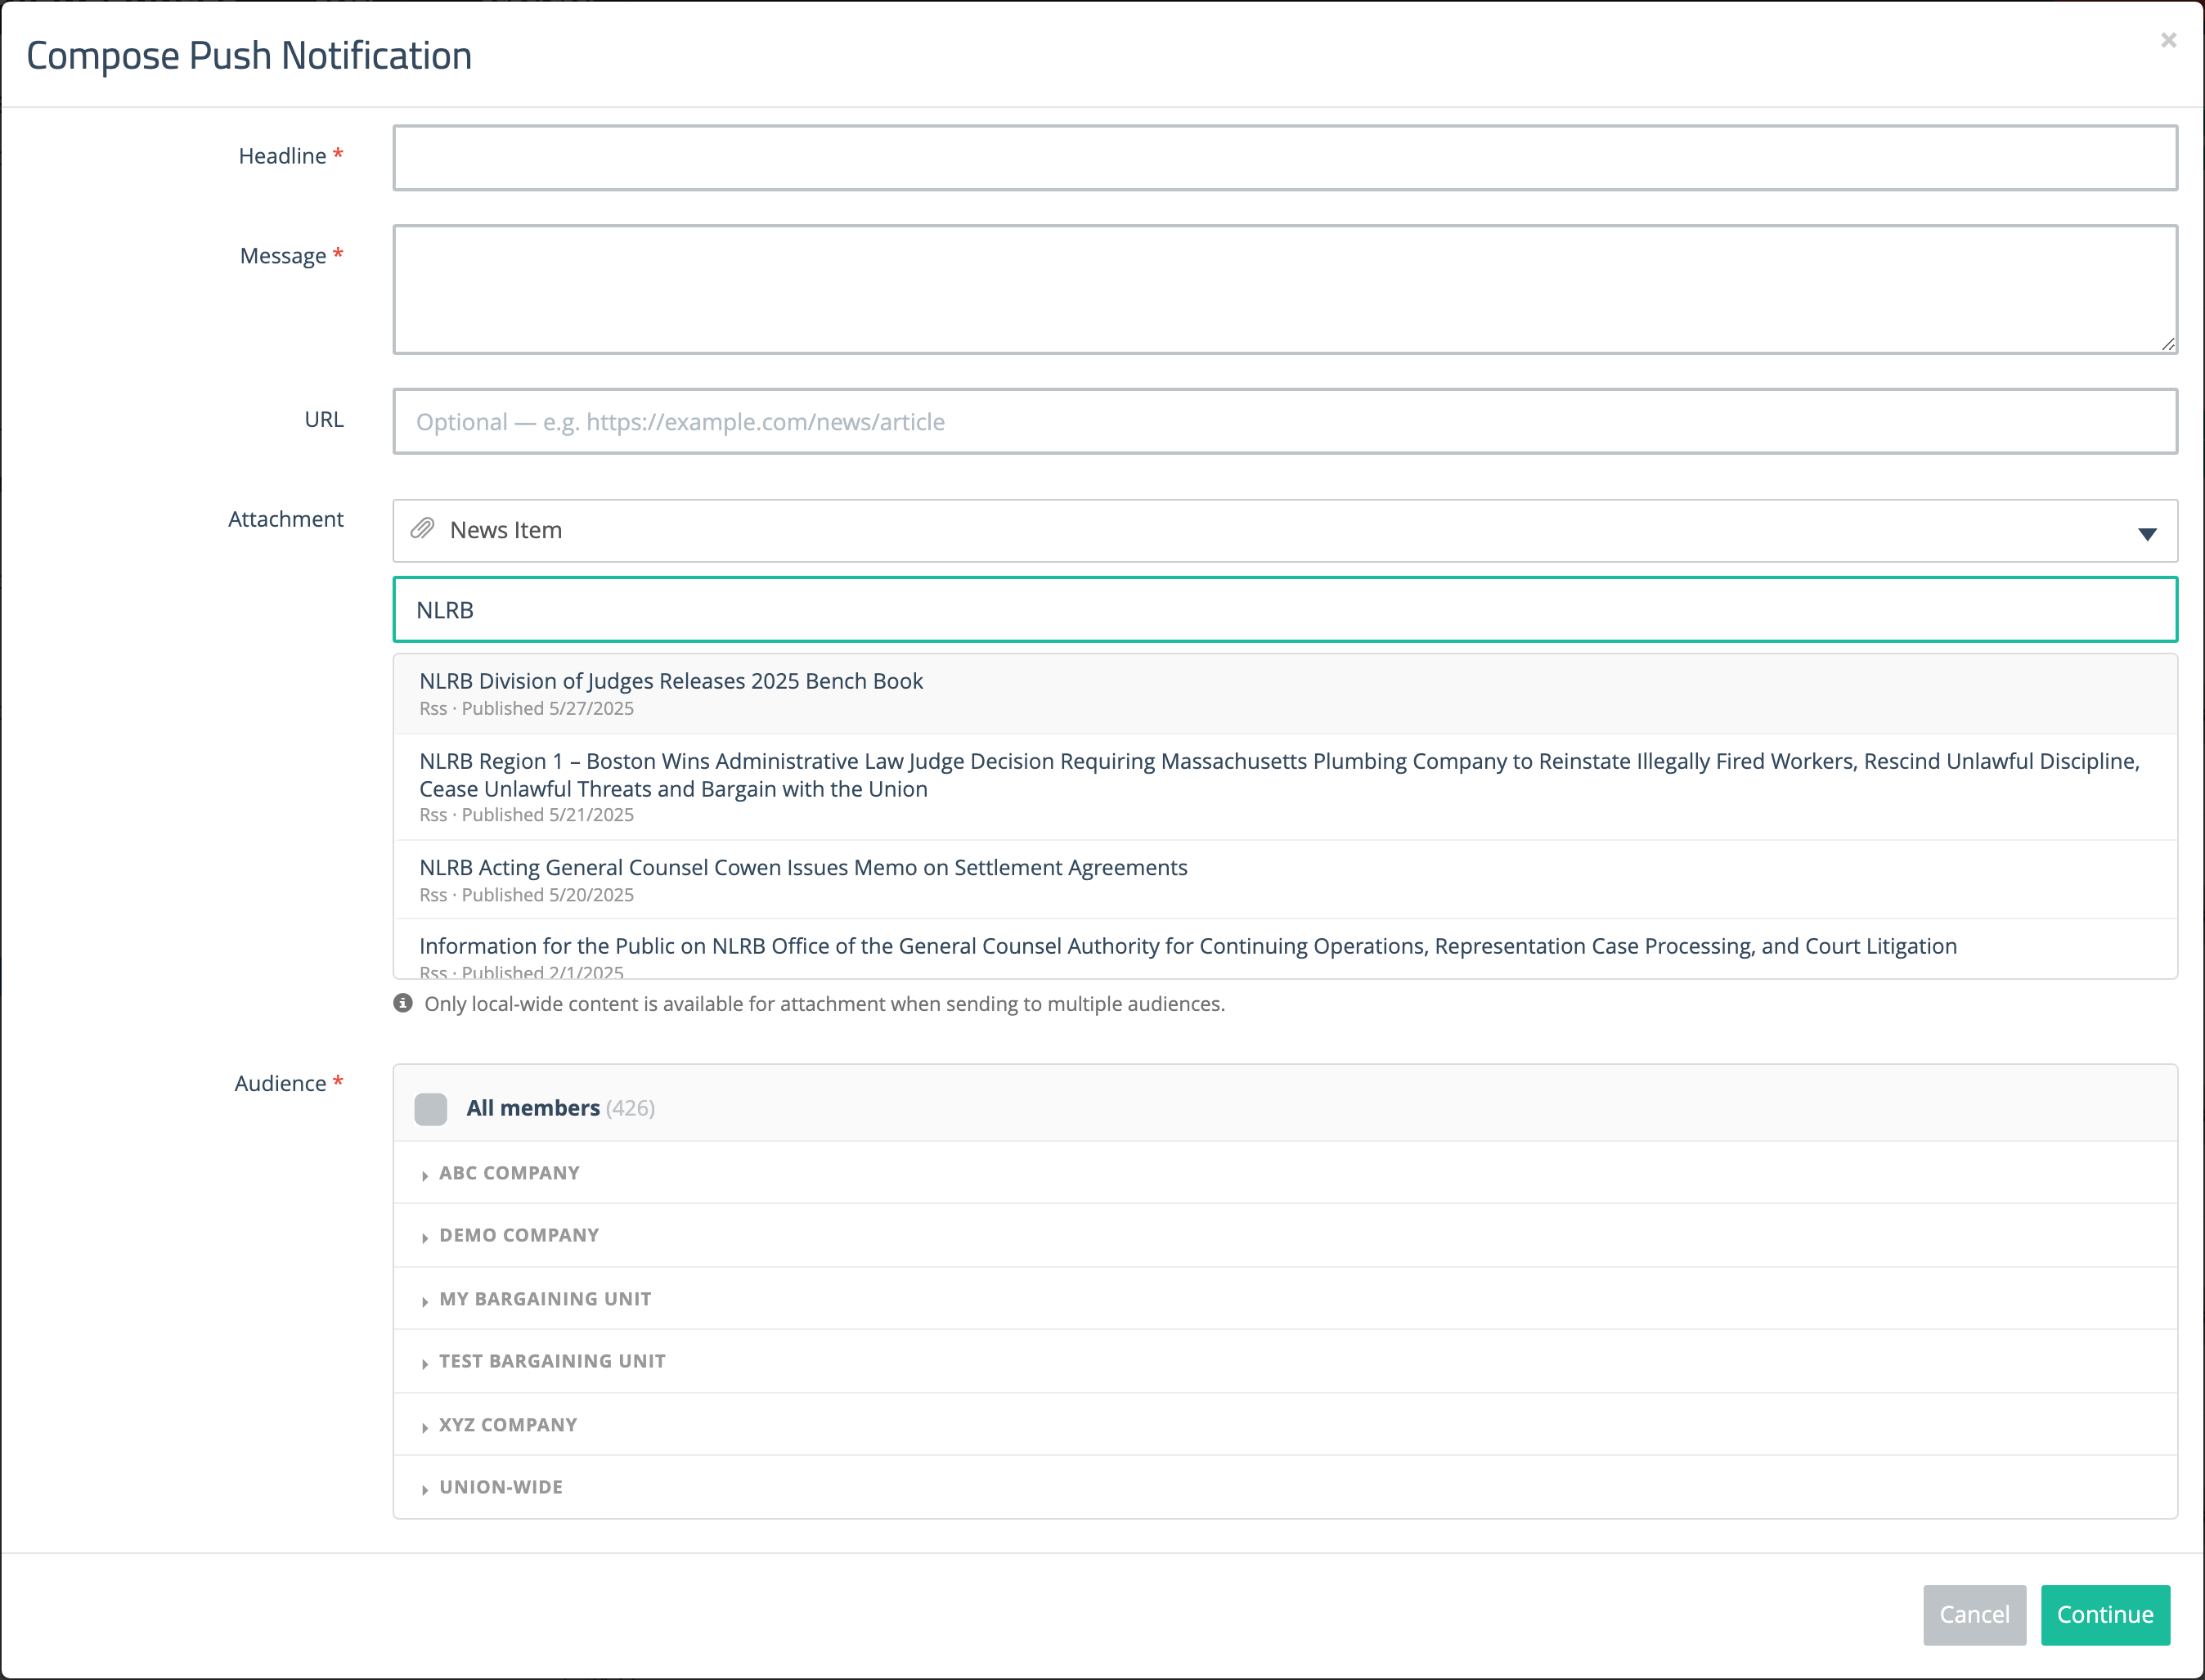
- If you don’t see what you’re looking for, type part of its title into the Search box. The list narrows as you type. Only the 50 most recent items are shown at a time, so search is the way to reach anything older.
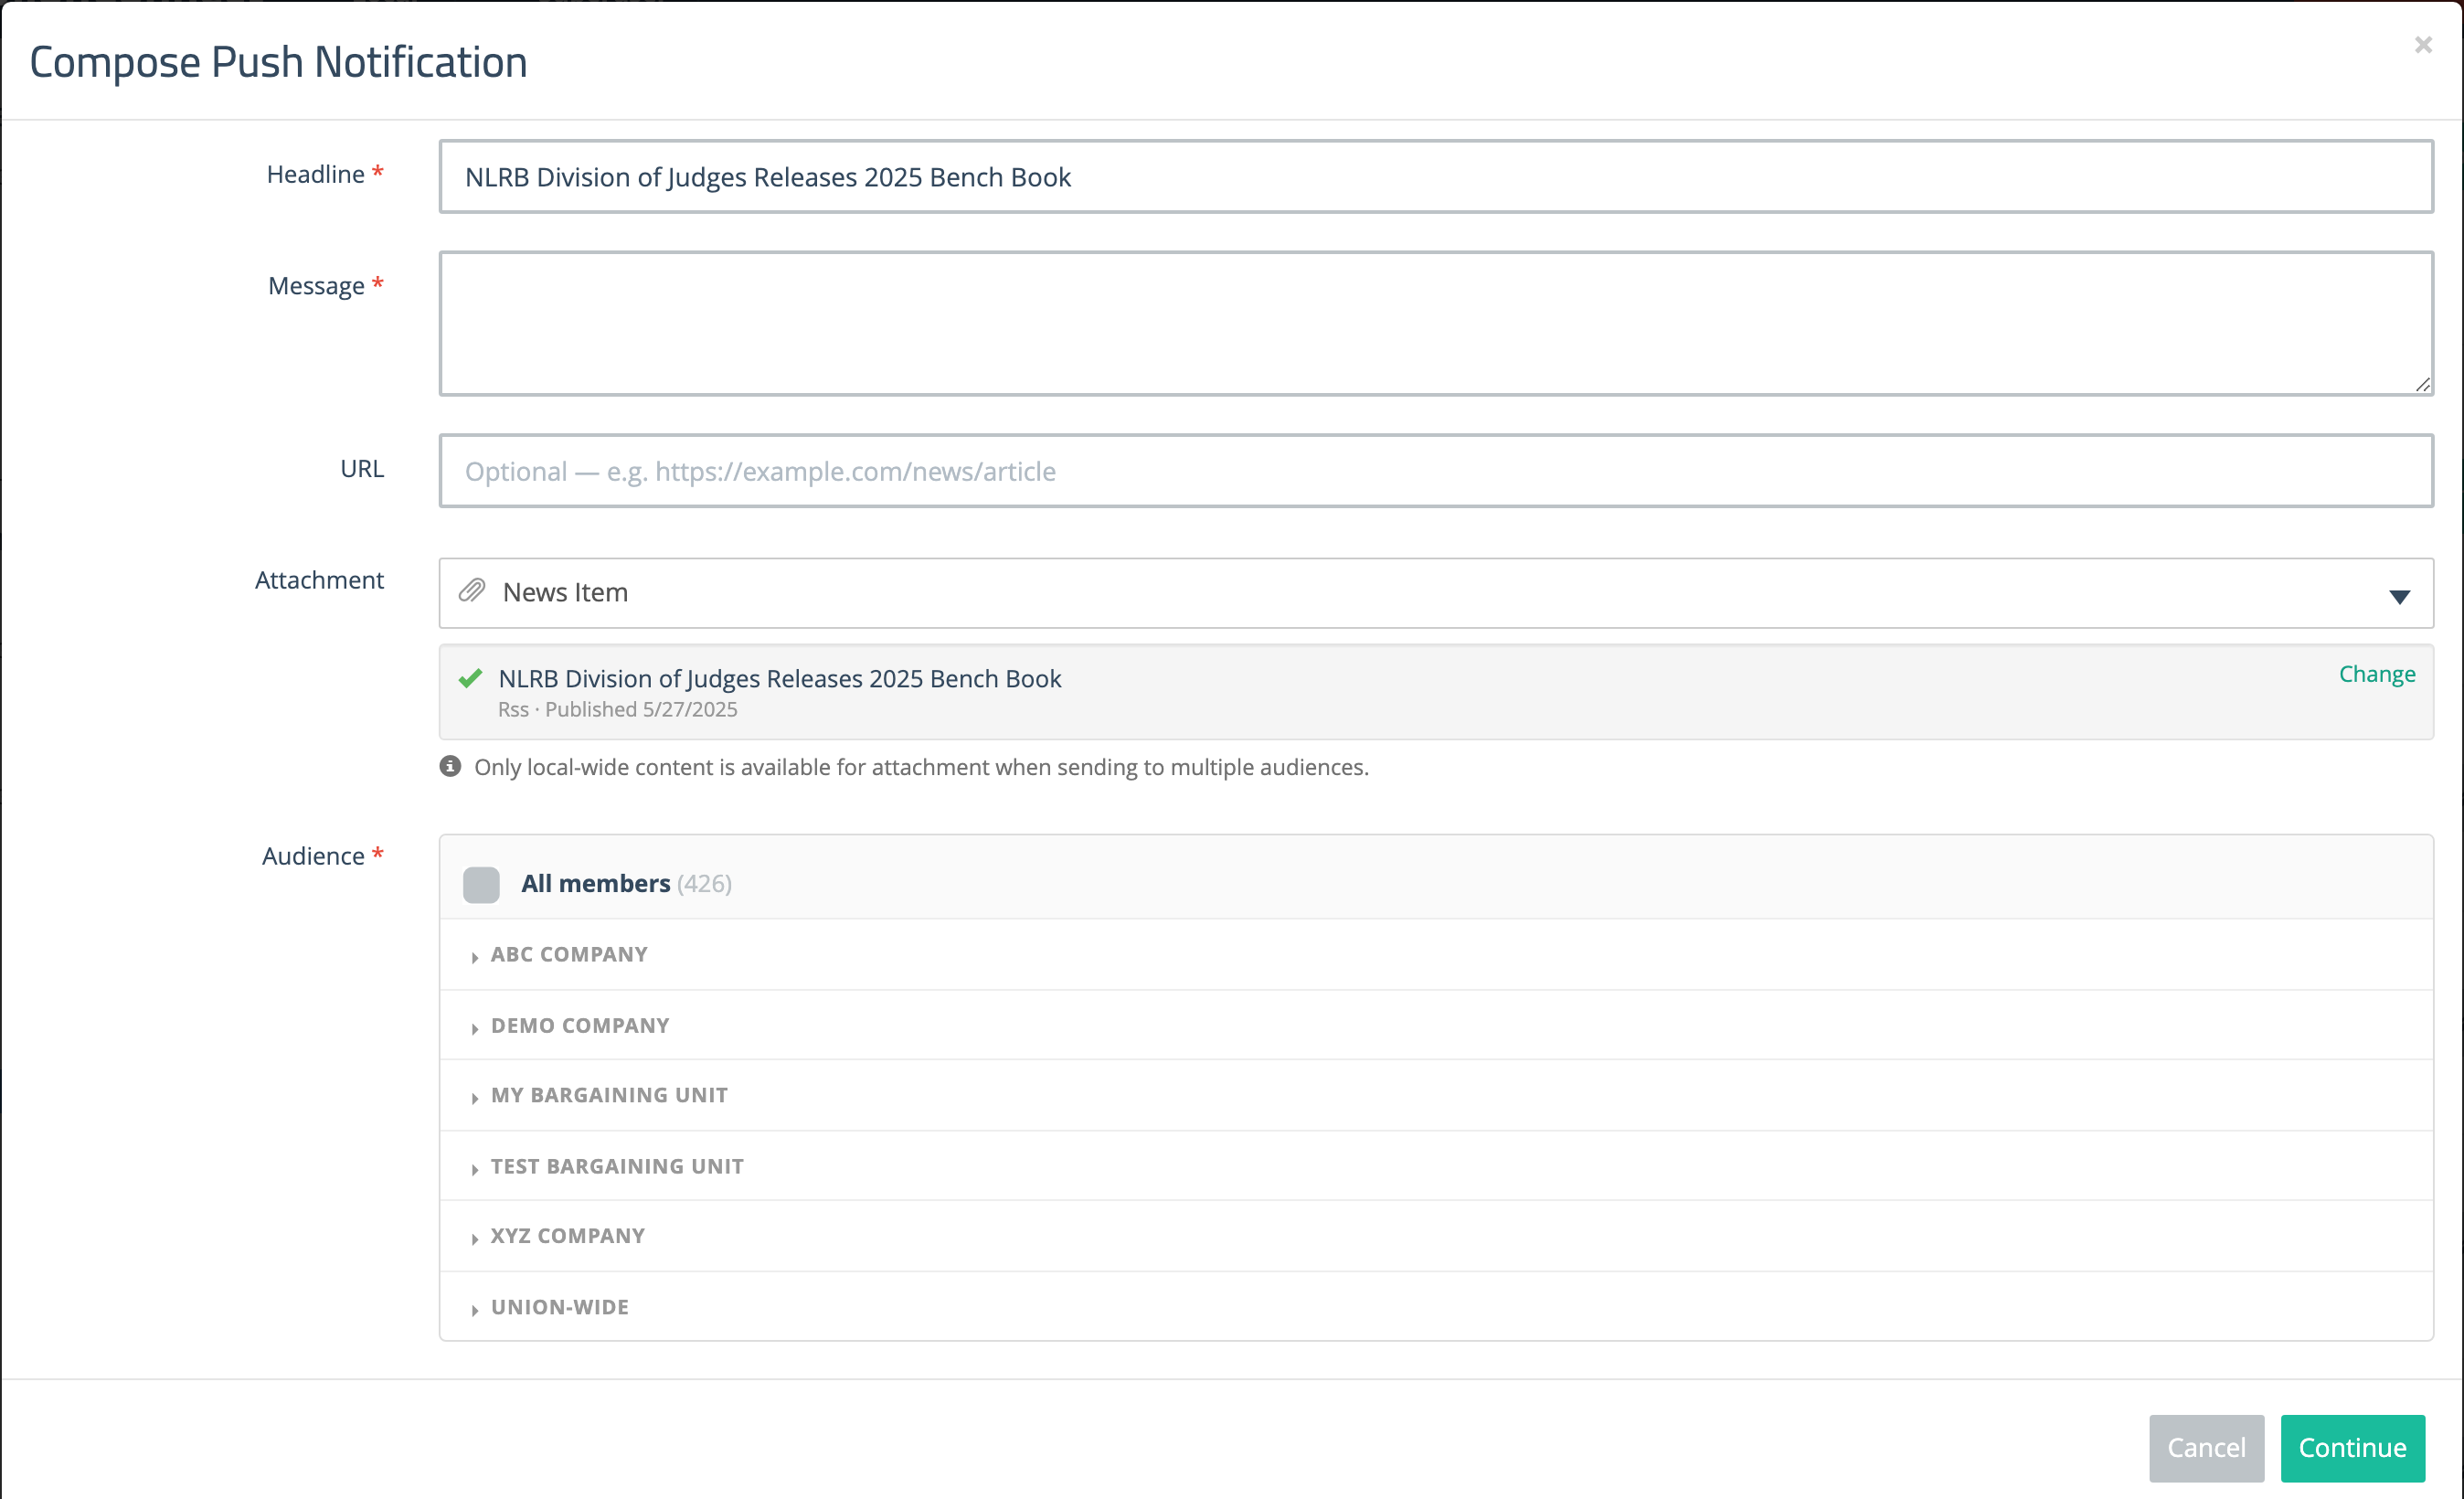
- Click the item you want. The list collapses and the item is confirmed with a green check mark.
- Fill in the rest of the notification — Headline, Message, and your Audience — then click Continue and choose Send Now or Schedule for Later.
The Headline Fills In for You
If the Headline is still empty when you pick an attachment, it is filled in with the attached item’s title to save you retyping it. You are free to replace it with something better. If you had already typed a headline, it is left alone — choosing an attachment never overwrites your own wording.
Choosing a Different Item
Click Change next to the confirmed item to reopen the list and pick a different one. To send with no attachment after all, reopen the Attachment dropdown and choose No content attached.
Which Content Is Offered
What the list offers depends on the Audience you have picked:
- Local-wide content is always offered, whatever the audience.
- If you pick exactly one bargaining unit, location, or group as the audience, that audience’s own content is offered too. The note under the Attachment dropdown changes to say so — for example, “Local-wide and <audience> content can be attached.”
- If your local has only one bargaining unit, that bargaining unit’s content is always offered alongside local-wide content.
- If you pick All members, specific members, or more than one audience, only local-wide content is offered.
Because of this, set the audience before you choose an attachment. If you attach an item while a single audience is picked and then change the audience, the attachment is removed and the message “The attachment was removed because the audience changed.” appears. Pick the item again from the updated list. An item you attached while only local-wide content was offered stays attached when you change the audience.
You can also send a notification from the content itself — see Send a Push Notification from Content. That route attaches the item and sets the audience for you.
Attachment vs. URL
The Compose modal has both a URL field and an Attachment picker. They do different things:
- Attachment — opens a piece of your own content inside the app. This is what makes tapping the notification go somewhere.
- URL — an outside web address. It appears as a link on the message in the member’s inbox and opens in the device’s browser.
You can use both on the same notification, but if the content already lives in the app, an attachment is the better choice — it keeps members inside the app and works whether or not they have a browser handy.
Checking That Something Is Attached
Back on the hub, notifications that carry an attachment show a small paperclip icon to the left of the headline. Hover over it to see what kind of content is attached.
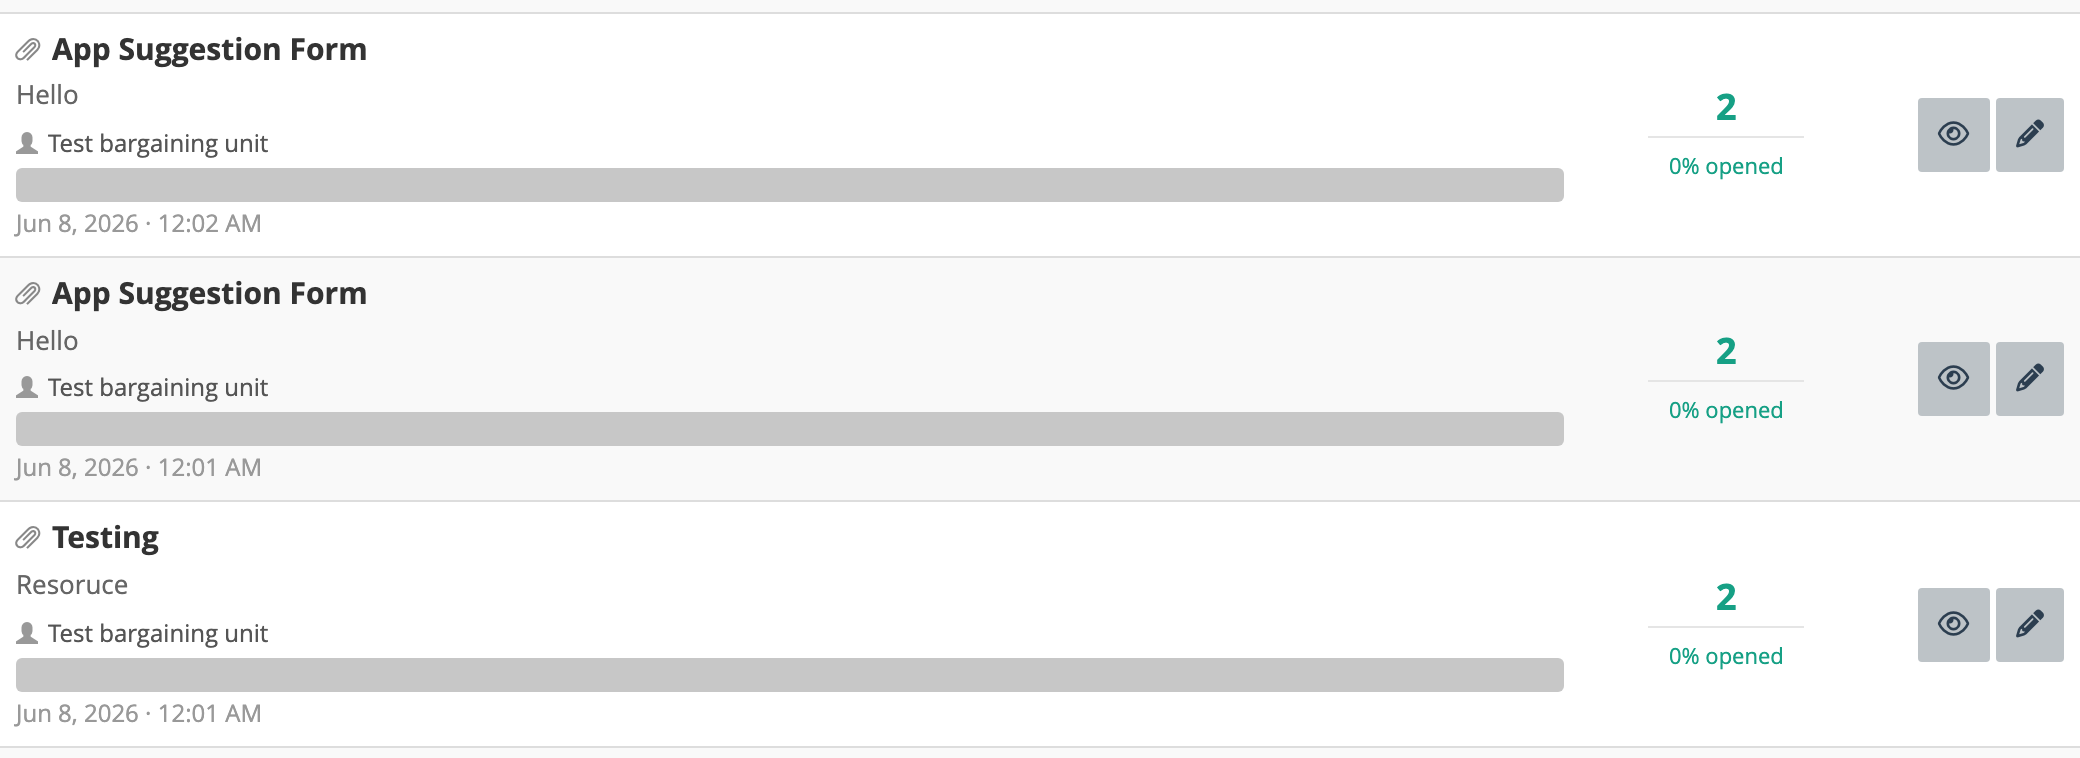
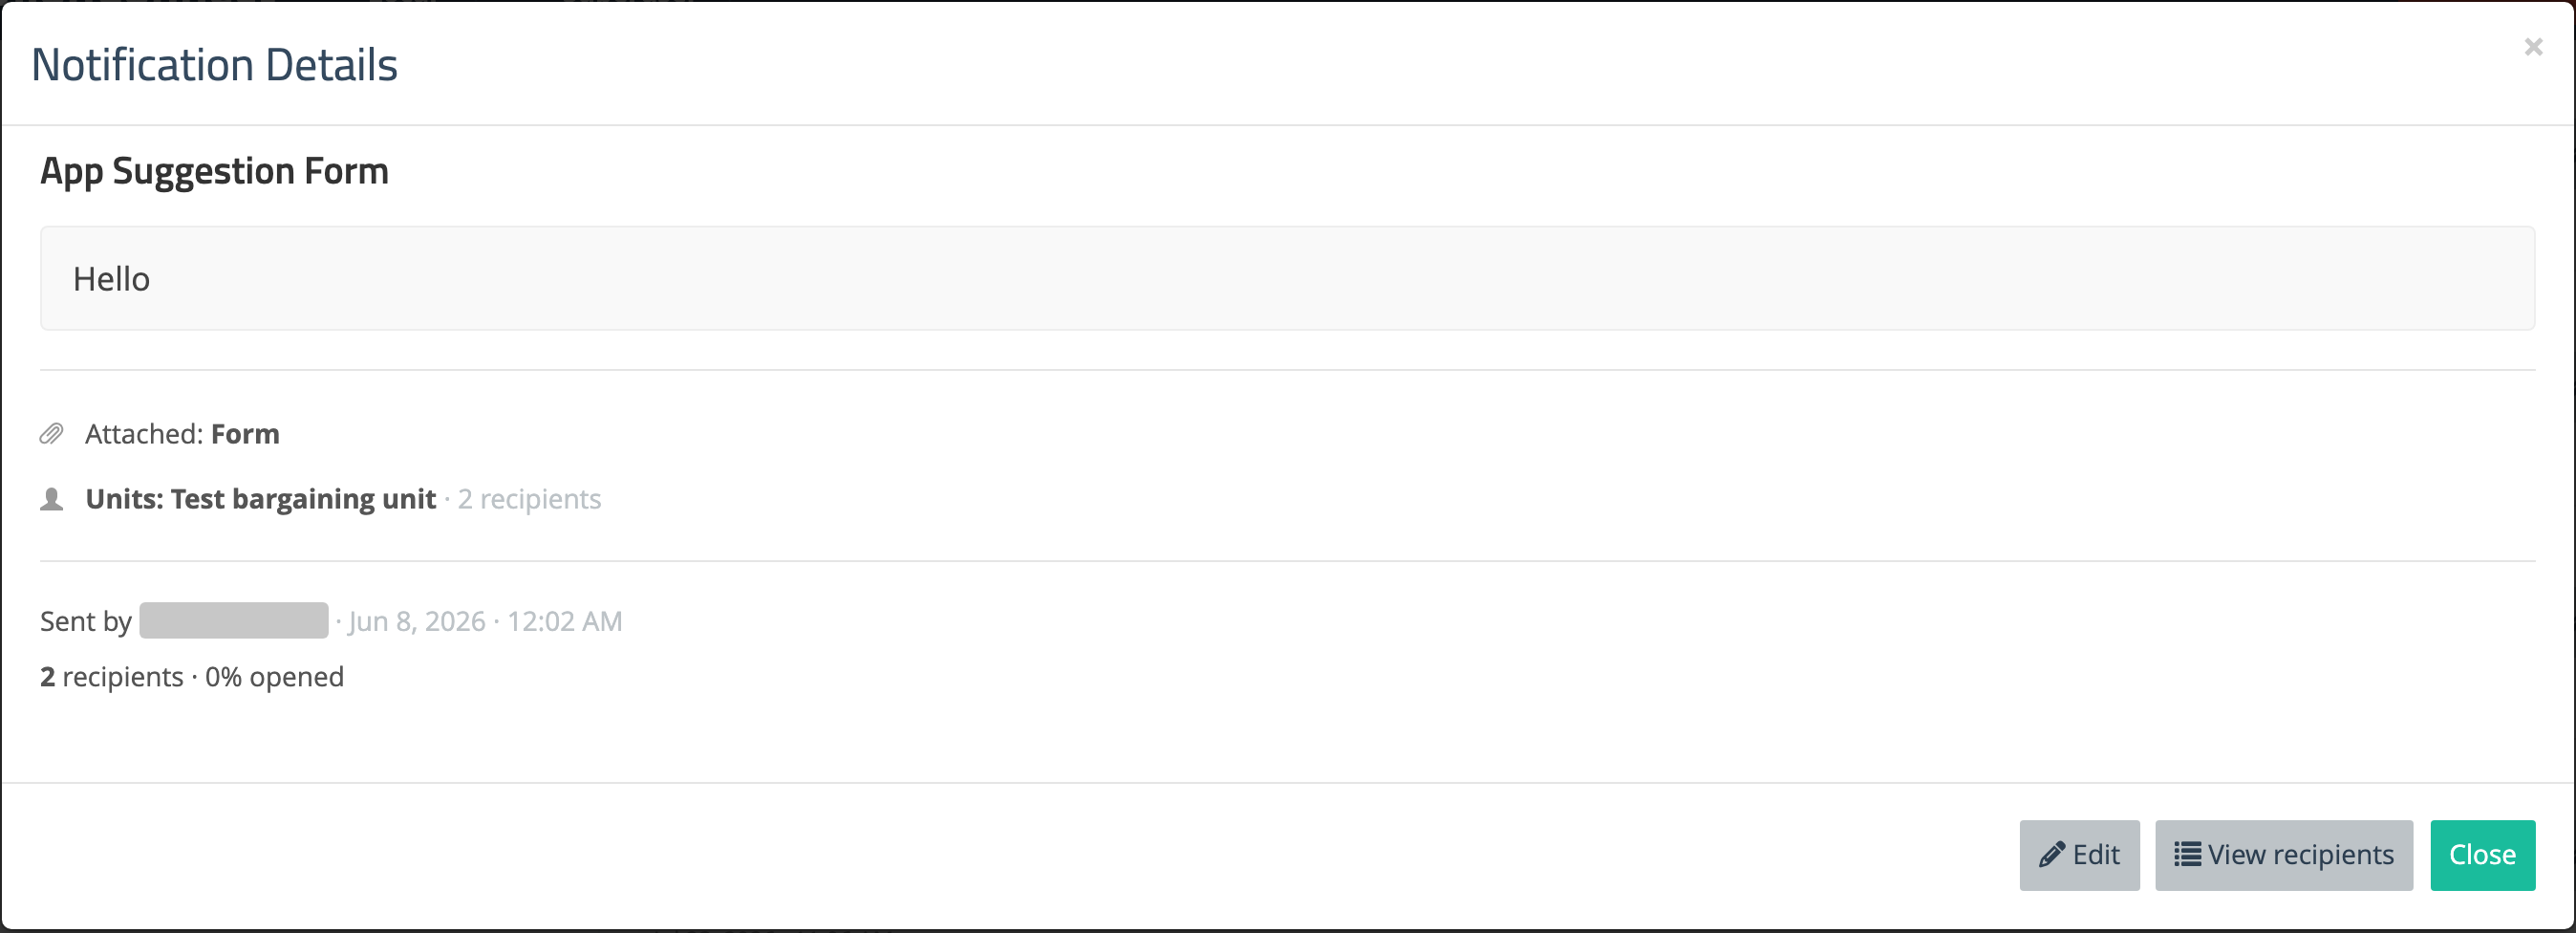
Click the eye icon on a row to open Notification Details, which spells the attachment out on an Attached line.
Changing or Removing an Attachment Later
Click the pencil icon on a notification — or Edit in the details modal — to open the Edit Notification form. It has the same Attachment picker, with the current attachment already shown. Pick a different item, or choose No content attached to remove it, then save.
What that accomplishes depends on the notification:
- Scheduled notifications haven’t gone out yet, so changing the attachment changes what members will actually receive.
- Sent notifications have already been delivered. Editing updates the stored record, but it does not re-send anything — members who already received the alert are unaffected.
Get the attachment right before you send. Once a notification is out the door, the only way to correct it is to send a new one.