The Custom Forms feature serves as an excellent tool for gathering information about your membership and facilitating seamless communication between you and your members.
When members submit a form entry, they can be viewed within the webapp and/or mailed out to any email addresses you specify.
All forms that you create are entirely customizable. This means the feature supports any kind of form that you may need.
The forms you create can be found under My Forms in the main menu of the app.
Creating a Form
- Login to the app manager
- Click Custom Forms under Union-wide resources
- Click New Form
- Give your form a title using the text field at the top
- Use the Active and Protected checkboxes to control availability:
- Active — enables/disables the form in the app
- Protected — requires members to be logged in to submit
Form Builder
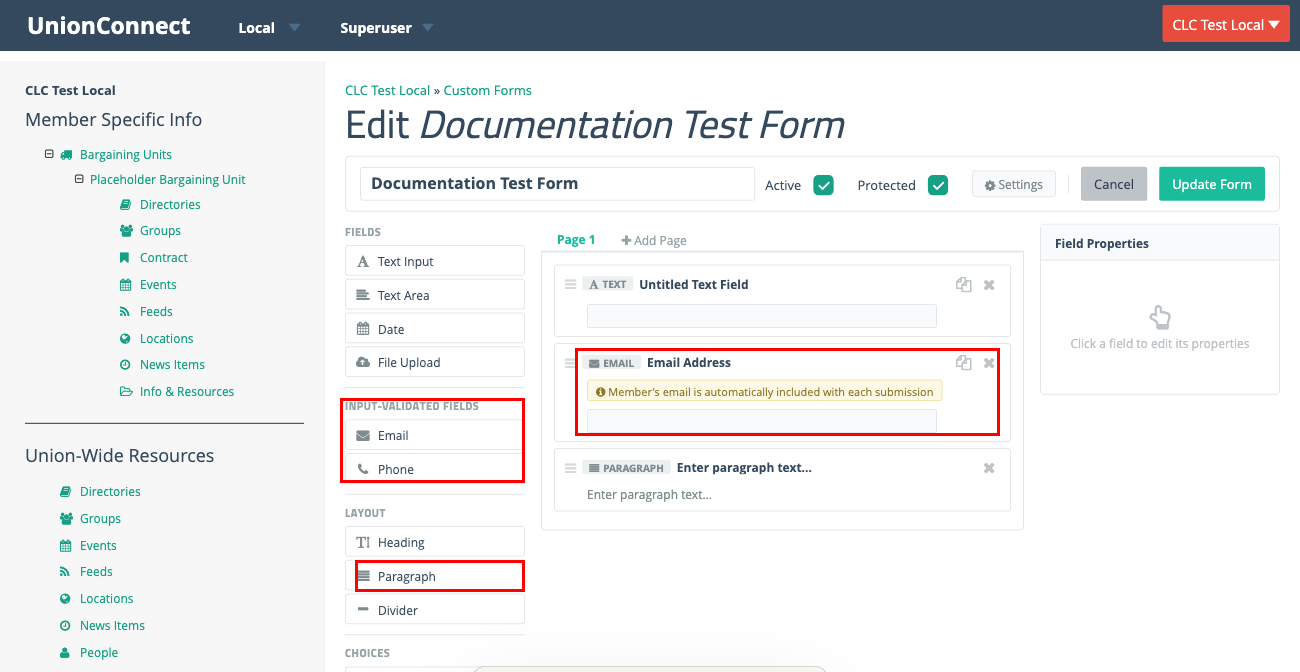
The form builder uses a drag-and-drop interface. The left panel contains the available field types, the center is your form canvas, and the right panel shows properties for the selected field.
Field Types
Fields are organized into four categories in the palette:
- Fields — Text Input, Text Area, Date, File Upload
- Input-Validated Fields — Email and Phone fields with built-in format validation. On protected forms, these fields automatically include the member’s information with each submission (shown with a green notice on the form canvas).
- Layout — Heading, Paragraph (for adding descriptive text blocks to your form), and Divider
- Choices — Radio Buttons, Checkboxes, Dropdown
Click a field to add it to the form canvas. Once added, click the field on the canvas to edit its properties in the right panel.
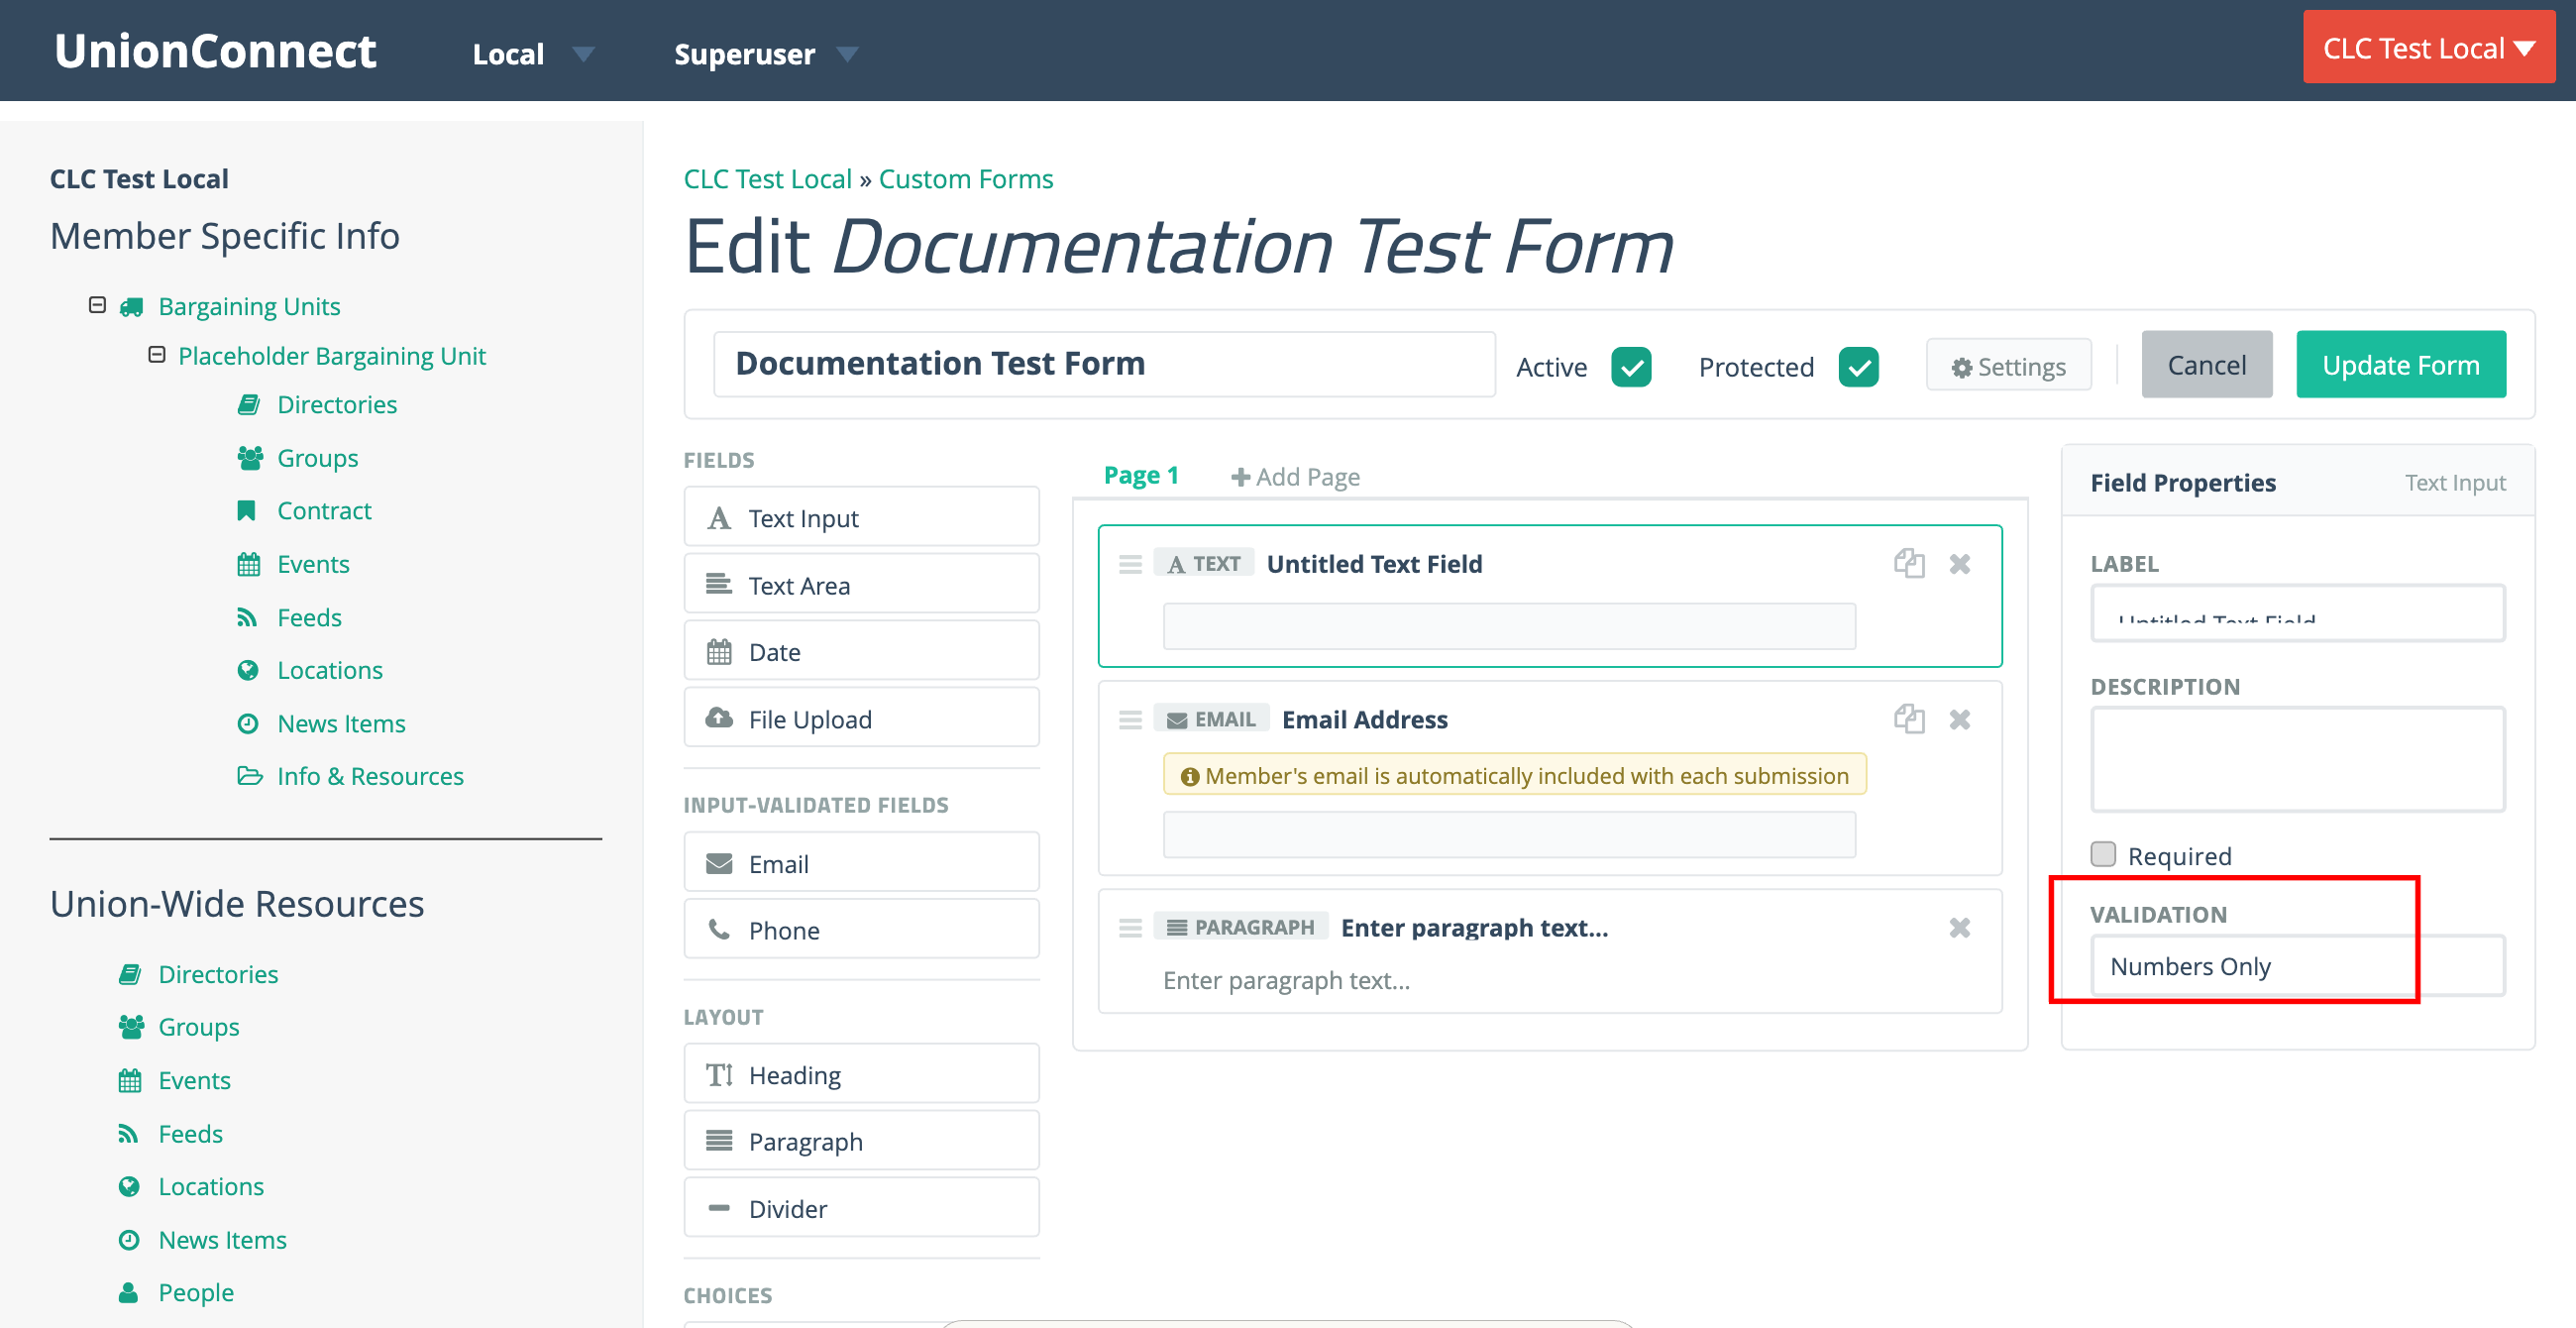
Field Properties
When you select a field on the canvas, the Field Properties panel appears on the right with the following options:
- Label — the name displayed to users
- Description — help text shown below the field
- Required — whether the field must be filled out
- Validation — for Text Input fields, you can restrict input to:
- Numbers Only
- Letters Only
- Alphanumerical (letters and numbers)
Pages
Forms can have multiple pages. Click + Add Page above the canvas to create additional pages. Members will navigate between pages when filling out the form.
Form Settings
Click the Settings button to configure submission behavior and email notifications. Settings are organized into two tabs:
Submissions Tab
- Show Message / Redirect to URL — choose what happens after a successful submission
- Success Message — the message shown to the member after submitting
- Max Submissions Per Account — limit how many times a member can submit (leave blank for unlimited)
Notifications Tab
The Notifications tab has two sections for controlling who gets emailed when a form is submitted:
Processor Notification — Enter one or more comma-separated email addresses in the Send submissions to field. These addresses receive an email with the full submission details each time someone fills out the form. If left blank, notifications fall back to the local’s primary email address.
Submitter Confirmation — The person who submits the form automatically receives a confirmation email. You can customize the From Address, Subject, and Email Body, or leave them blank to use sensible defaults.

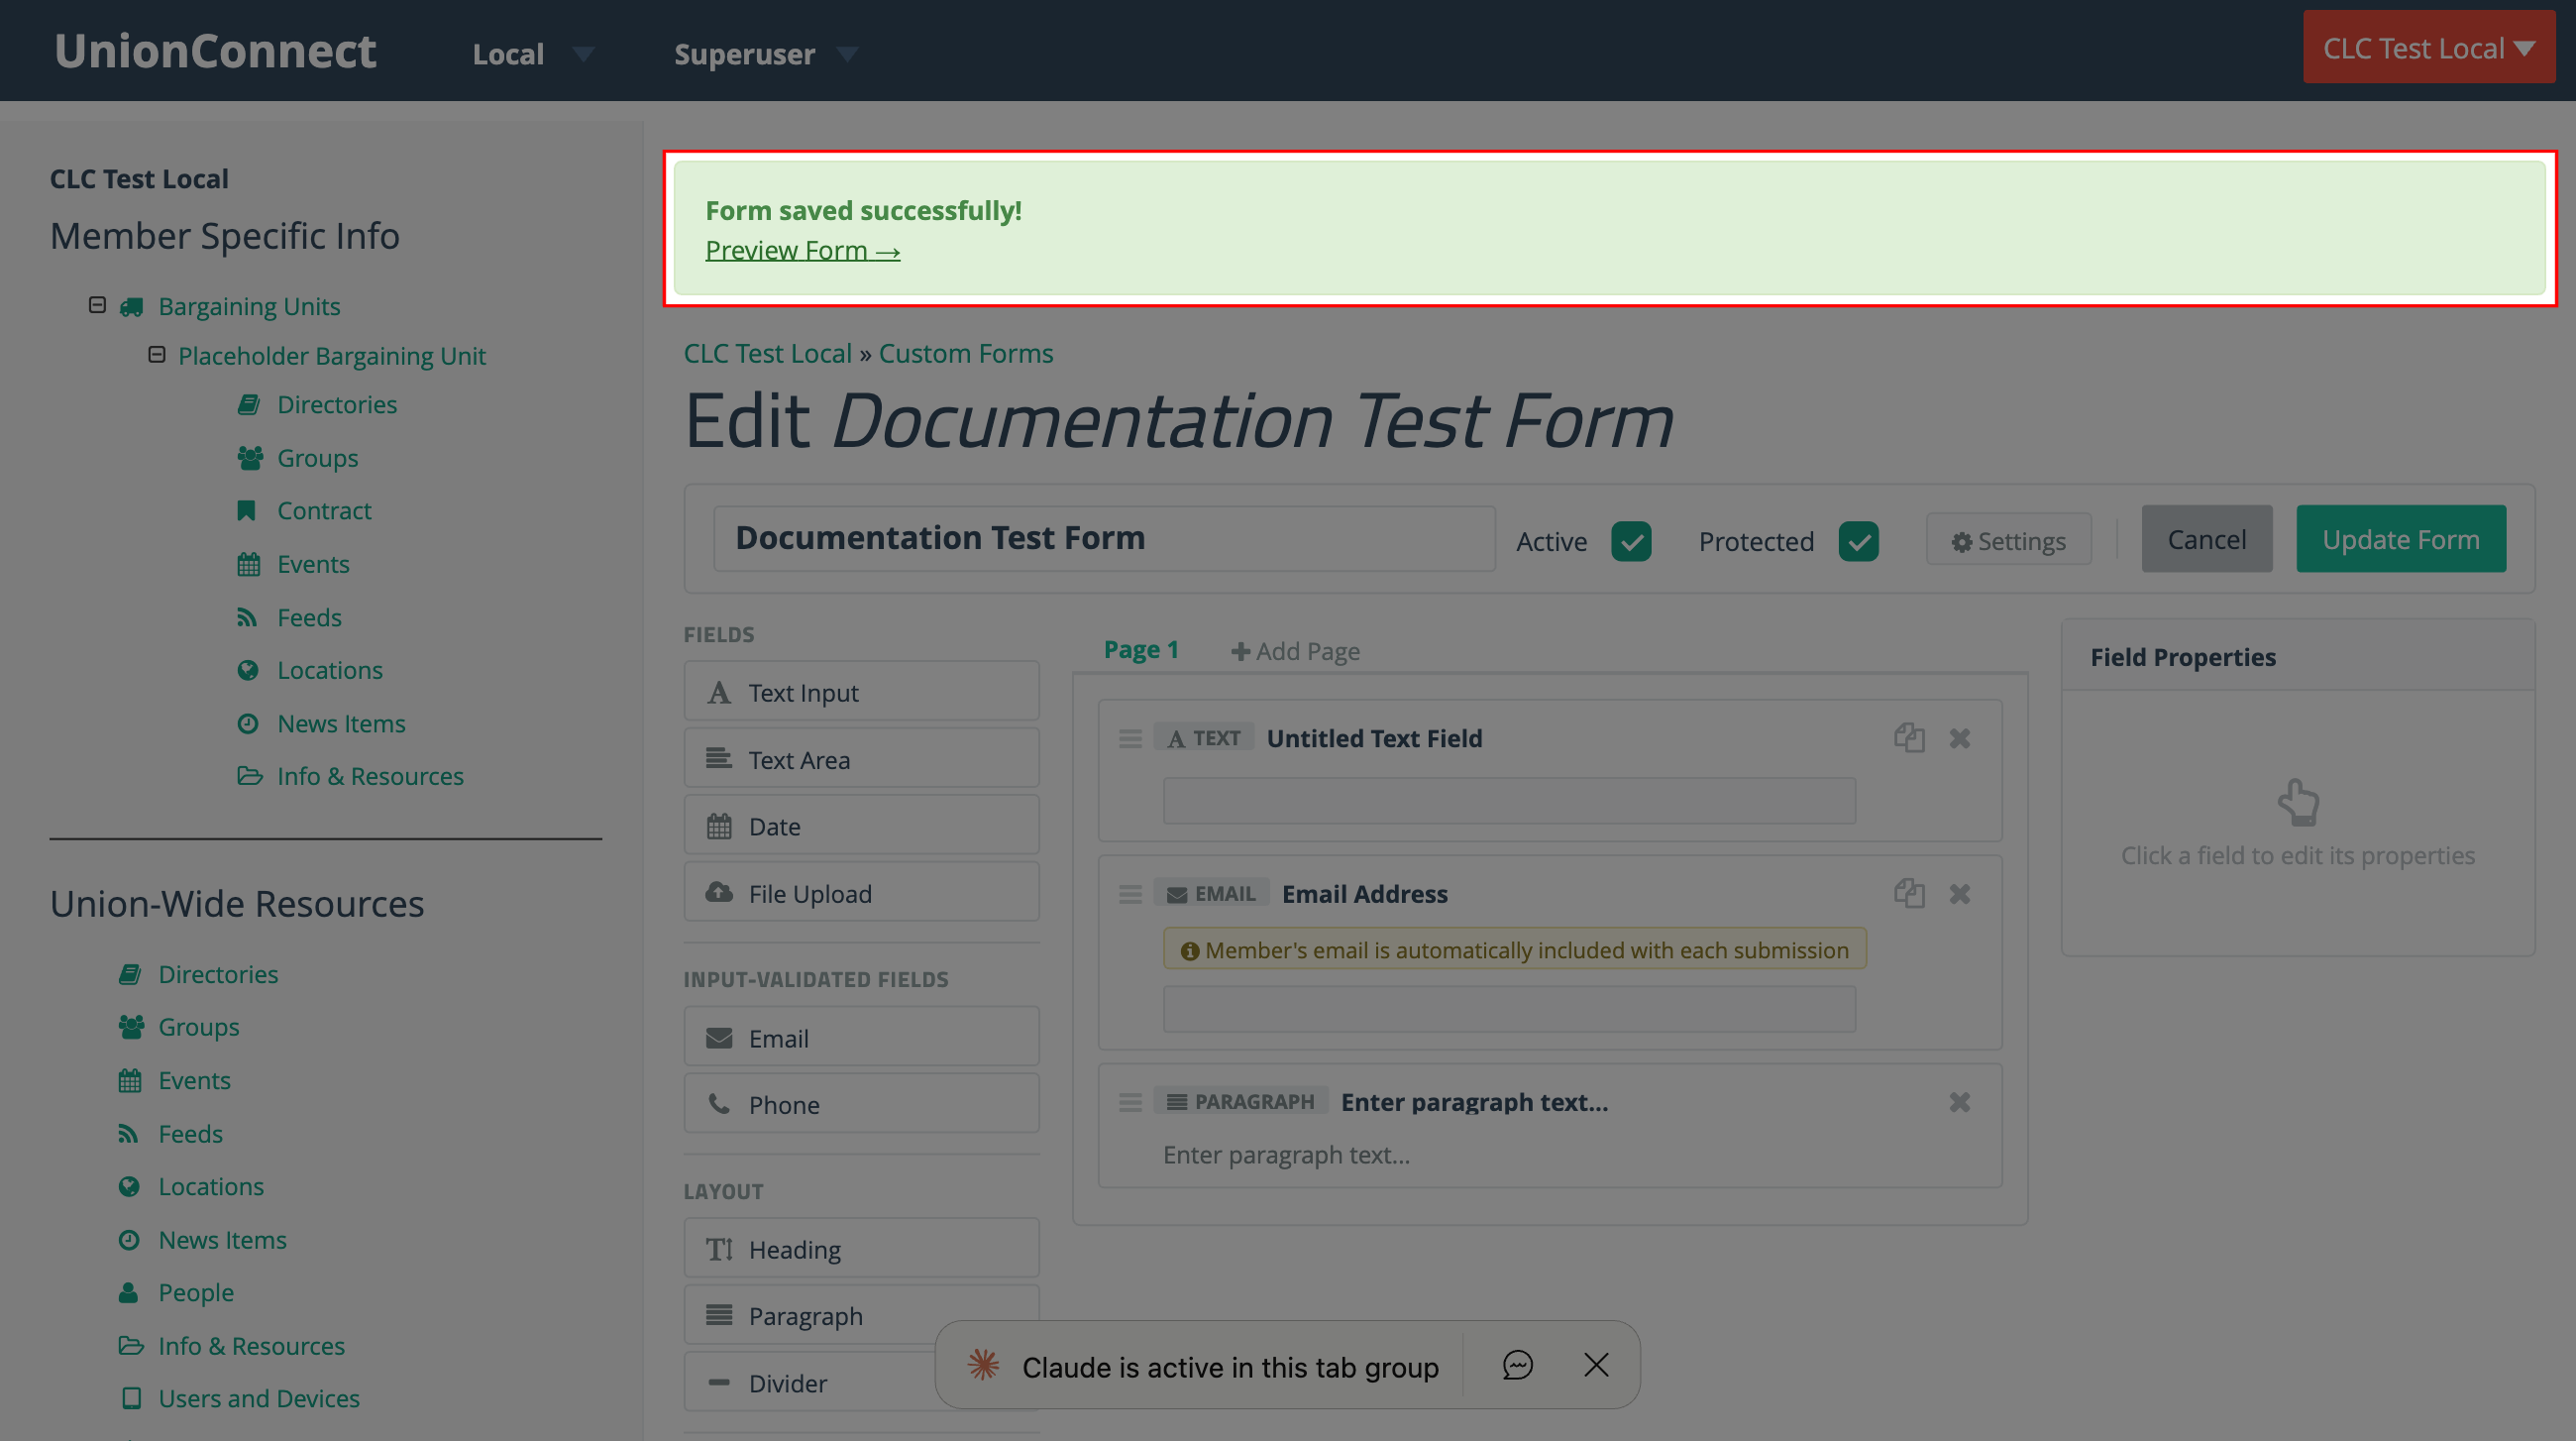
Saving and Previewing
Click Create Form (for new forms) or Update Form (when editing) to save your changes. After saving, a success message appears with a Preview Form link that lets you see exactly how the form will look to members.
Viewing and Downloading Submissions
Every time a member fills out one of your forms, the entry is saved so you can review it in the app manager and export it for your records. Submissions are kept even if you later edit the form.
Opening a Form’s Submissions
- Click Custom Forms under Union-wide resources
- Find the form in the list and click the dropdown arrow next to its Edit button
- Choose View Submissions
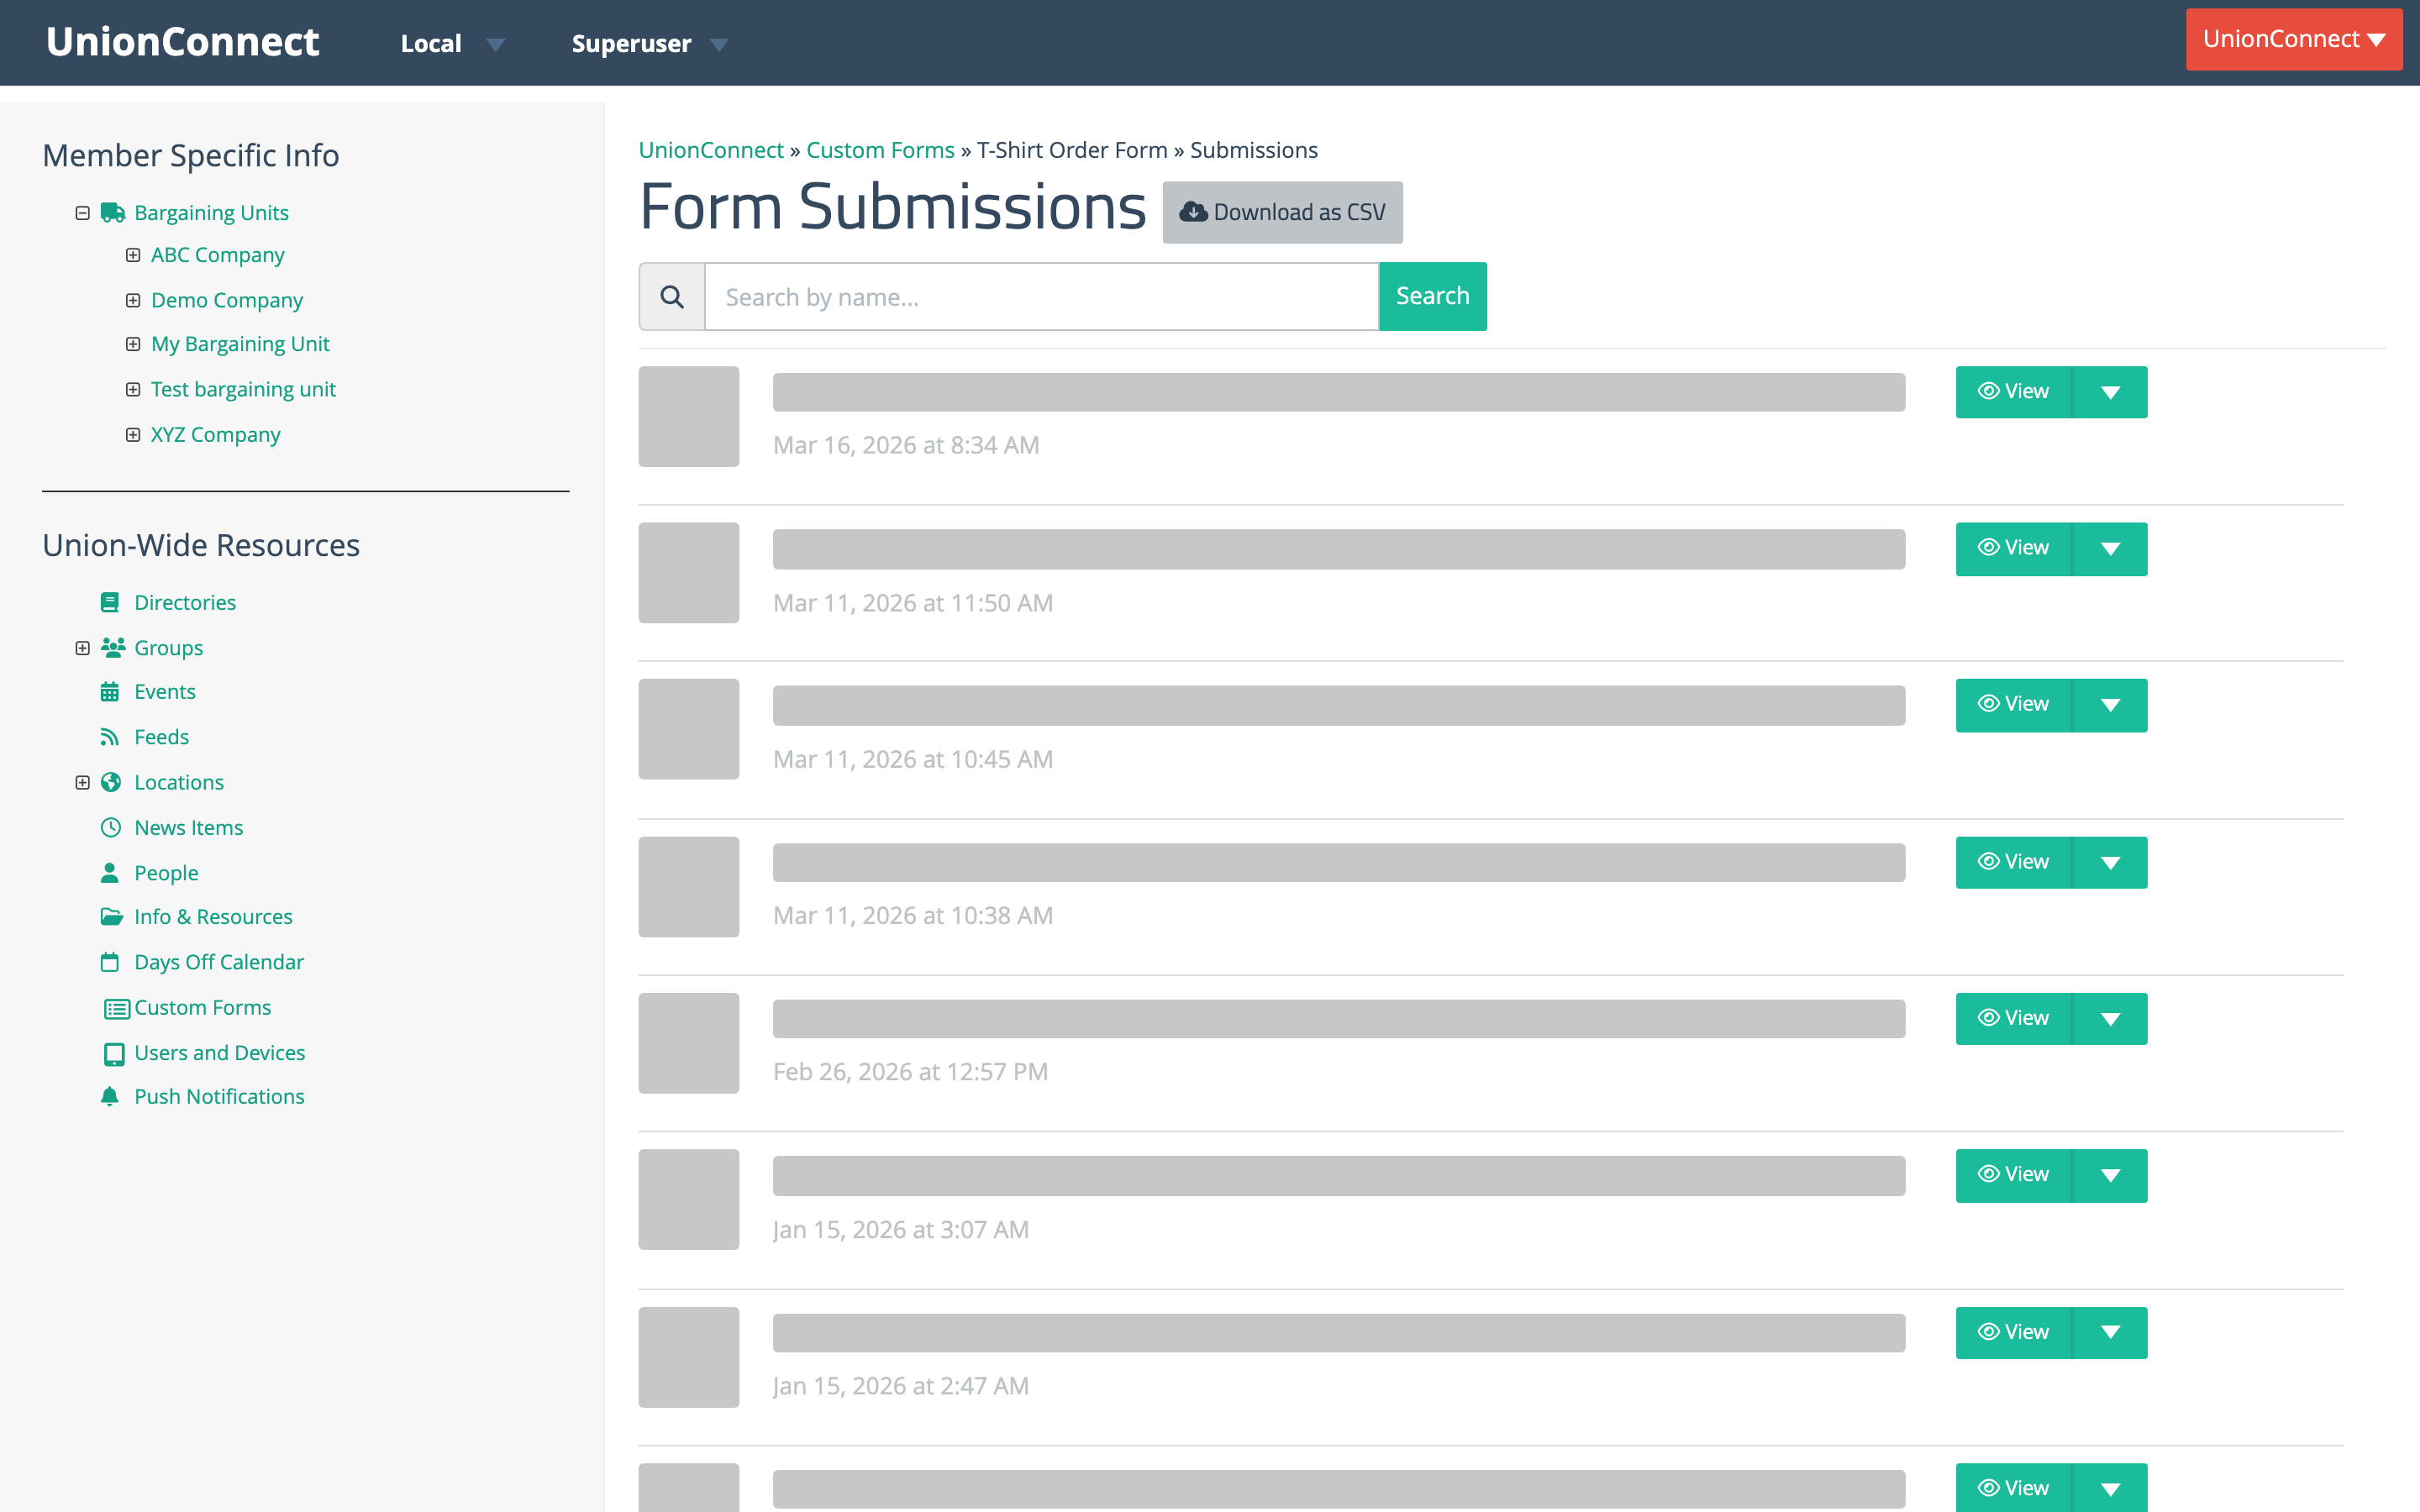
The Form Submissions page lists every entry, newest first. Each row shows the submitter’s name and email address — or Anonymous if the form was submitted without a logged-in account — along with the date and time it was received. Use the Search by name… box to filter the list by a submitter’s first or last name, and the page links at the bottom to move through longer lists.
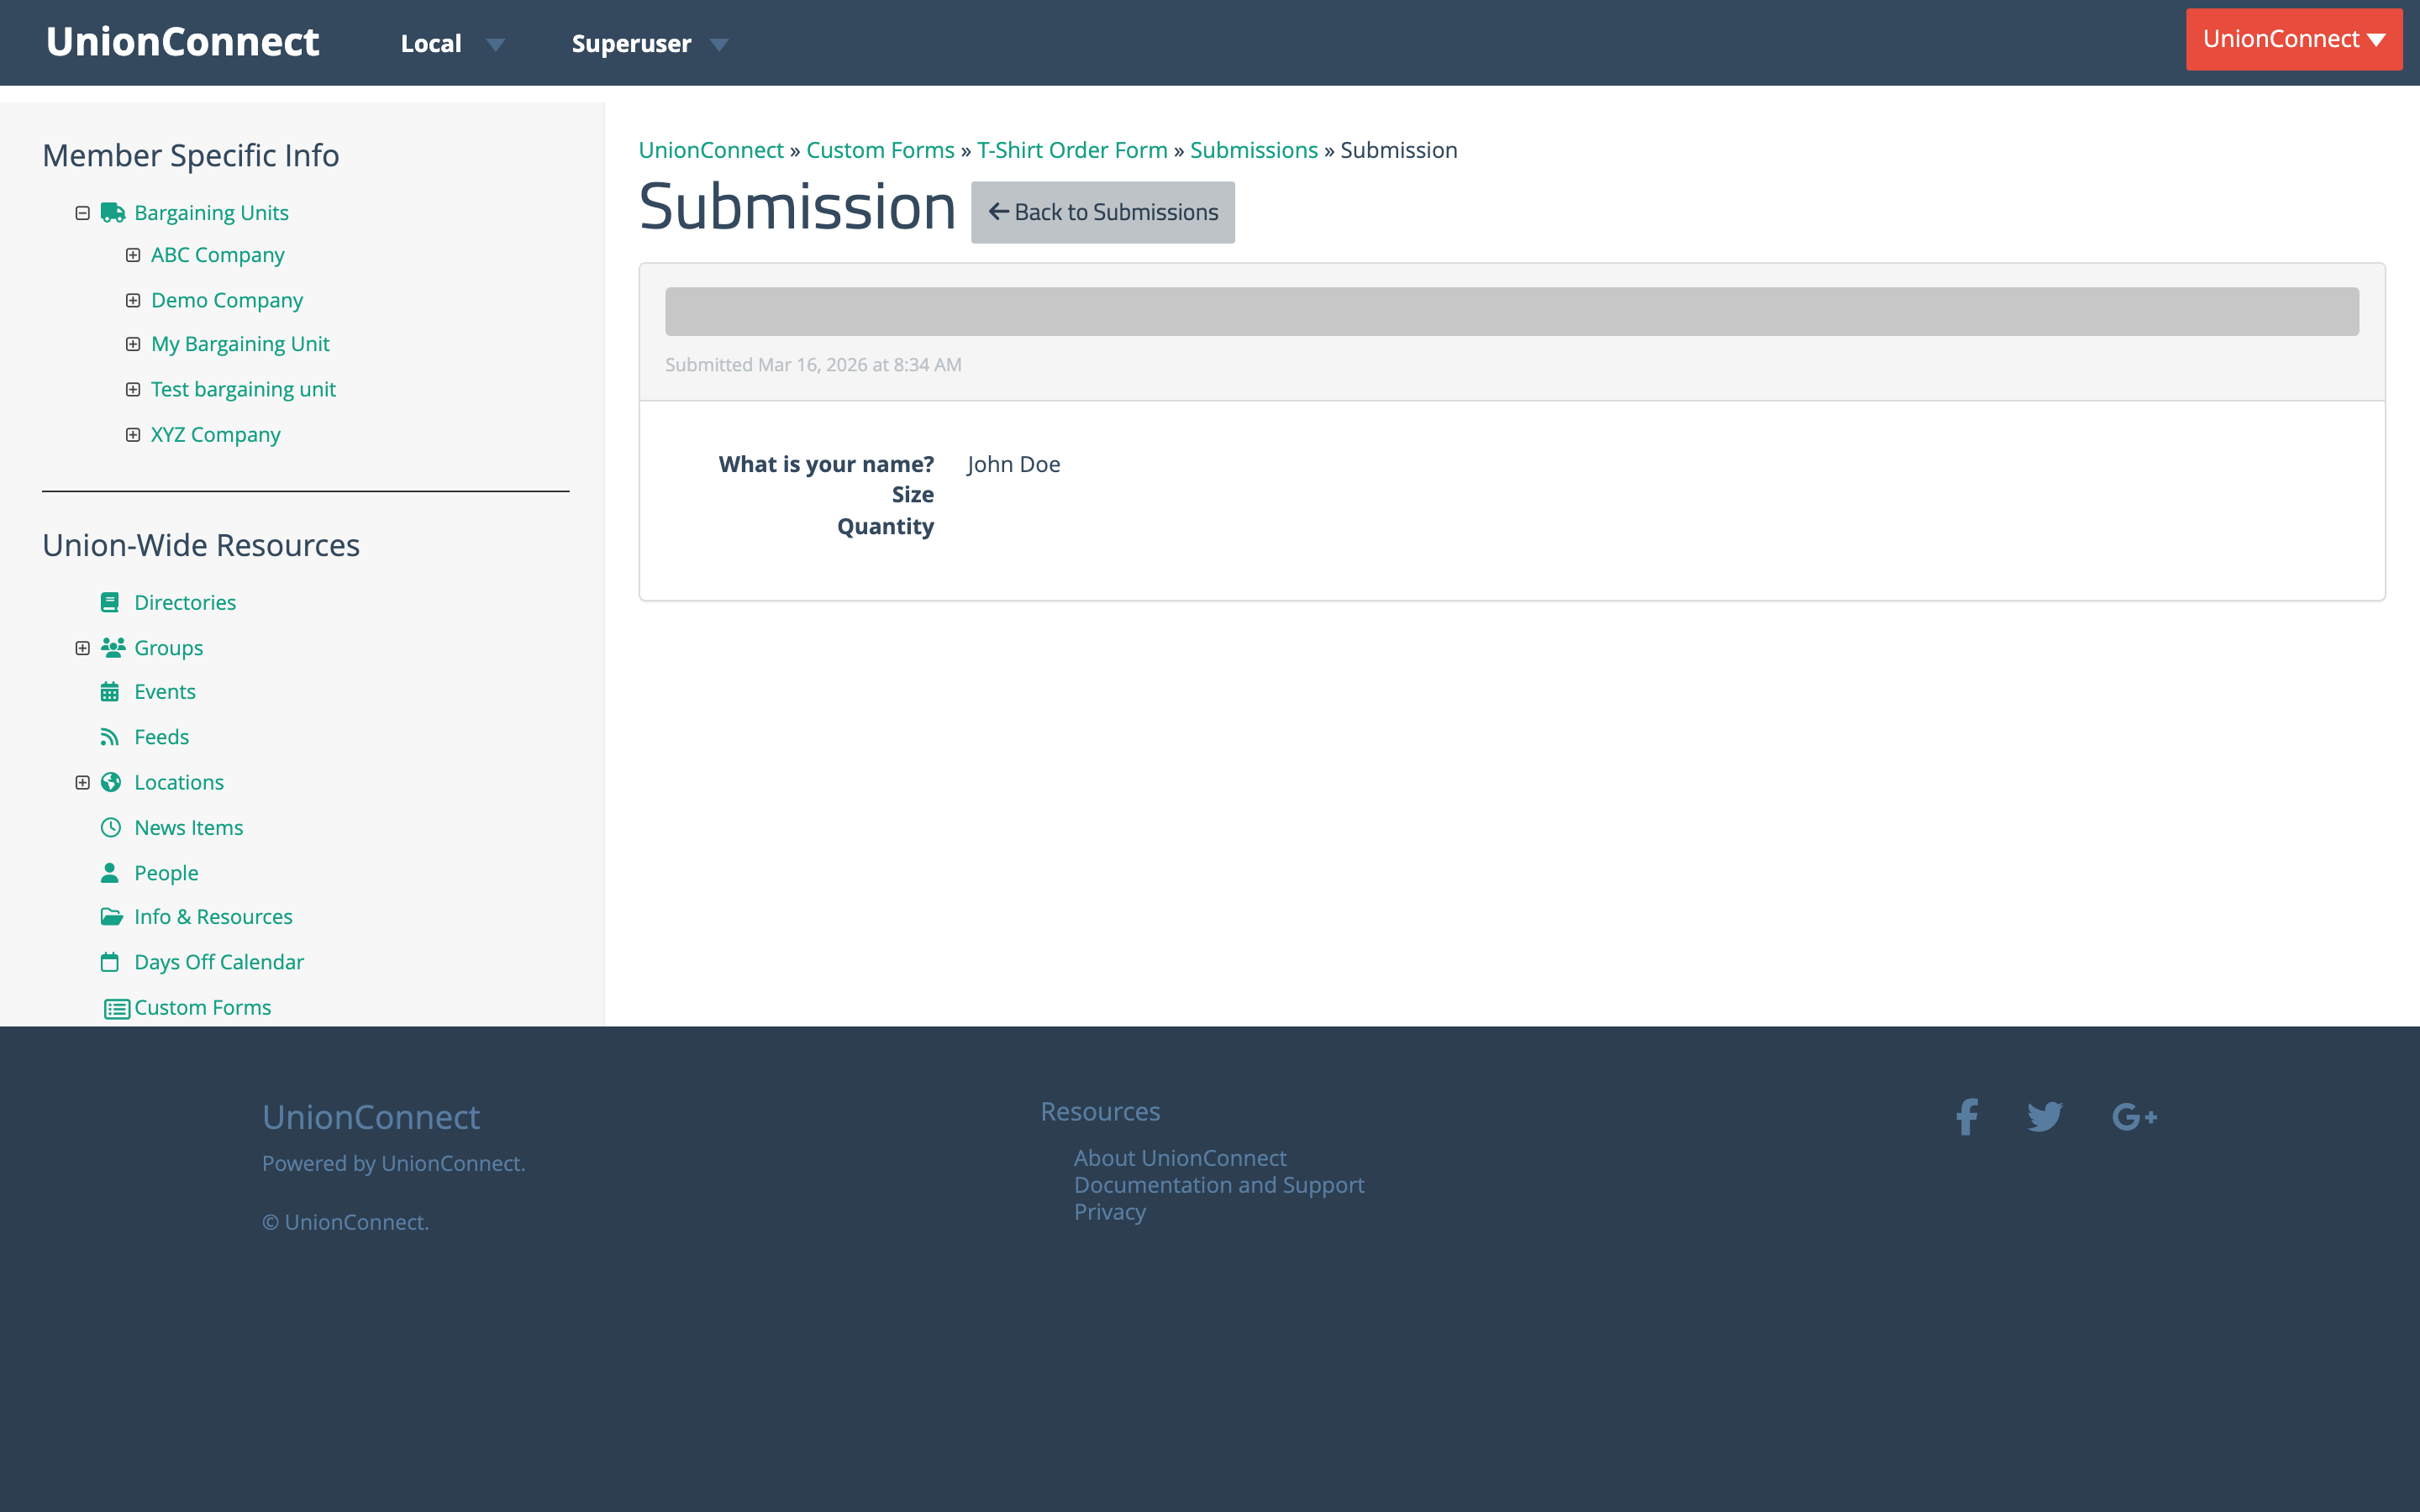
Viewing a Single Submission
Click the View button on any row to open that entry. The submission page lists each question from your form next to the member’s answer. If your form included a File Upload field, the uploaded file appears here as a link — click it to download what the member attached. Use Back to Submissions to return to the full list.
Downloading Submissions as a CSV
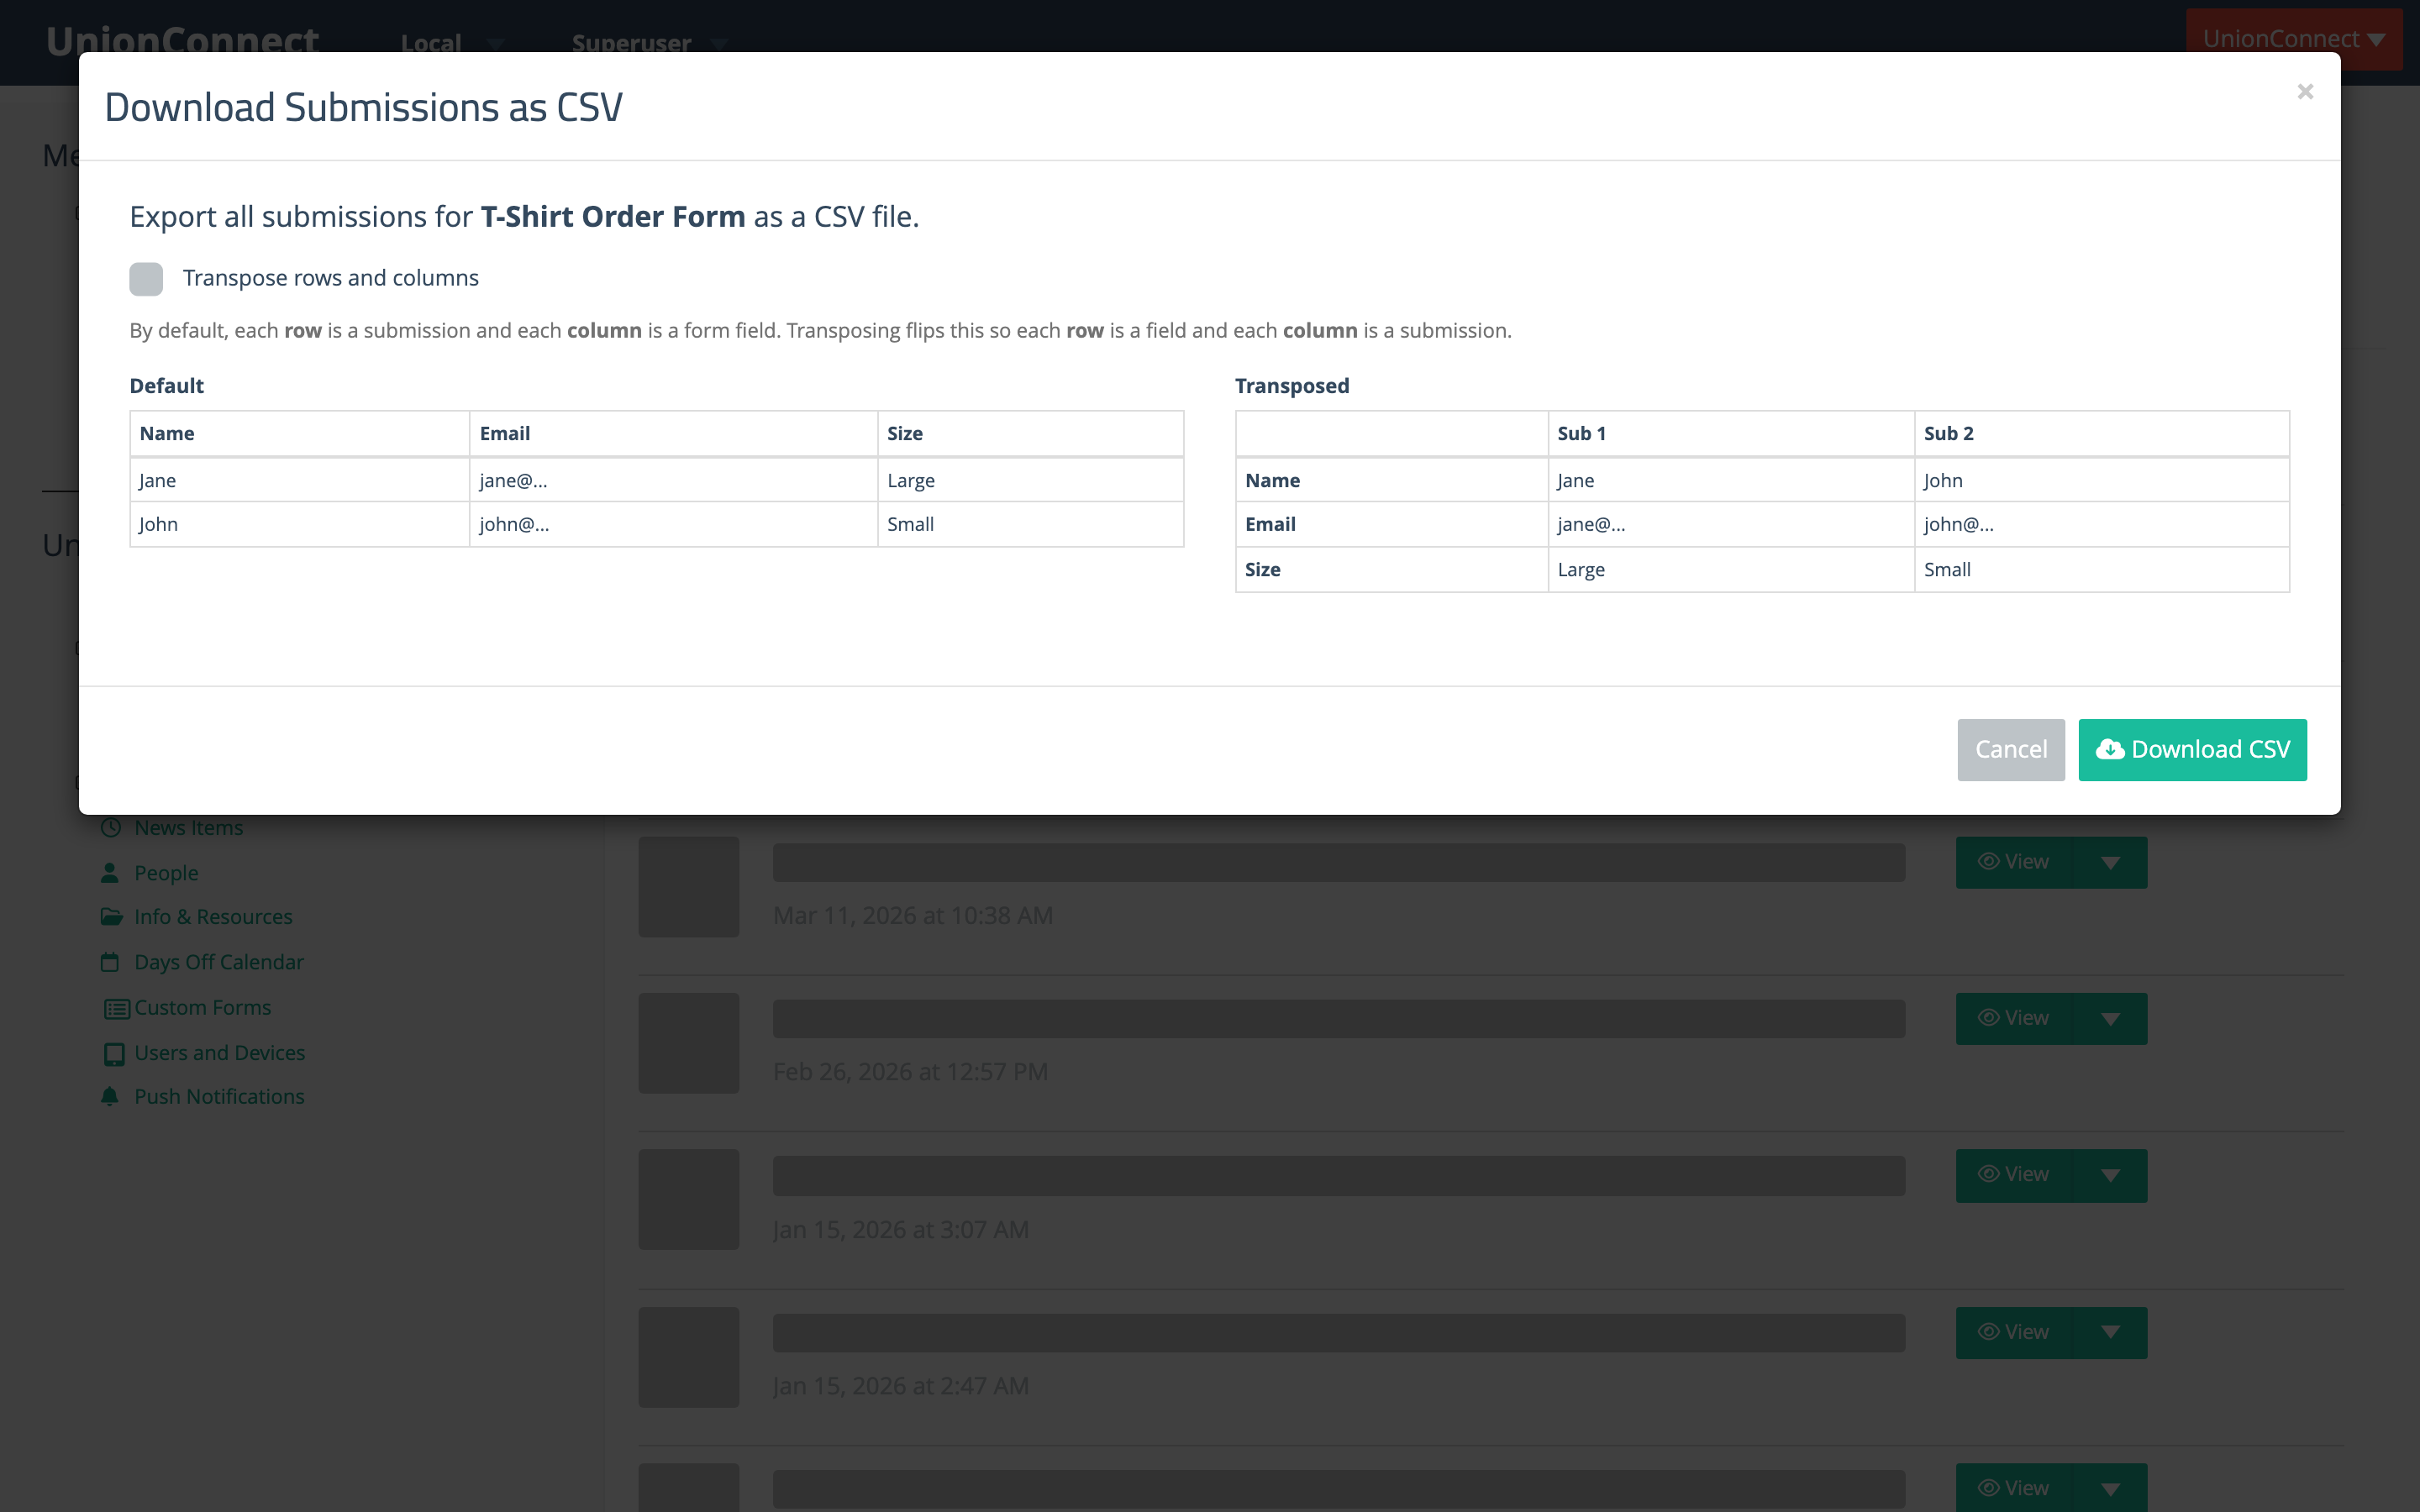
To export every entry at once — for example to open in Excel or Google Sheets — click Download as CSV at the top of the Form Submissions page. A dialog appears with a preview of the two available layouts:
- Default — each row is one submission and each column is a form field. Best when you have many submissions.
- Transpose rows and columns — tick this checkbox to flip the layout so each row is a form field and each column is a submission. Handy for forms with only a few entries but many questions.
Click Download CSV to save the file. The export includes a Date and Name column followed by one column for every field on the form. For File Upload fields the spreadsheet lists the uploaded file’s name; download the file itself from the individual submission page.
Deleting a Submission
To remove an entry, click the dropdown arrow next to its View button and choose Delete. You’ll be asked to confirm before the submission is permanently removed.