When you get a newer roster — people joined, left, or moved units — re-checking compares your current members against the new file and sorts them into groups so you can act in bulk.
1. Upload the new file
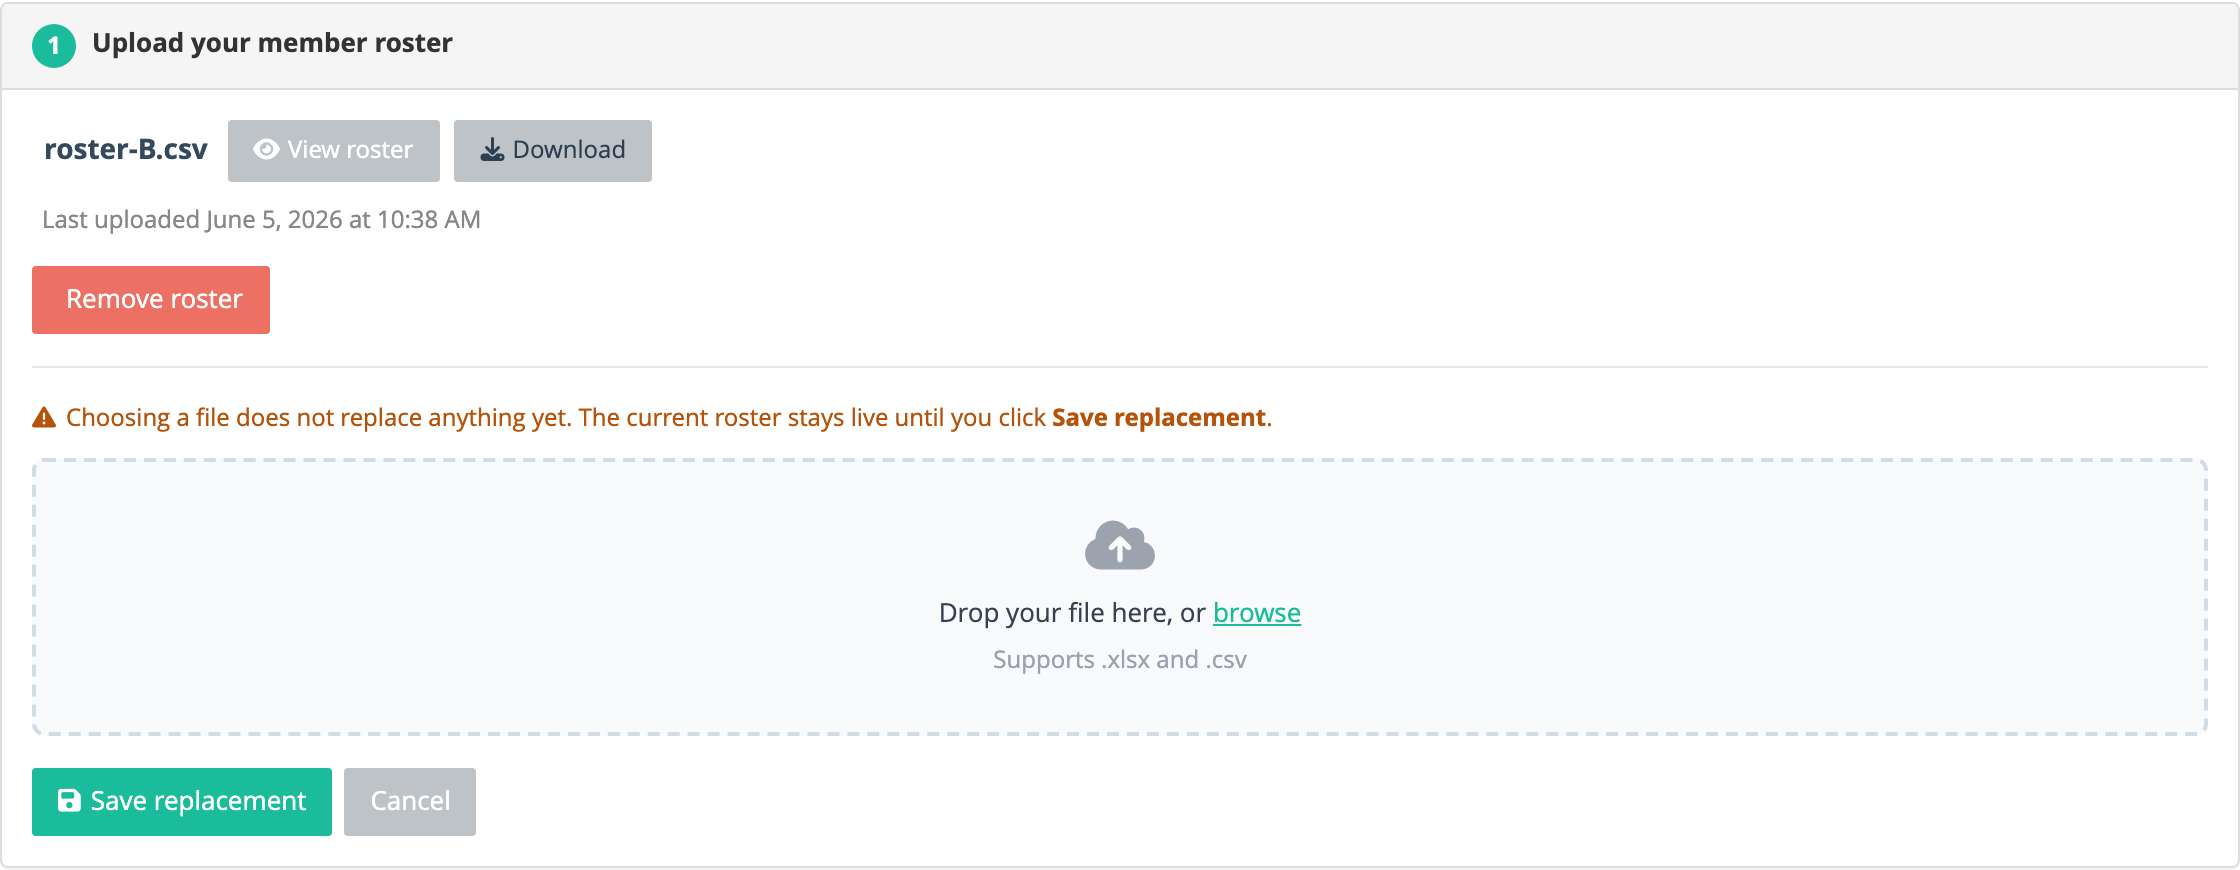
In Step 1, click Replace file and choose your updated roster. The current roster stays live until you click Save replacement.
2. Run the check
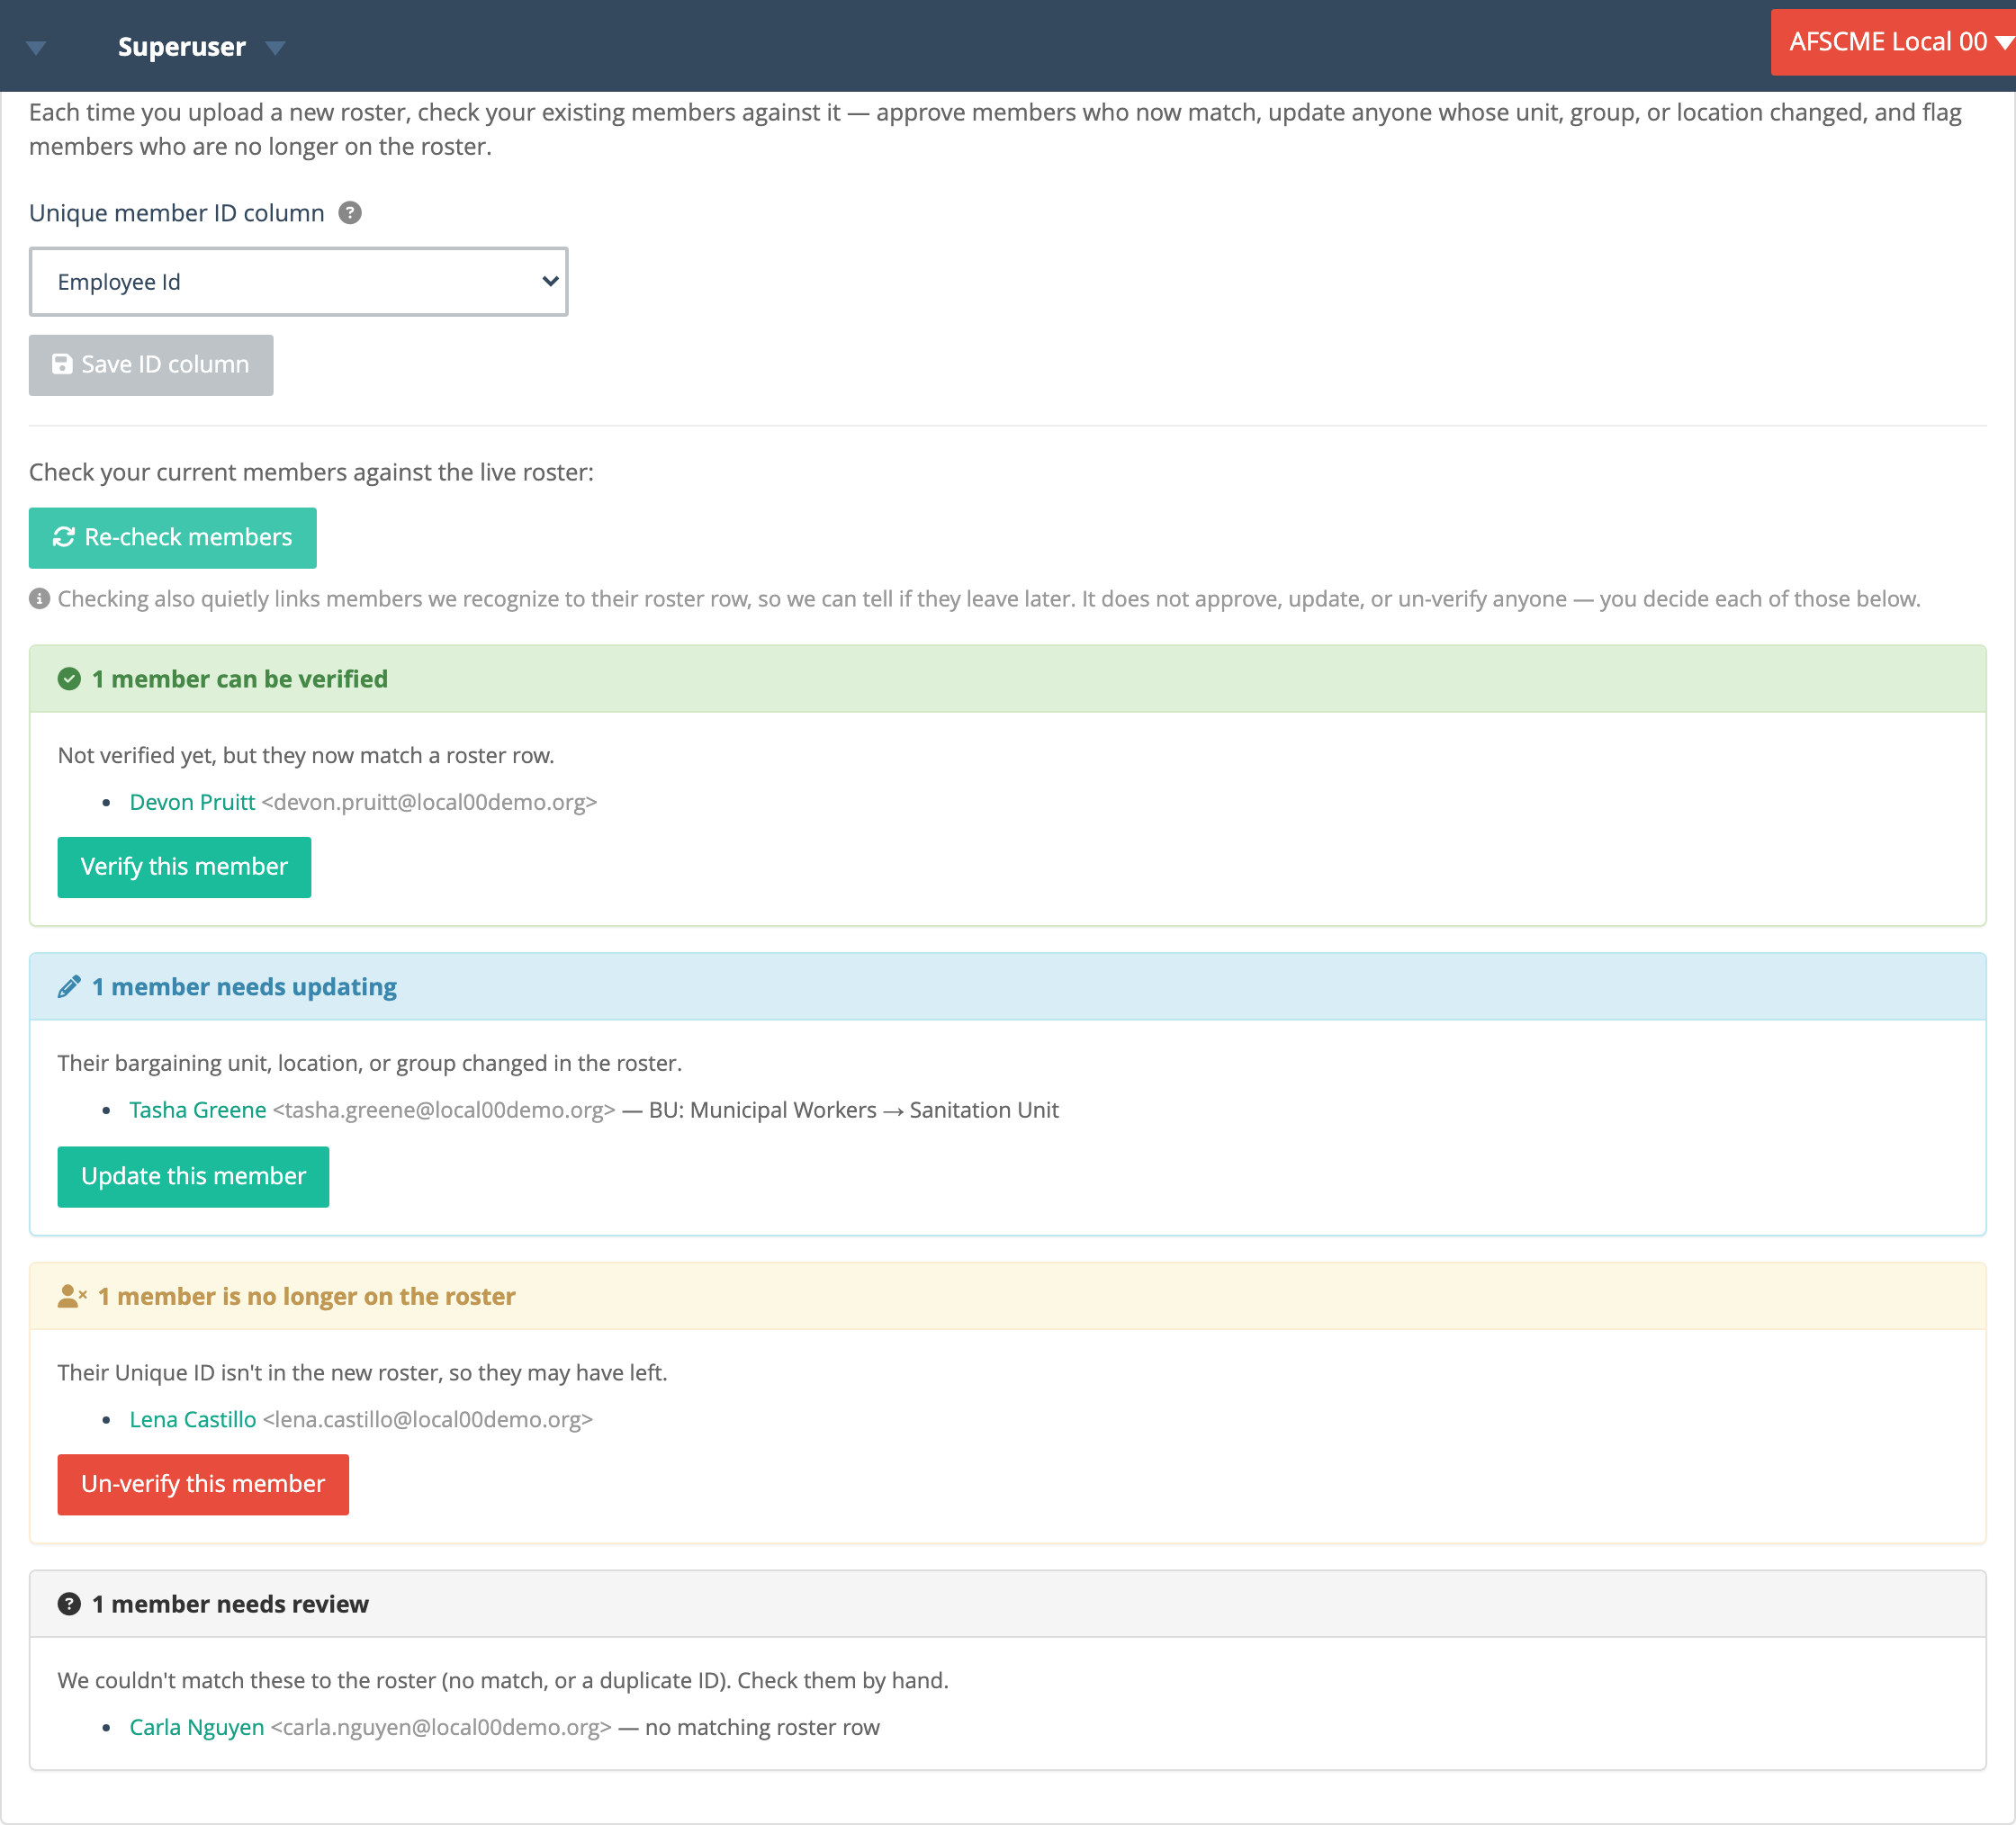
Open Re-check members against your roster, confirm the Unique member ID column is set, and click Check members against roster. This only links and sorts your members — it does not approve, update, or un-verify anyone.
3. Review the results
Members are grouped into four kinds, each with its own action:
- Can be verified (green) — they weren’t approved yet, but they now match a roster row. Click Verify this member to approve them.
- Needs updating (blue) — a verified member whose unit, group, or location changed in the new roster (for example BU: Municipal Workers → Sanitation Unit). Click Update this member to move them.
- No longer on the roster (yellow) — a verified member whose unique ID isn’t in the new roster, so they may have left. Click Un-verify this member if that’s correct.
- Needs review (grey) — we couldn’t match them (no matching row, or a duplicate ID). Check these by hand.
4. Take action
Each button affects only that member — nothing changes until you click it, so you stay in control of every approval, move, and un-verify.
Tip: Set the unique-ID column the very first time you upload. That’s what lets re-checks tell members apart reliably, even if a name or email later changes.