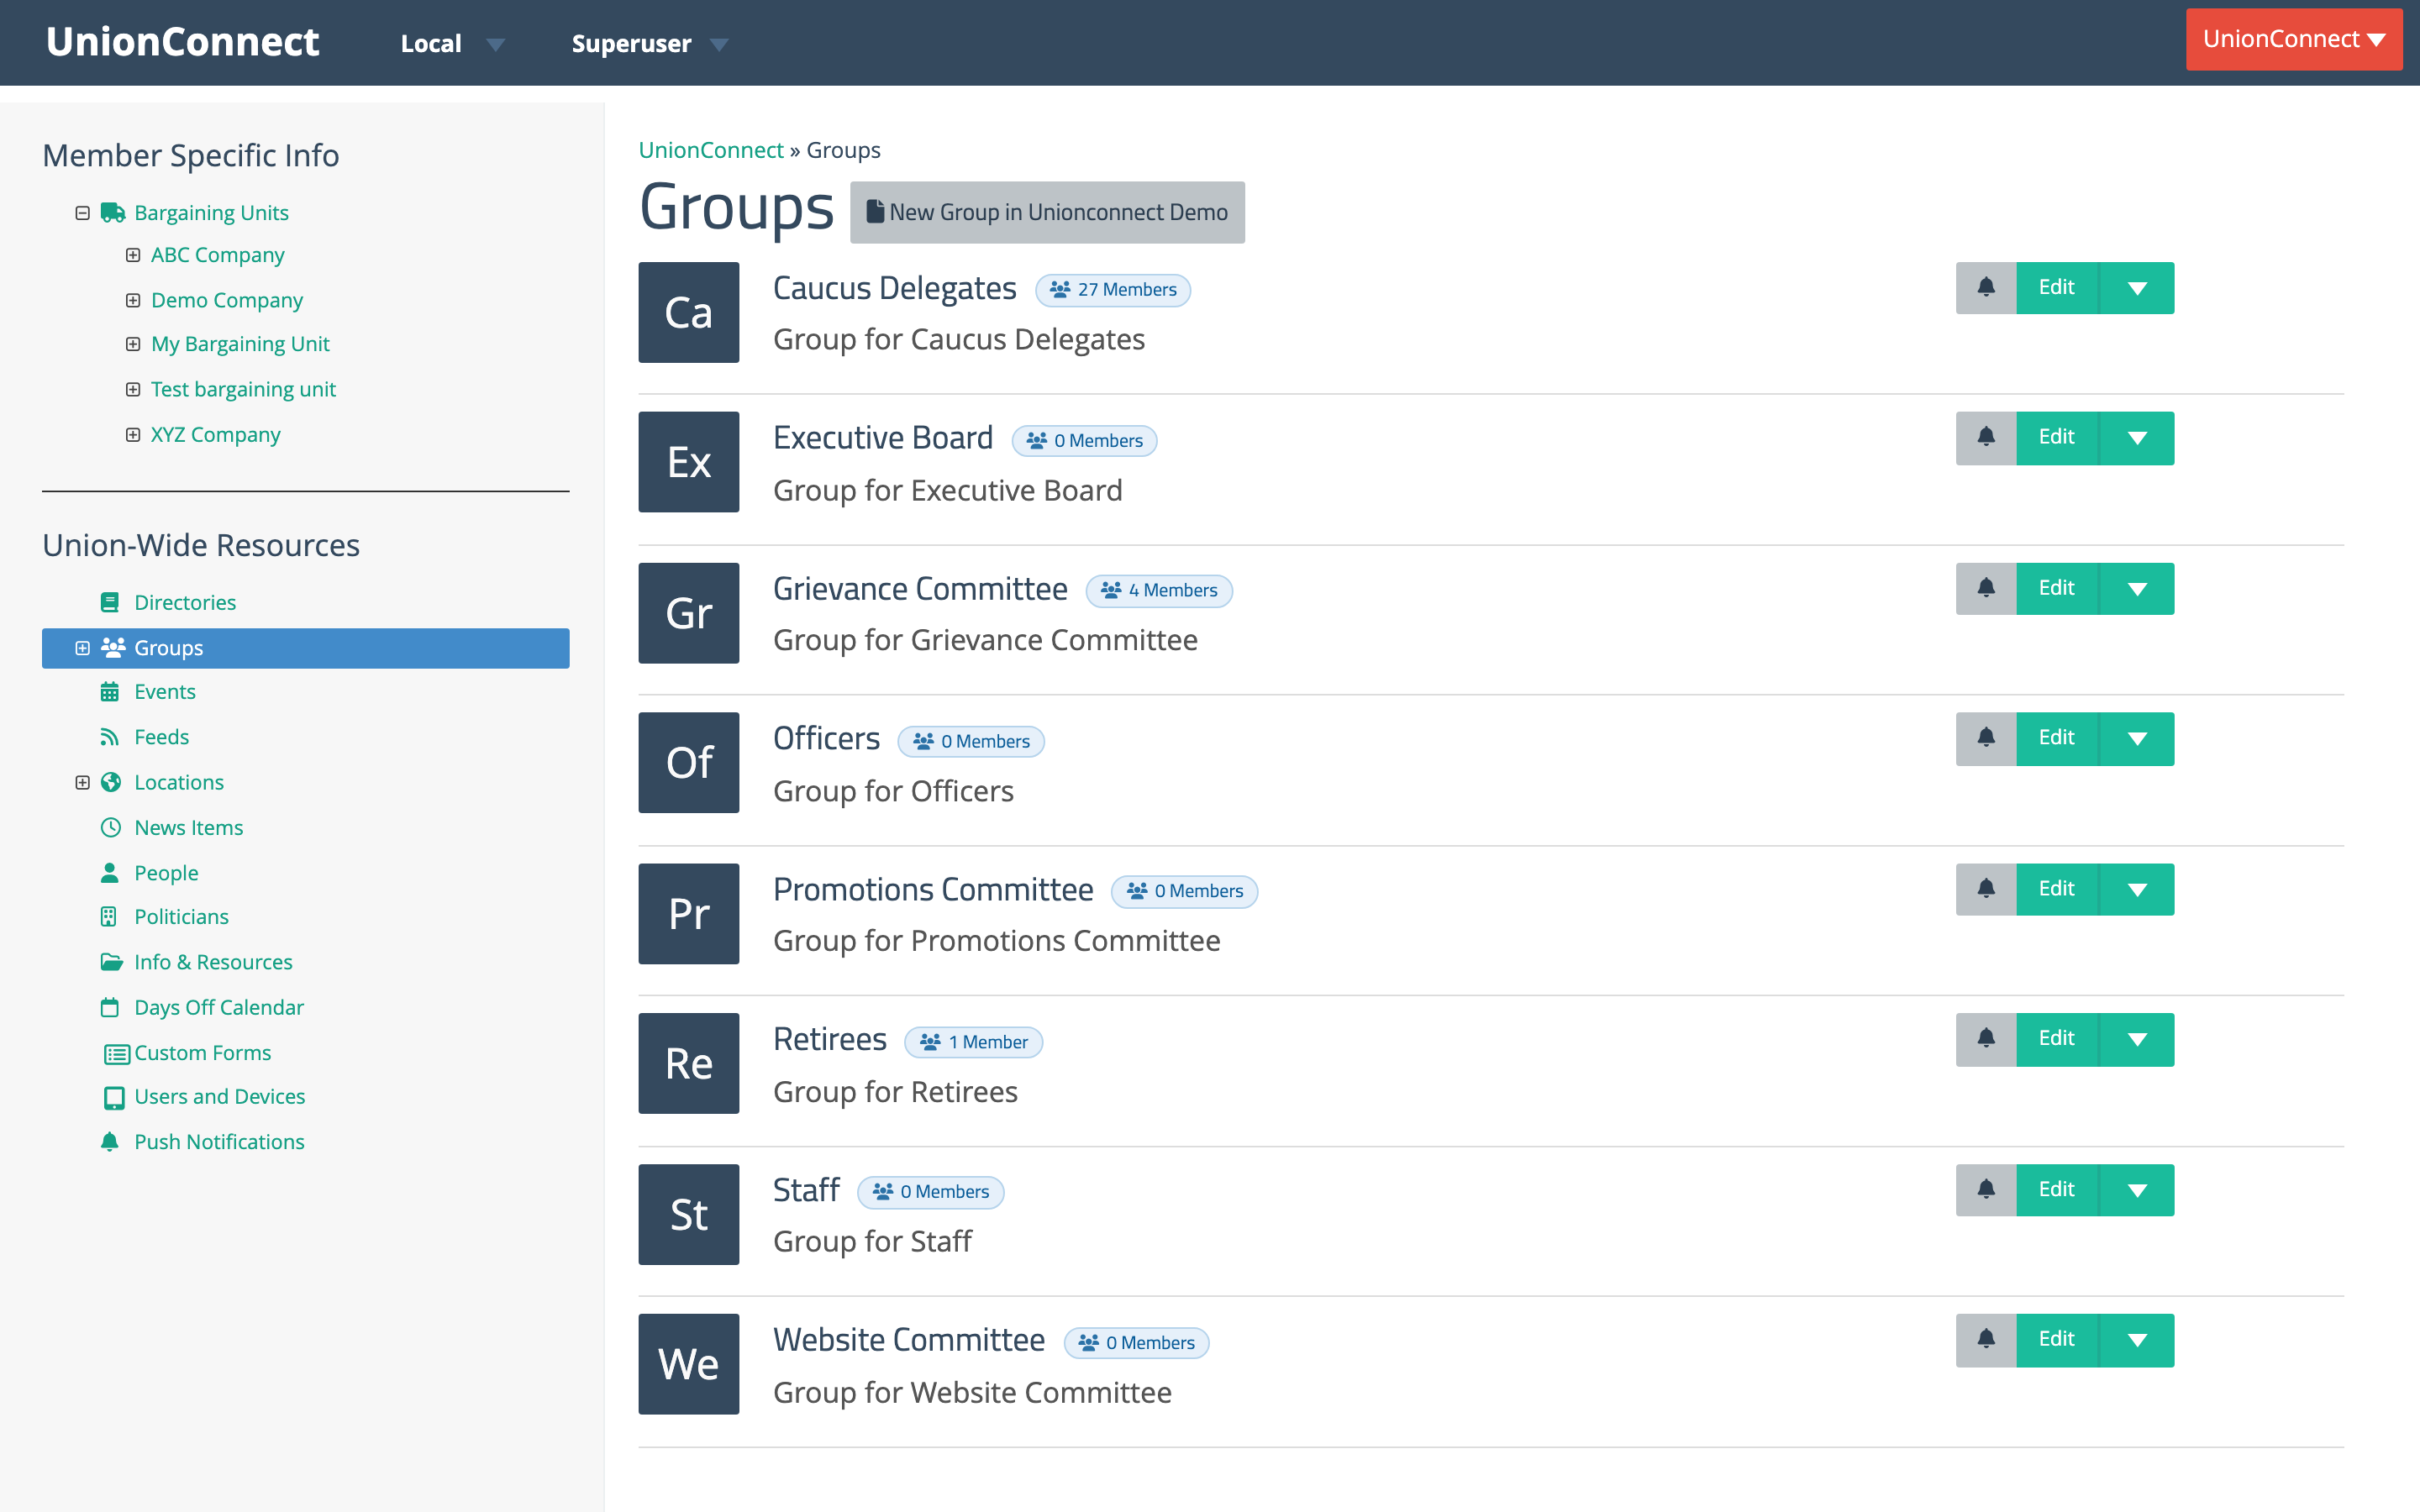
Groups are a way to organize your members that don’t necessarily share a bargaining unit. Each group has its own directory, events, feed, and news stories that only group members see. You can also send push notifications to a group.
Groups can be union-wide or scoped to a specific bargaining unit. They can also be made public so members can join the groups they belong to on their own.
Creating a Group
- Login to the app manager.
- To create a group inside a specific bargaining unit, expand that bargaining unit in the sidebar and click Groups under it. To create a union-wide group, click Groups under Union-Wide Resources.
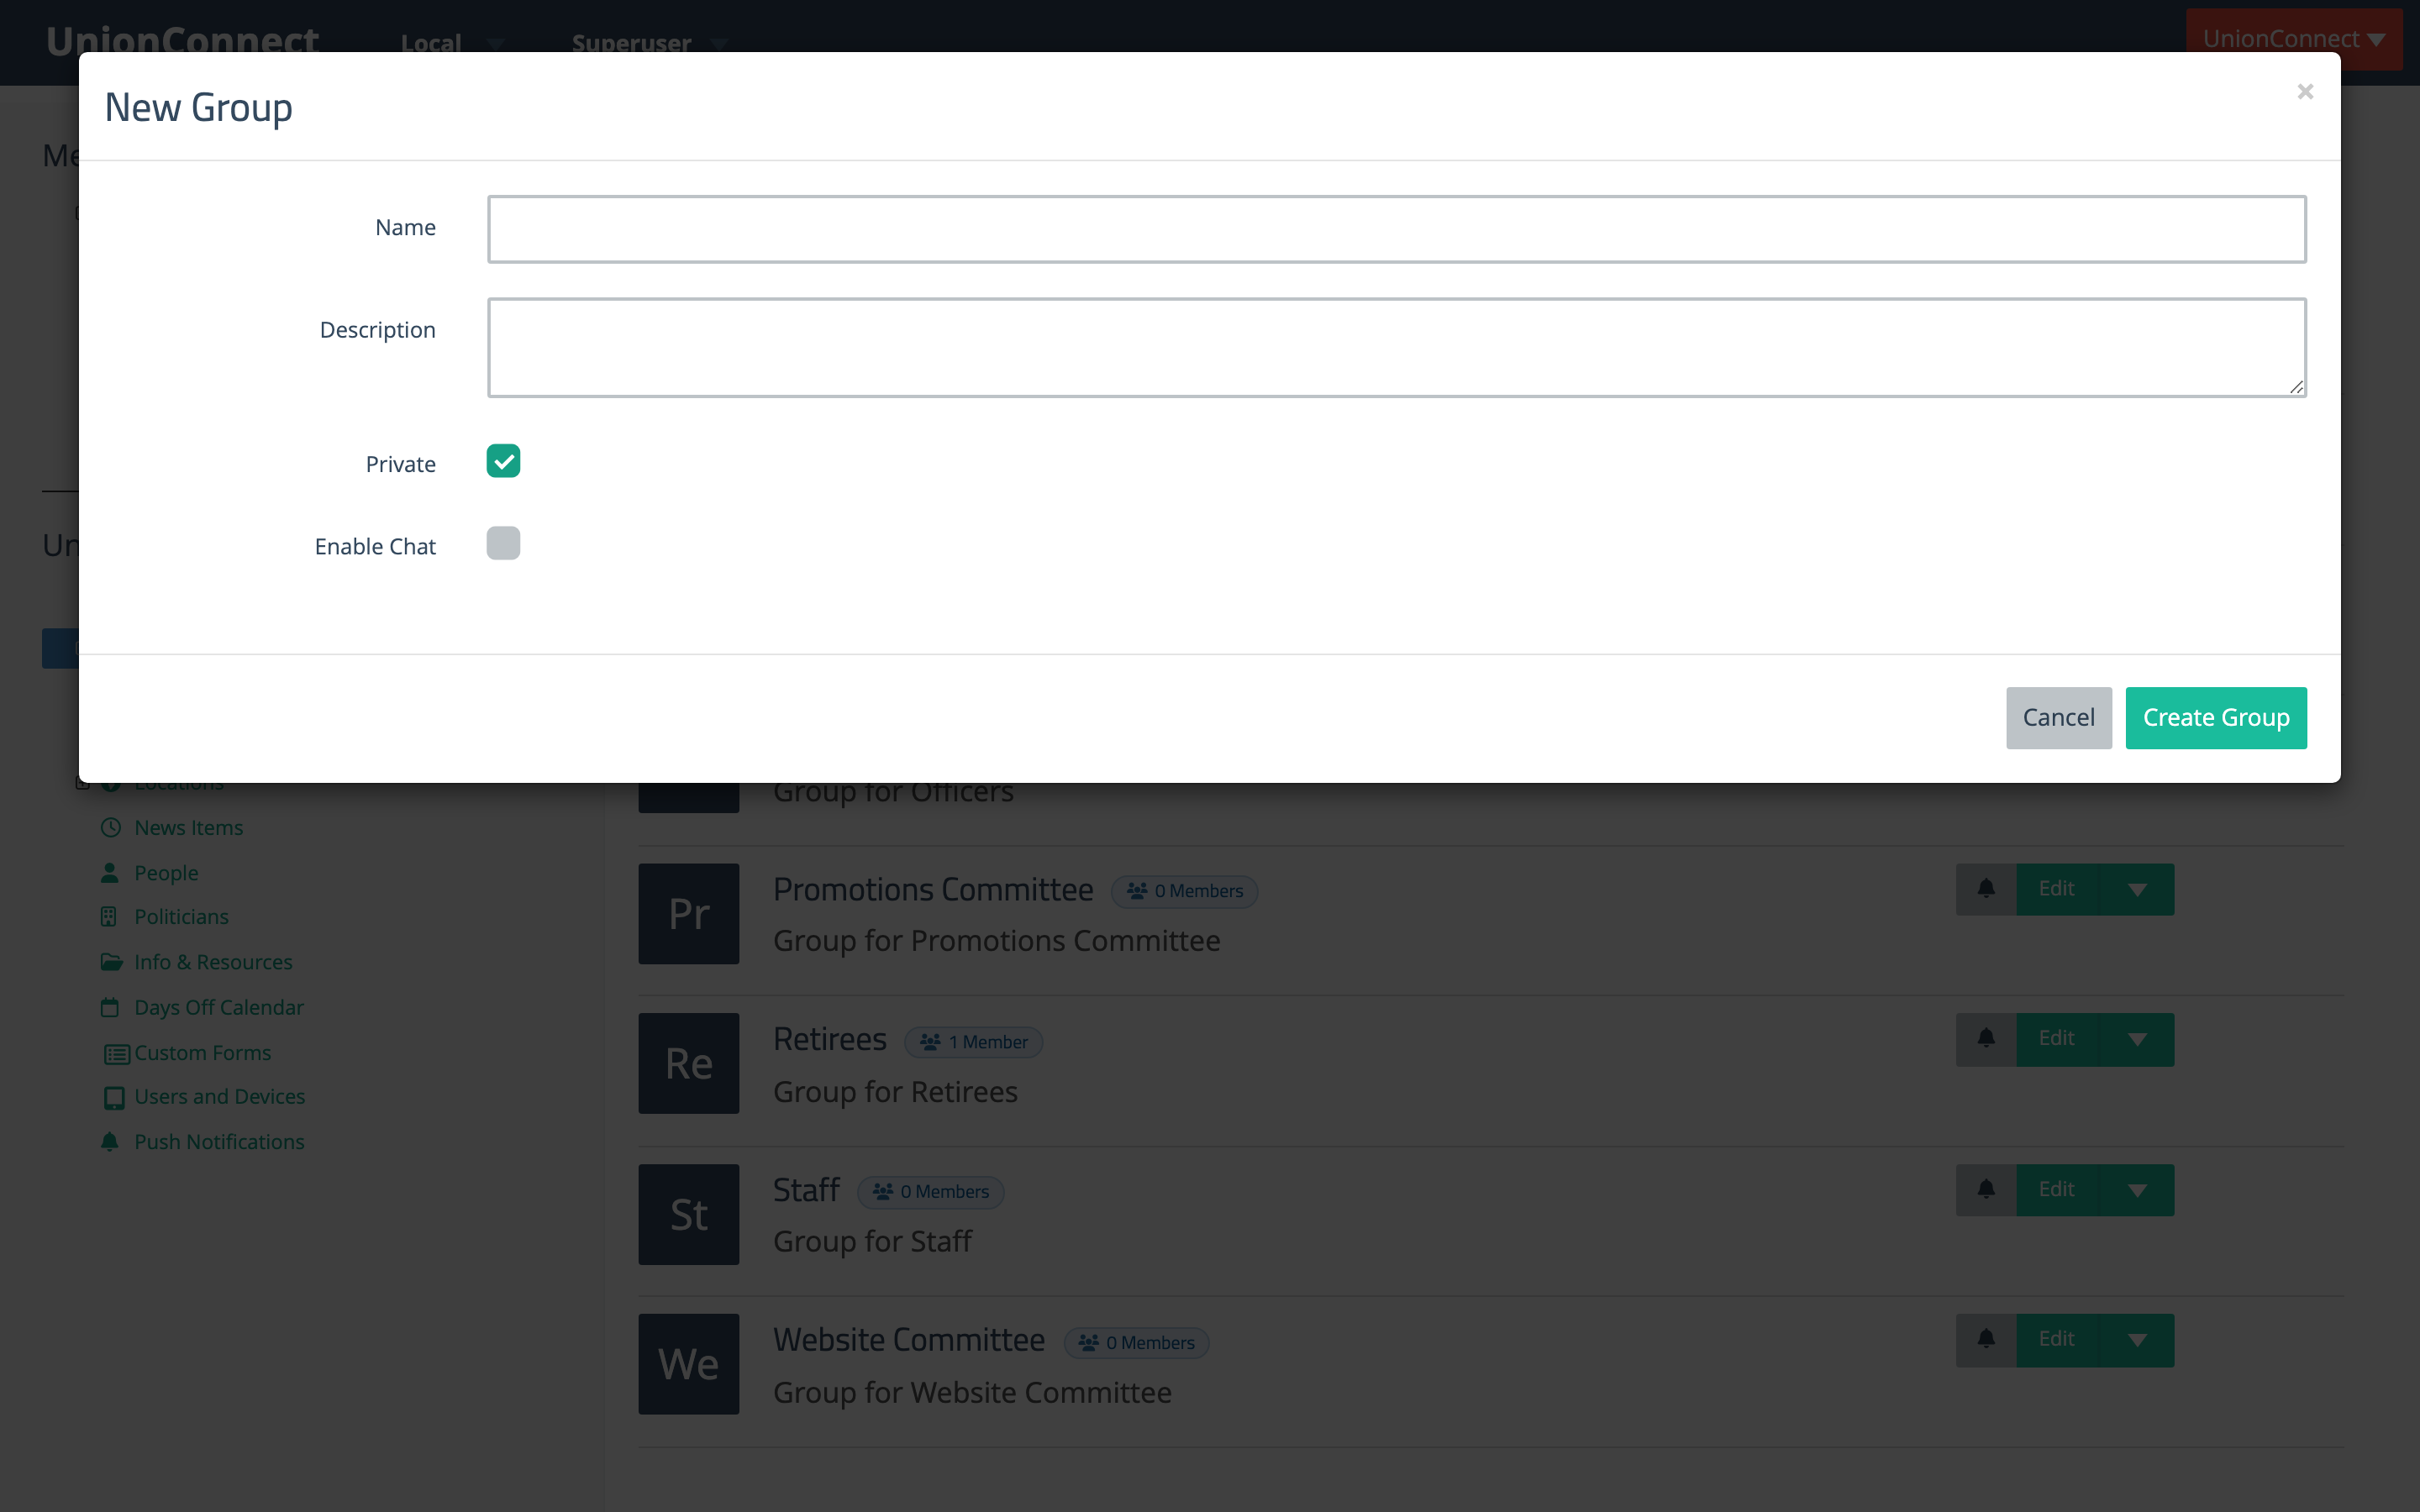
- Click the New Group in yoursectionname button at the top of the page.
- Fill out the New Group modal:
- Name — the name of the group.
- Description — a short description of what the group is for.
- Private — checked by default. When checked, an admin must add members manually. Uncheck it to make the group public so members can join voluntarily from the app.
- Enable Chat — turns on group chat so members can message each other inside the group.
- Click Create Group to save.
Adding Members to a Group
There are two ways to add a member to a group. Use whichever fits the situation:
- From the group — best when you’re adding or removing several members at once for one group.
- From the member’s account — best when you’re setting up a single member’s group memberships across several groups at once.
From the Group’s Manage Members Page
- Find the group either under a bargaining unit or under Union-Wide Resources.
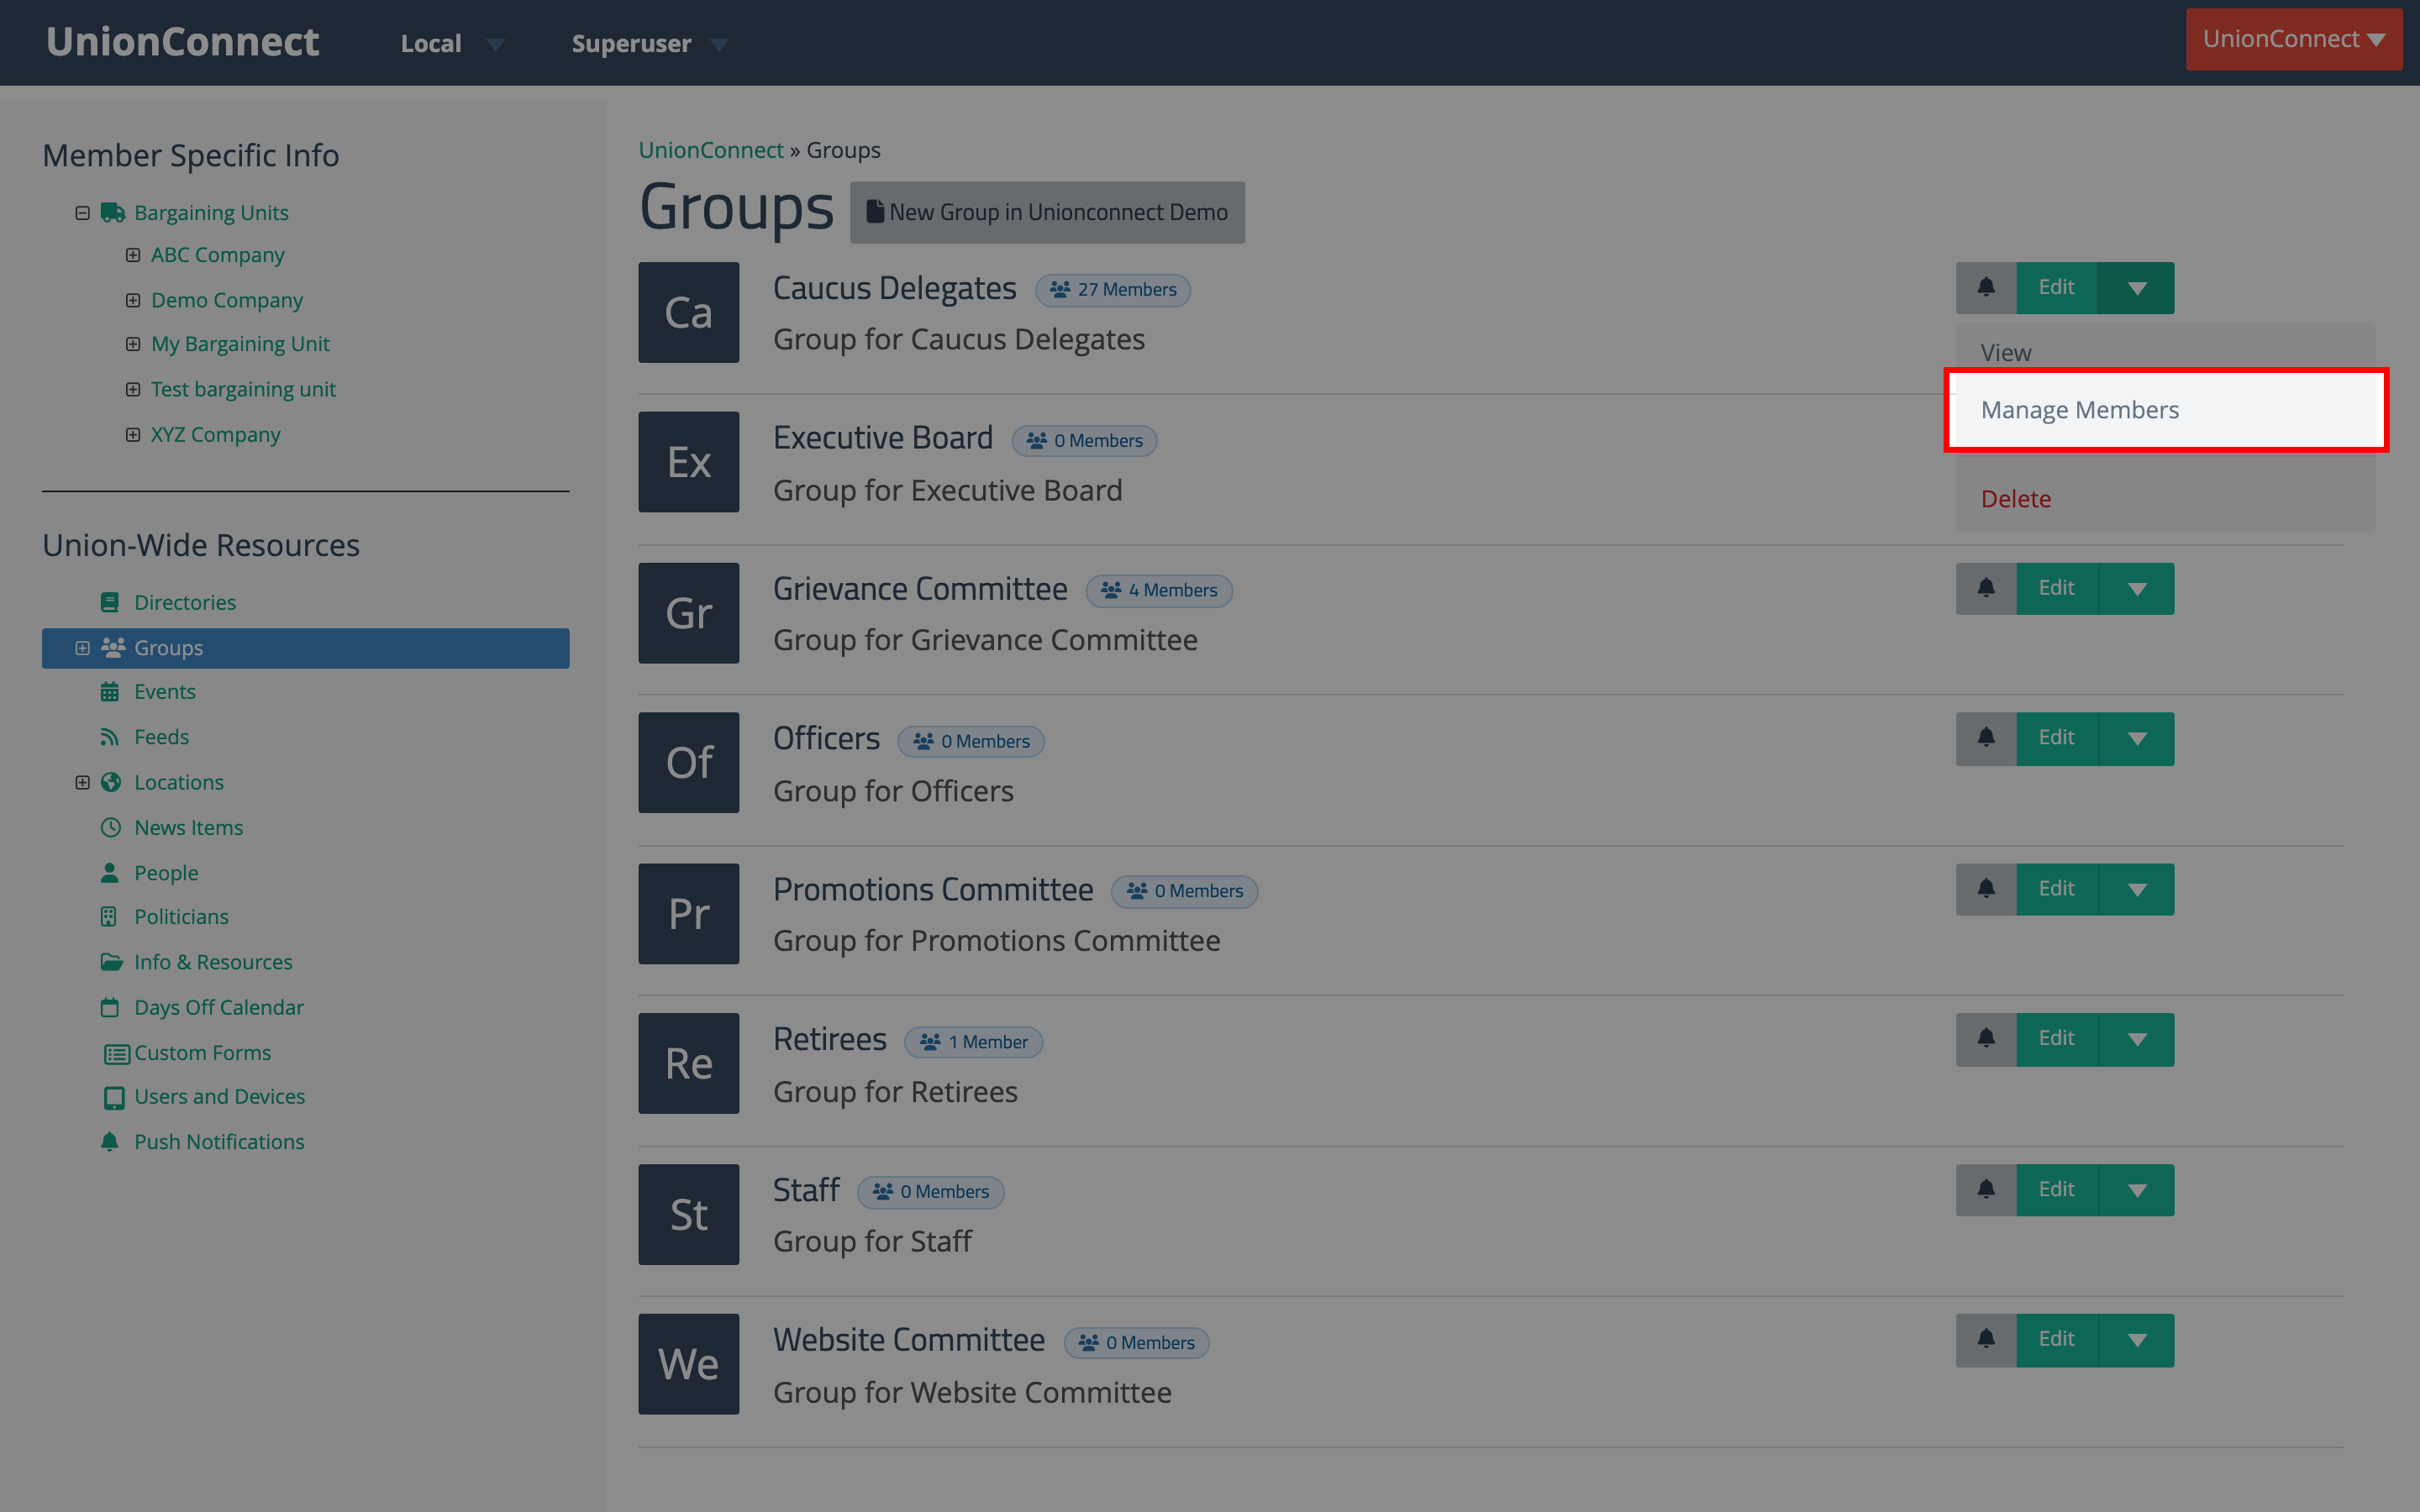
- Click the dropdown arrow ▾ next to Edit on the group’s row, then click Manage Members.
- The Manage Members page has two side-by-side panes:
- Members (left) — the people currently in the group. Click × Remove next to anyone you want to take out.
- Add Members (right) — everyone eligible to join. Click + Add next to anyone you want to put in the group.
- Use the search boxes at the top of each pane to filter by name or email when the list is long.
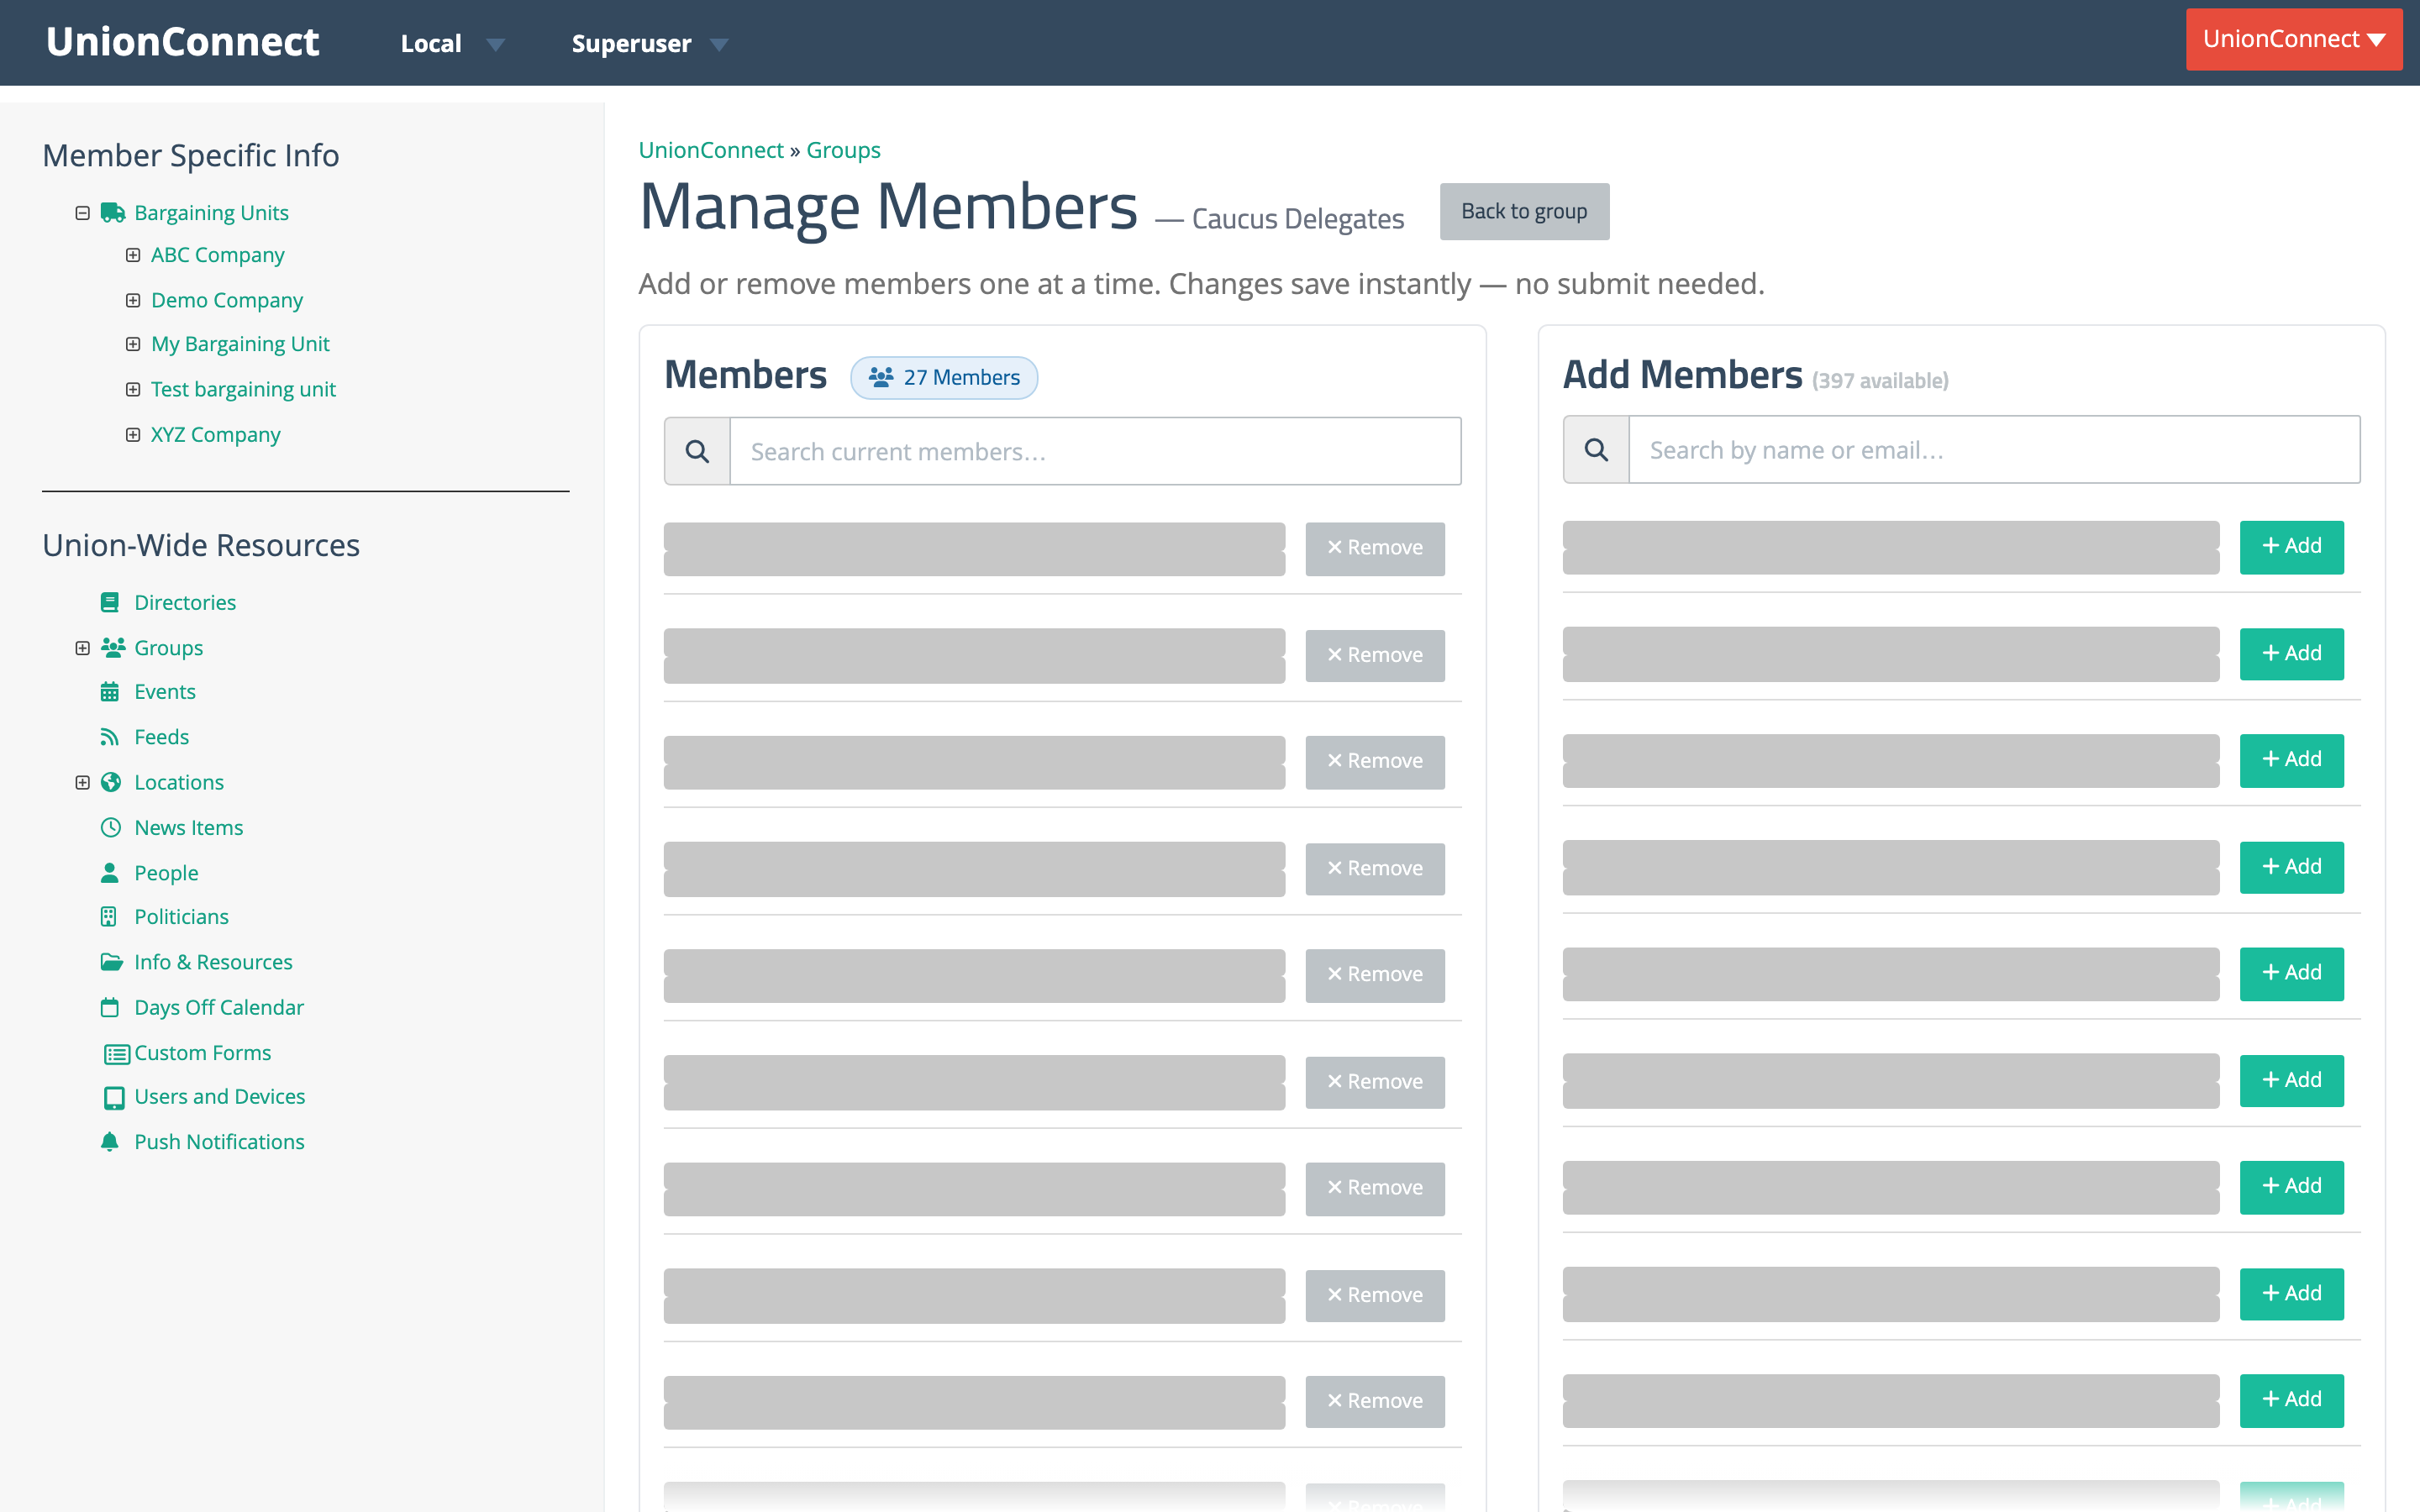
Every add and remove saves instantly — there’s no Submit button. Click Back to group at the top right when you’re done.
From the Member’s User Account
- Go to Users and Devices in the sidebar.
- Find the member and click the green Edit button on their row.
- Scroll down to the Affiliation section and click the Groups field. The dropdown lists every group the member is eligible to join — union-wide groups at the top, followed by groups belonging to the member’s bargaining unit.
- Click a group to add the member to it. Selected groups appear as green chips inside the field. Click the × on a chip to remove a group.
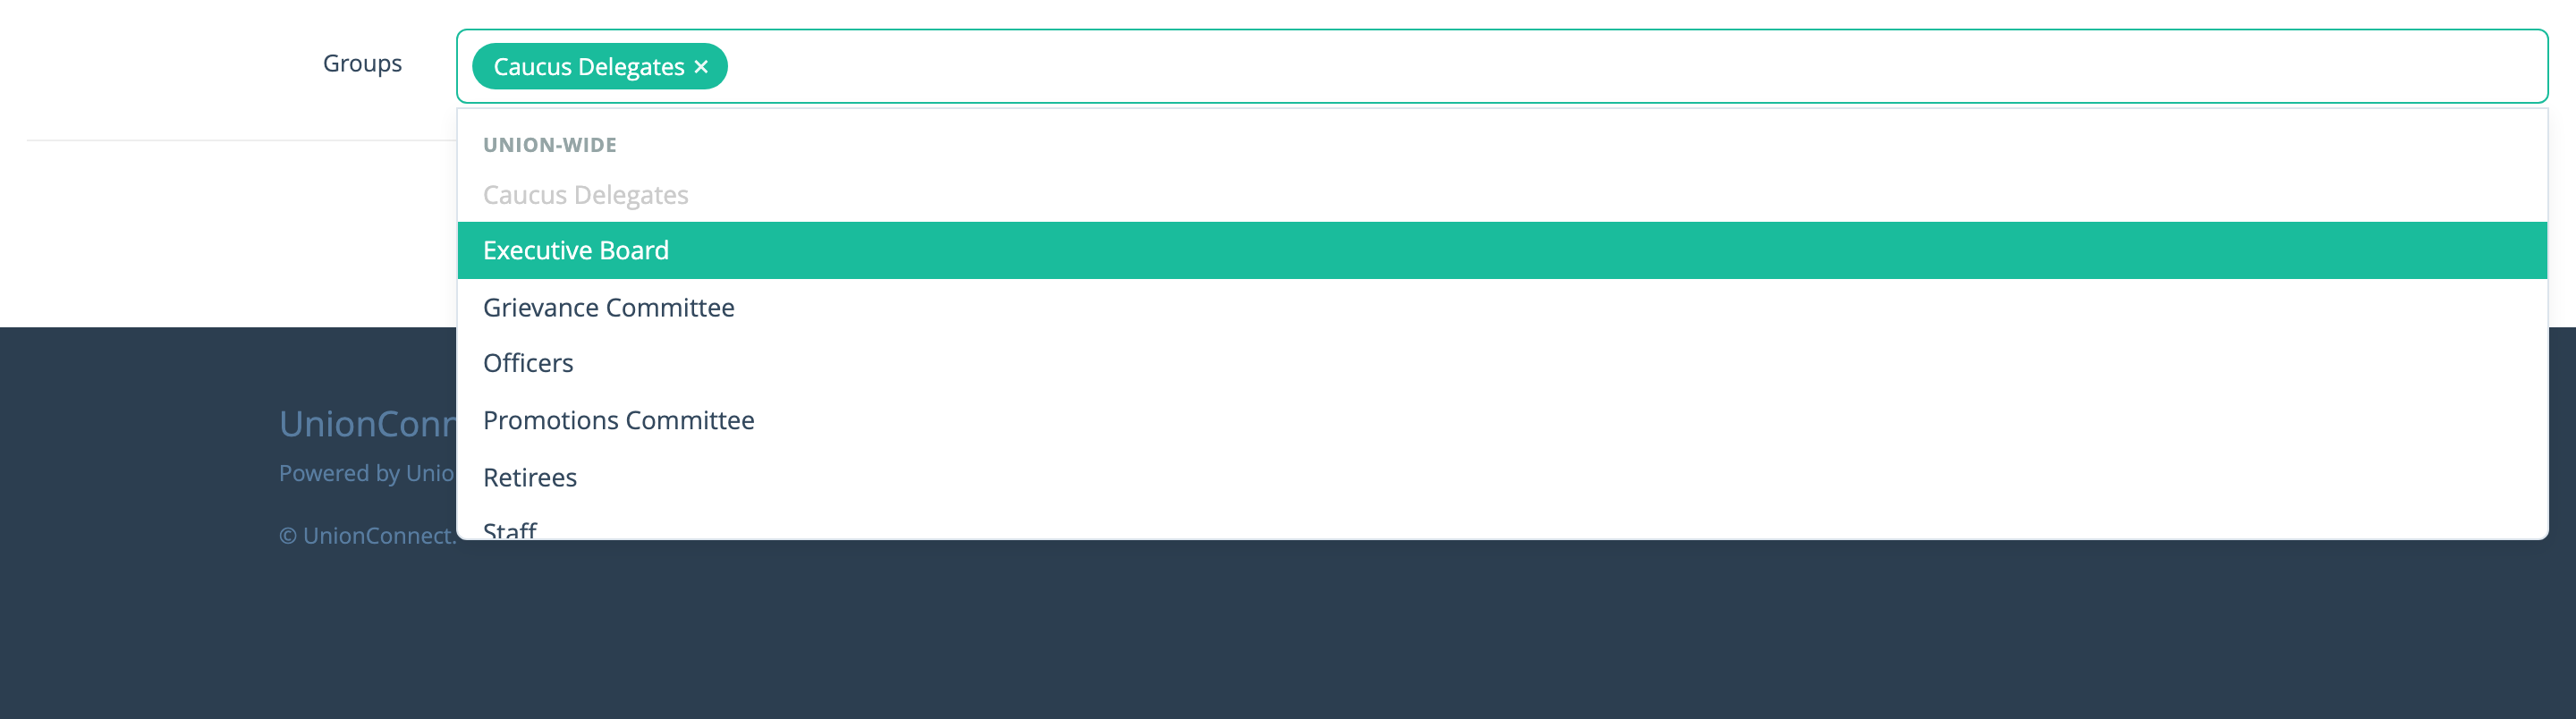
- Click the green Finish button at the bottom of the form to save the member’s new group assignments.
You can also reach a per-user Manage Groups modal from the member’s row on the Users and Devices page — click the dropdown arrow next to Edit and choose Manage Groups. The modal lists every group available to the member, sectioned by scope (Union-wide, then by bargaining unit), with Select all and Clear shortcuts at the top.