The Registration Form builder lets you control exactly what new members see when they sign up for your union’s app. You can show or hide fields, mark them required, rename their labels, reorder them, add your own custom fields, and set rules for ID numbers — all with a live phone preview that updates as you work.
Note: The Registration Form tab appears in your local-wide settings only when the feature is enabled for your local. It is turned on automatically for newly created locals. If you don’t see the tab and would like it, contact UnionConnect support.
Opening the Registration Form builder
- Log in to the app manager.
- Open your local’s settings (the Edit Local form).
- Click the Registration Form tab.
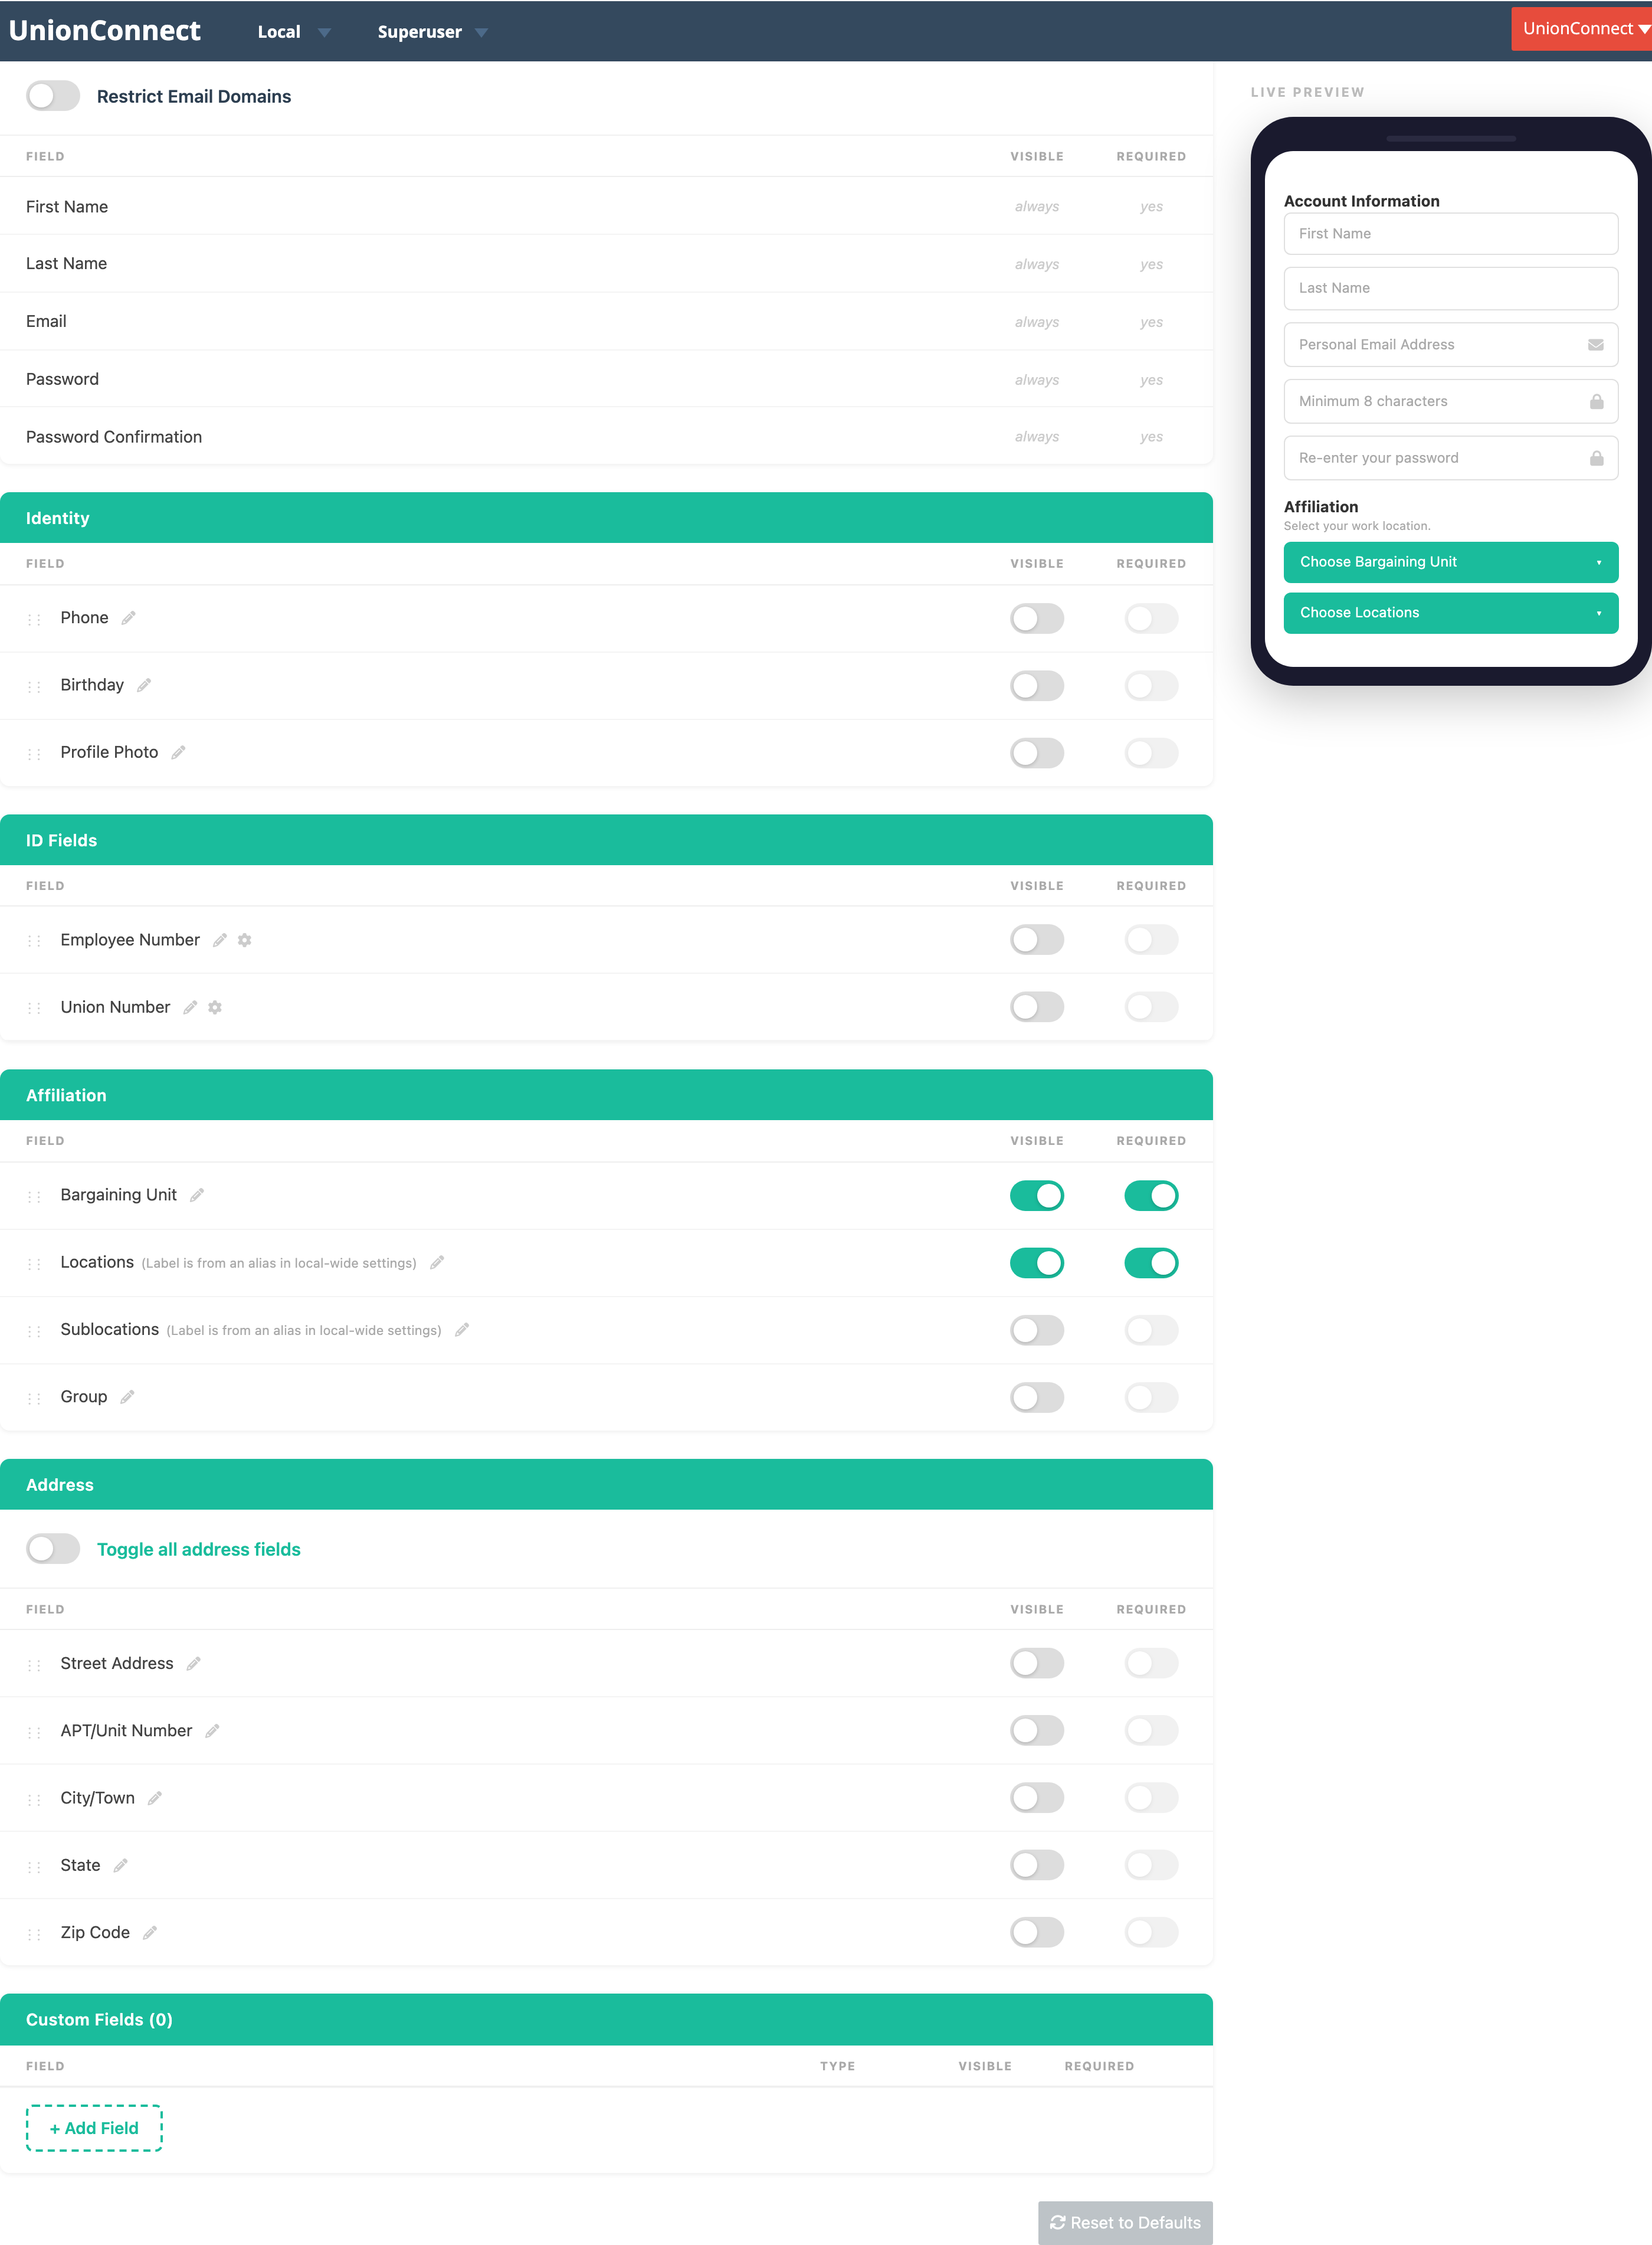
The builder is split into two columns. On the left are the fields, grouped into sections you can configure. On the right is a live phone preview that shows the sign-up form exactly as members will see it — it updates instantly as you make changes.
How fields work
Most fields share the same three controls:
- Visible — show or hide the field on the sign-up form.
- Required — whether members must fill it in before they can finish signing up. A required field shows a red asterisk (*) in the preview.
- Edit field (pencil icon) — rename the field and add help text. Click the pencil to open the Edit field popover, which has two inputs: Label (the field’s name) and Help text (optional guidance shown under the field). Type your changes and click Save.
You can also drag fields by the grip handle to change the order they appear in.
Help text can be added to any field — Identity, ID, Affiliation, Address, and custom fields alike. It appears as a small line of text beneath the field in the live preview and on the real sign-up form. (For Location and Sublocation, the label is set elsewhere in local-wide settings, so the popover offers help text only.)
The sections
Account Information (locked)
These are the core account fields — First Name, Last Name, Email, Password, and Password Confirmation. They are always shown and always required, so they can’t be toggled off.
This section also holds the Restrict Email Domains option. Turn it on to block sign-ups from specific email domains (for example, a former employer’s domain). Add each domain, such as @company.com, and it will be rejected at sign-up.
Identity
Optional personal fields: Phone, Birthday, and Profile Photo. All are hidden by default — switch on the ones you want to collect.
ID Fields
Number fields used to identify members: Employee Number and Union Number. In addition to the usual controls, each has a validation panel (the gear icon) where you can require a specific format:
- Prefix — text that must appear at the start (e.g.
EMP-). - Min Digits / Max Digits — the allowed length.
- Pad Zeros — pad shorter entries with leading zeros to a set length (e.g. store
123as00123). - Allow Numbers / Allow Letters — which characters are permitted.
Use these to make sure members enter ID numbers in the format your records expect.
Affiliation
Where the member belongs: Bargaining Unit, Location, Sublocation, and Group. Bargaining Unit and Location are shown and required by default.
- In the live preview, clicking one of these dropdowns shows the actual options your members will choose from, pulled from your local’s configuration.
- The Location and Sublocation labels come from the aliases you’ve set elsewhere in local-wide settings, so they aren’t renamed here.
- Sublocation can only be enabled if your local uses sublocations.
- Additional Locations — if your local has multi-location users turned on, the sign-up form also shows an Additional Locations picker (“Pick any other locations you also work at”), so a member can join more than one location at sign-up. This picker is controlled by the multi-location feature flag, not by the registration builder. See Multi-Location Users.
Address
A full mailing address: Street Address, APT/Unit Number, City/Town, State, and Zip Code. The whole section is off by default. Use Toggle all address fields to switch the section on or off, then choose which individual fields to show and require.
Custom Fields
Add your own questions beyond the built-in fields. Click + Add Field, give it a label, and choose a type:
- Single Text — a one-line text box.
- Textarea — a multi-line text box for longer answers.
- Checkbox — a single yes/no checkbox.
- Select — a dropdown. When you choose this type, an Options panel appears where you add each choice with + Add Option.
- Date — a date picker.
- Help Text — not an input at all, but a block of display-only text (instructions, a heading, or a note) you can drop between fields to guide members through the form.
Custom fields can be reordered, renamed, made required, or deleted. Whatever members enter is saved to their account and shown in the app manager.
Saving and resetting
- Click Update at the bottom of the settings form to save your registration form.
- Reset to Defaults restores every section to the standard UnionConnect configuration. This only changes the form going forward; it does not affect members who have already signed up.
Fields used for member verification
If a field is used by one of your member verification rules — for example, matching a new member’s Employee Number against your roster — it is locked. Locked fields stay visible and can’t be switched off, and (for custom fields) can’t be deleted. This prevents auto-verification from silently breaking. To change a locked field, remove the verification rule that depends on it first. See Verifying Members.
What members see
Changes take effect on the sign-up form right away. New members opening the app and tapping Sign Up will see the fields, labels, order, and requirements you configured. For the member’s side of this flow, see Signing Up.