
The Info and Resources feature is where you should put information that you want your membership to access at all times. This could include text pages, links to outside sources, and documents.
Resources can be further organized using categories. Categories work like folders that can group related resources together.
If you add something to the Info & Resources section within a bargaining unit it will display in the My Info & Resources section of the app. If you were to add something to the Info & Resources section union-wide, it will appear under the My Union section of the app.
Adding a Resource
- Login to the app manager
- Go to the Info & Resources section either under a specific bargaining unit, group, or union-wide
- Click New Resource
The New Resource window opens on a Type step. Start by choosing what kind of resource you’re adding — the rest of the form appears once you pick a type.
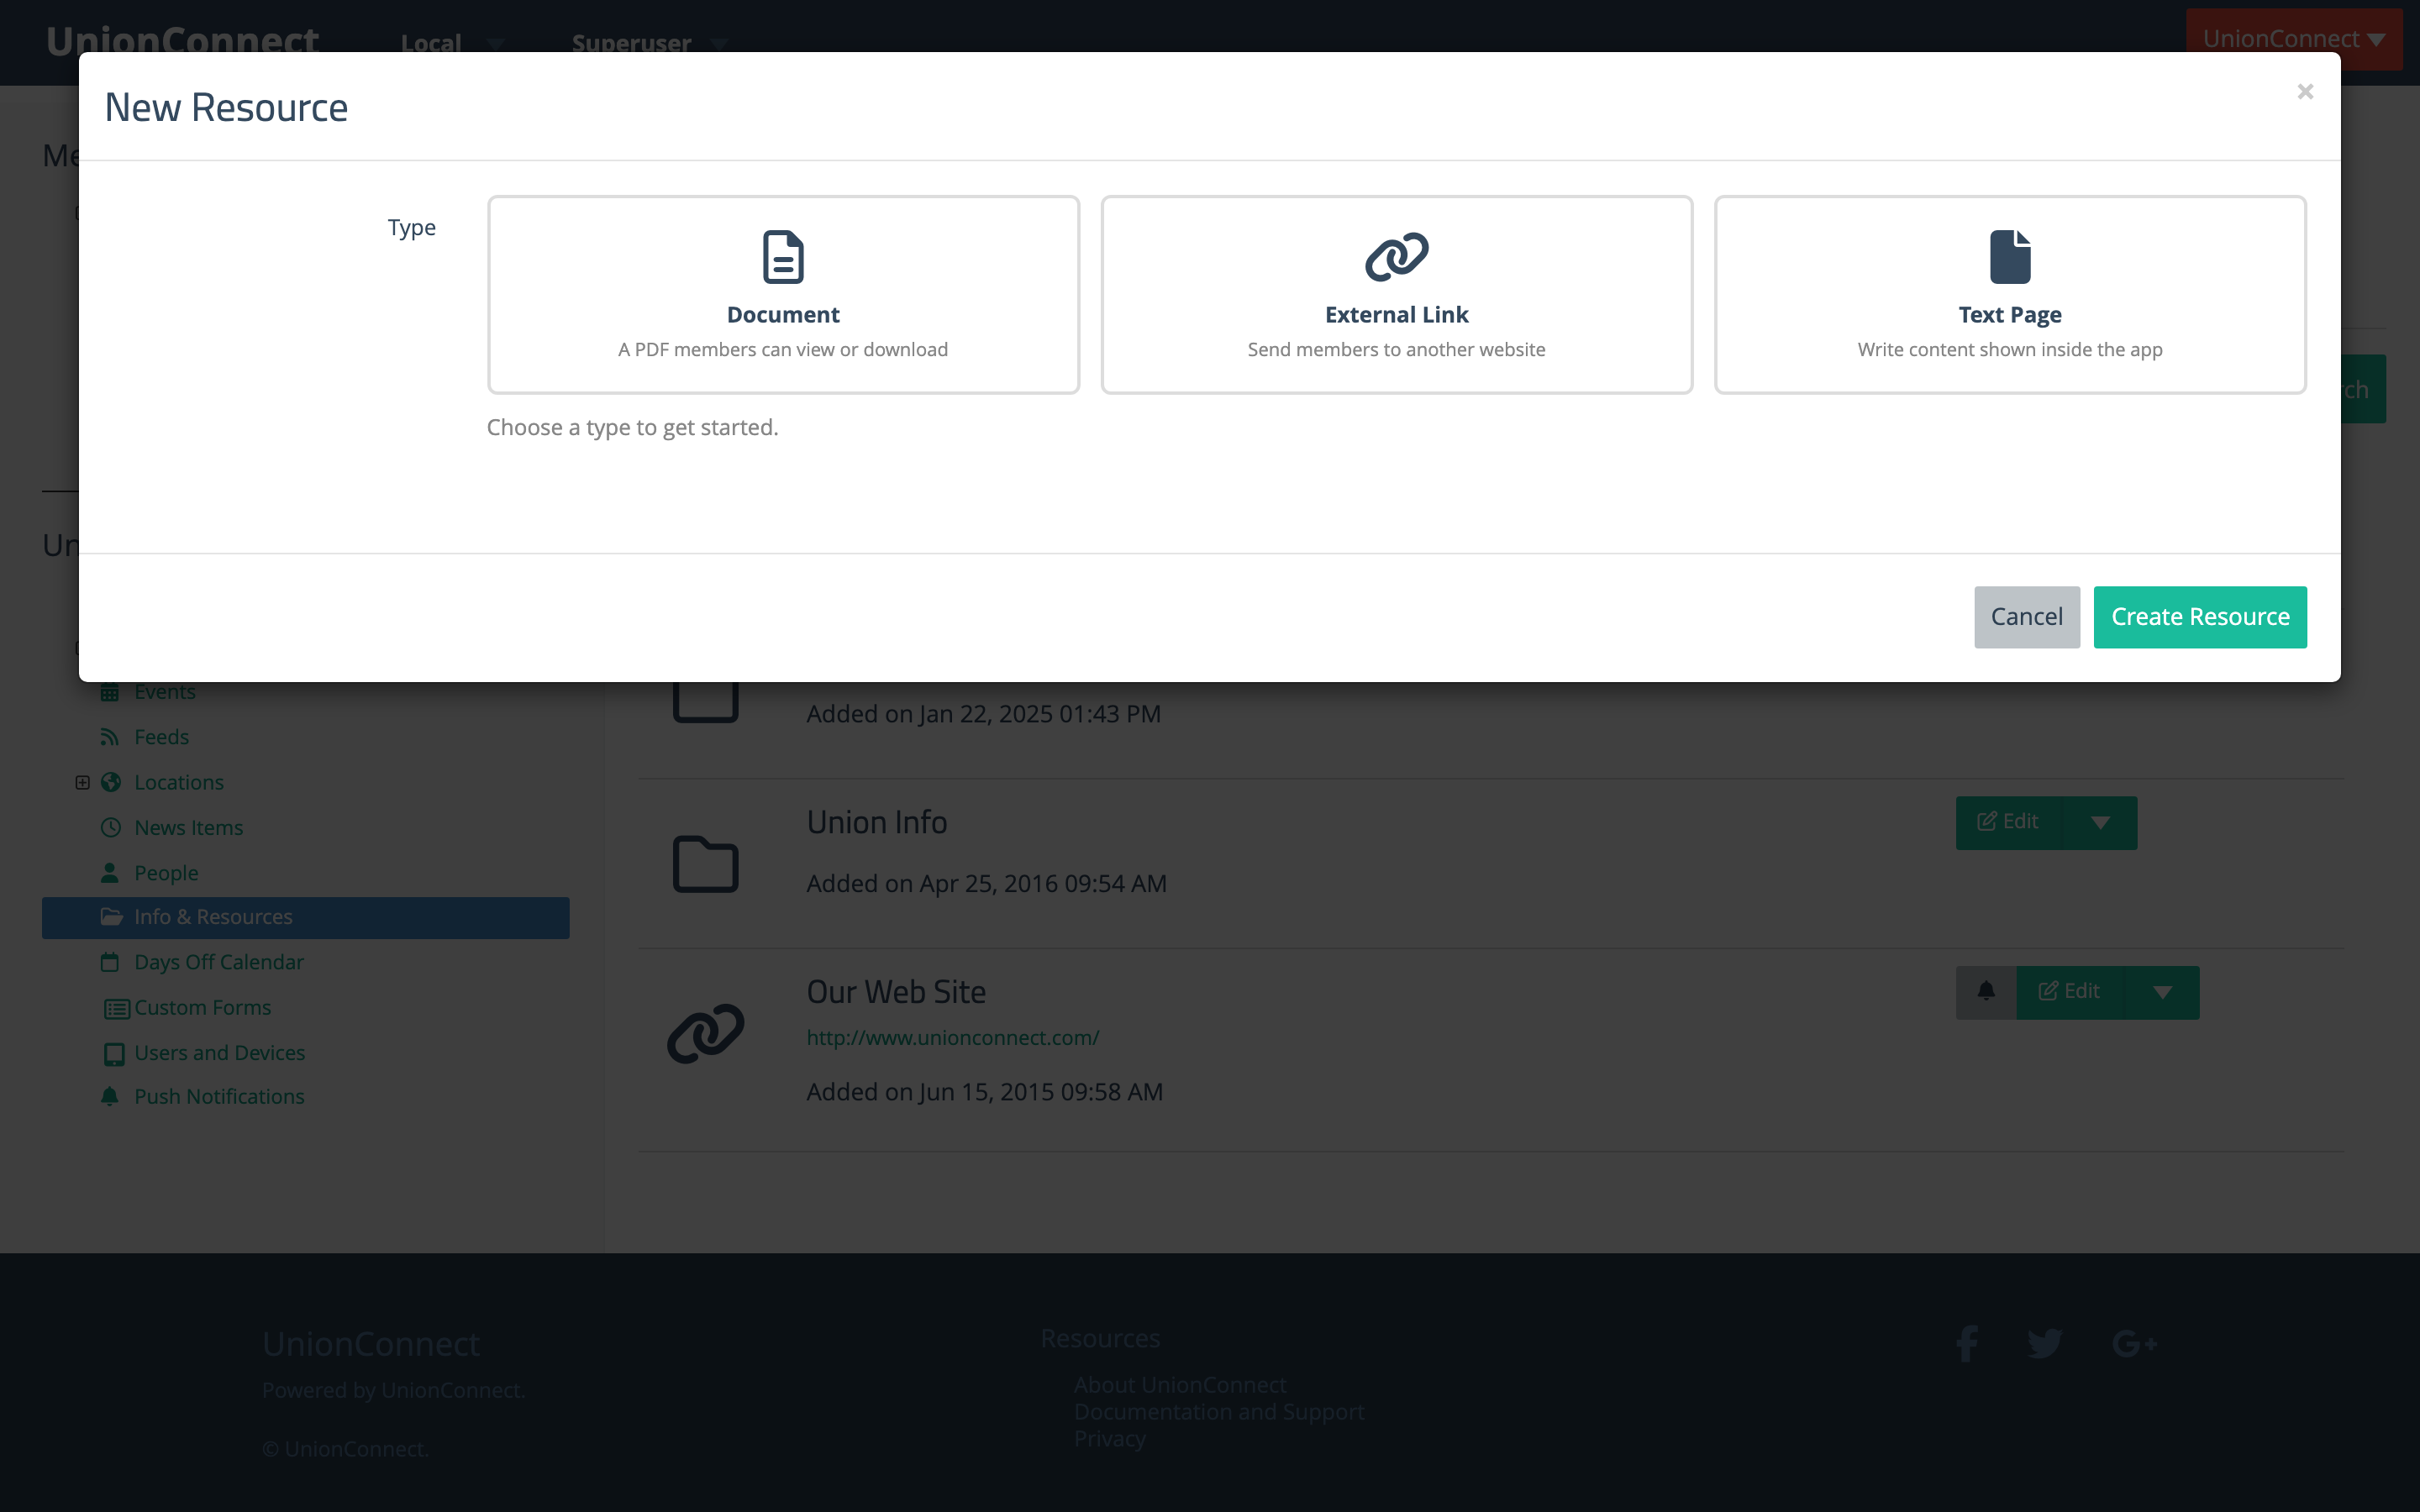
- Document — upload a PDF that members can view or download.
- External Link — send members to another website.
- Text Page — write content that’s shown inside the app, like a page on a website.
After you pick a type, the rest of the form slides down with only the fields that type needs.
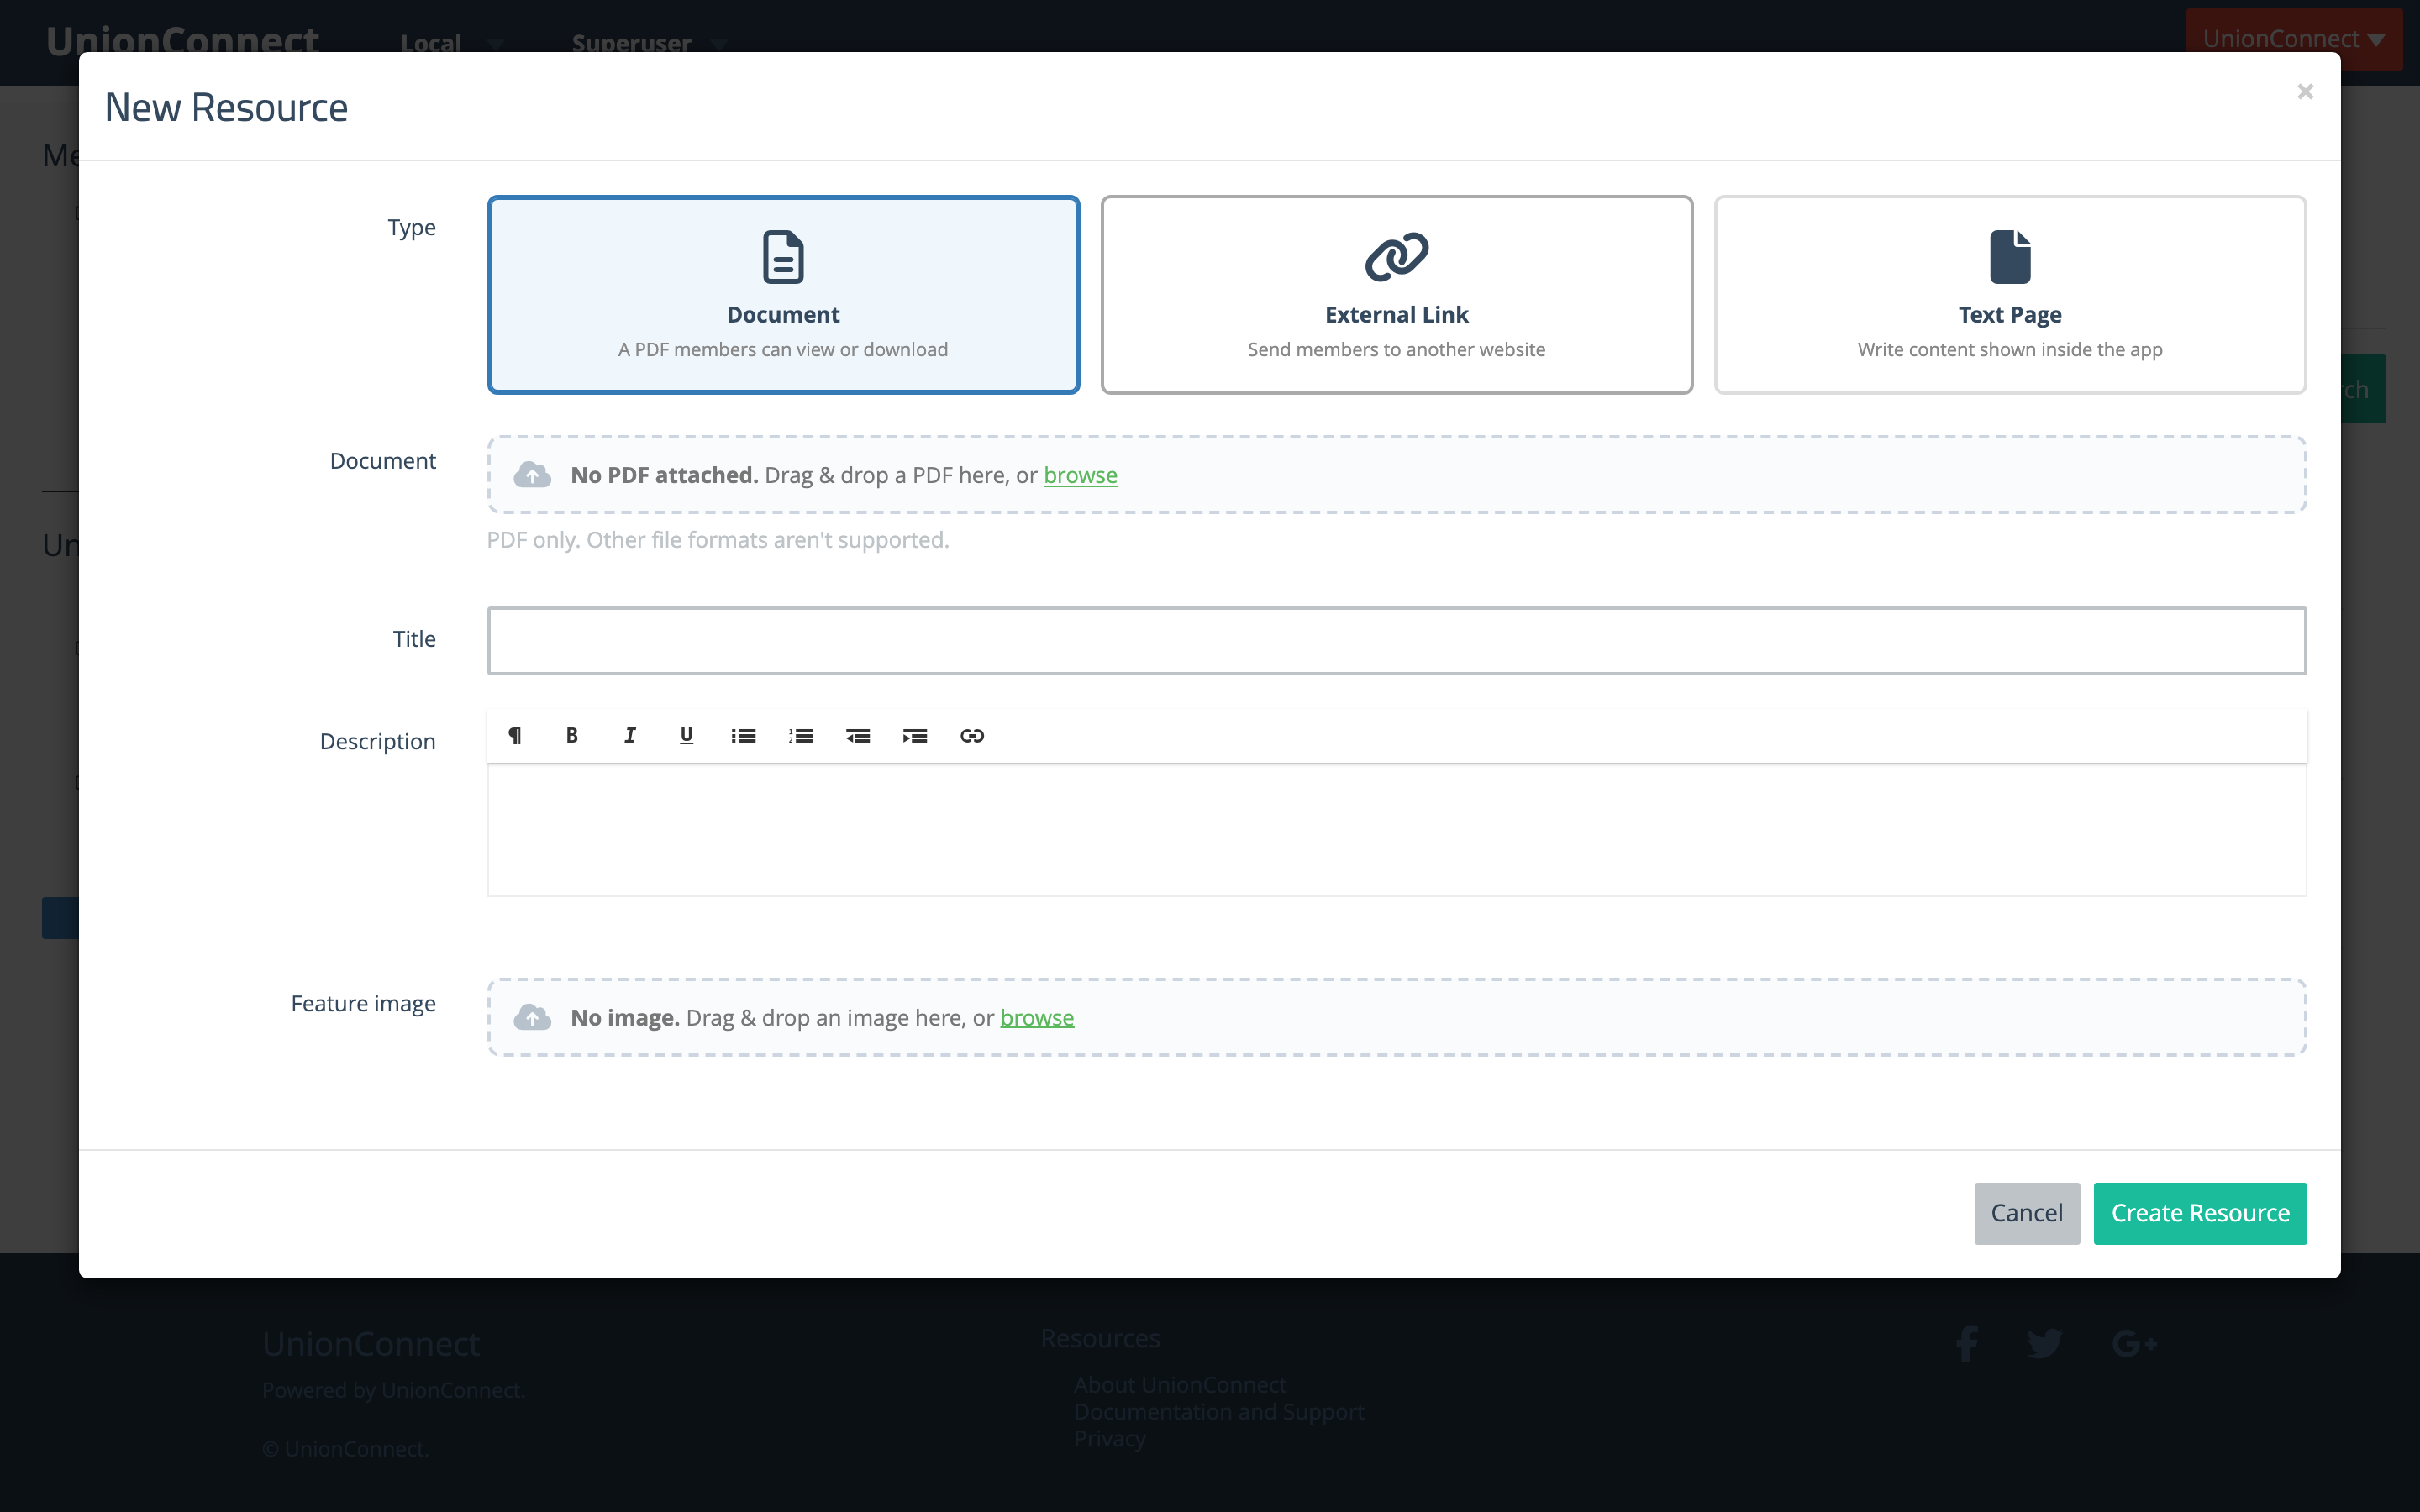
- Fill out the fields for your resource:
- Document (Document type only) — drag & drop a PDF onto the upload area, or click browse to pick one from your computer. Only PDF files are supported. The file uploads when you save.
- Url (External Link type only) — the full web address members should be taken to.
- Title (required) — the name of the resource as it appears in the app.
- Description (or Text for a Text Page) — the body content. For a Text Page this is the page’s text; for the other types it’s an optional description.
- Feature image — the icon shown next to the resource. Drag & drop an image or click browse. Use Replace or Remove to change it later.
- Click Create Resource when you are done.
Tip: For Document resources you can also create a shareable public web link. See Creating a Public Link for a Document.
Viewing a Resource
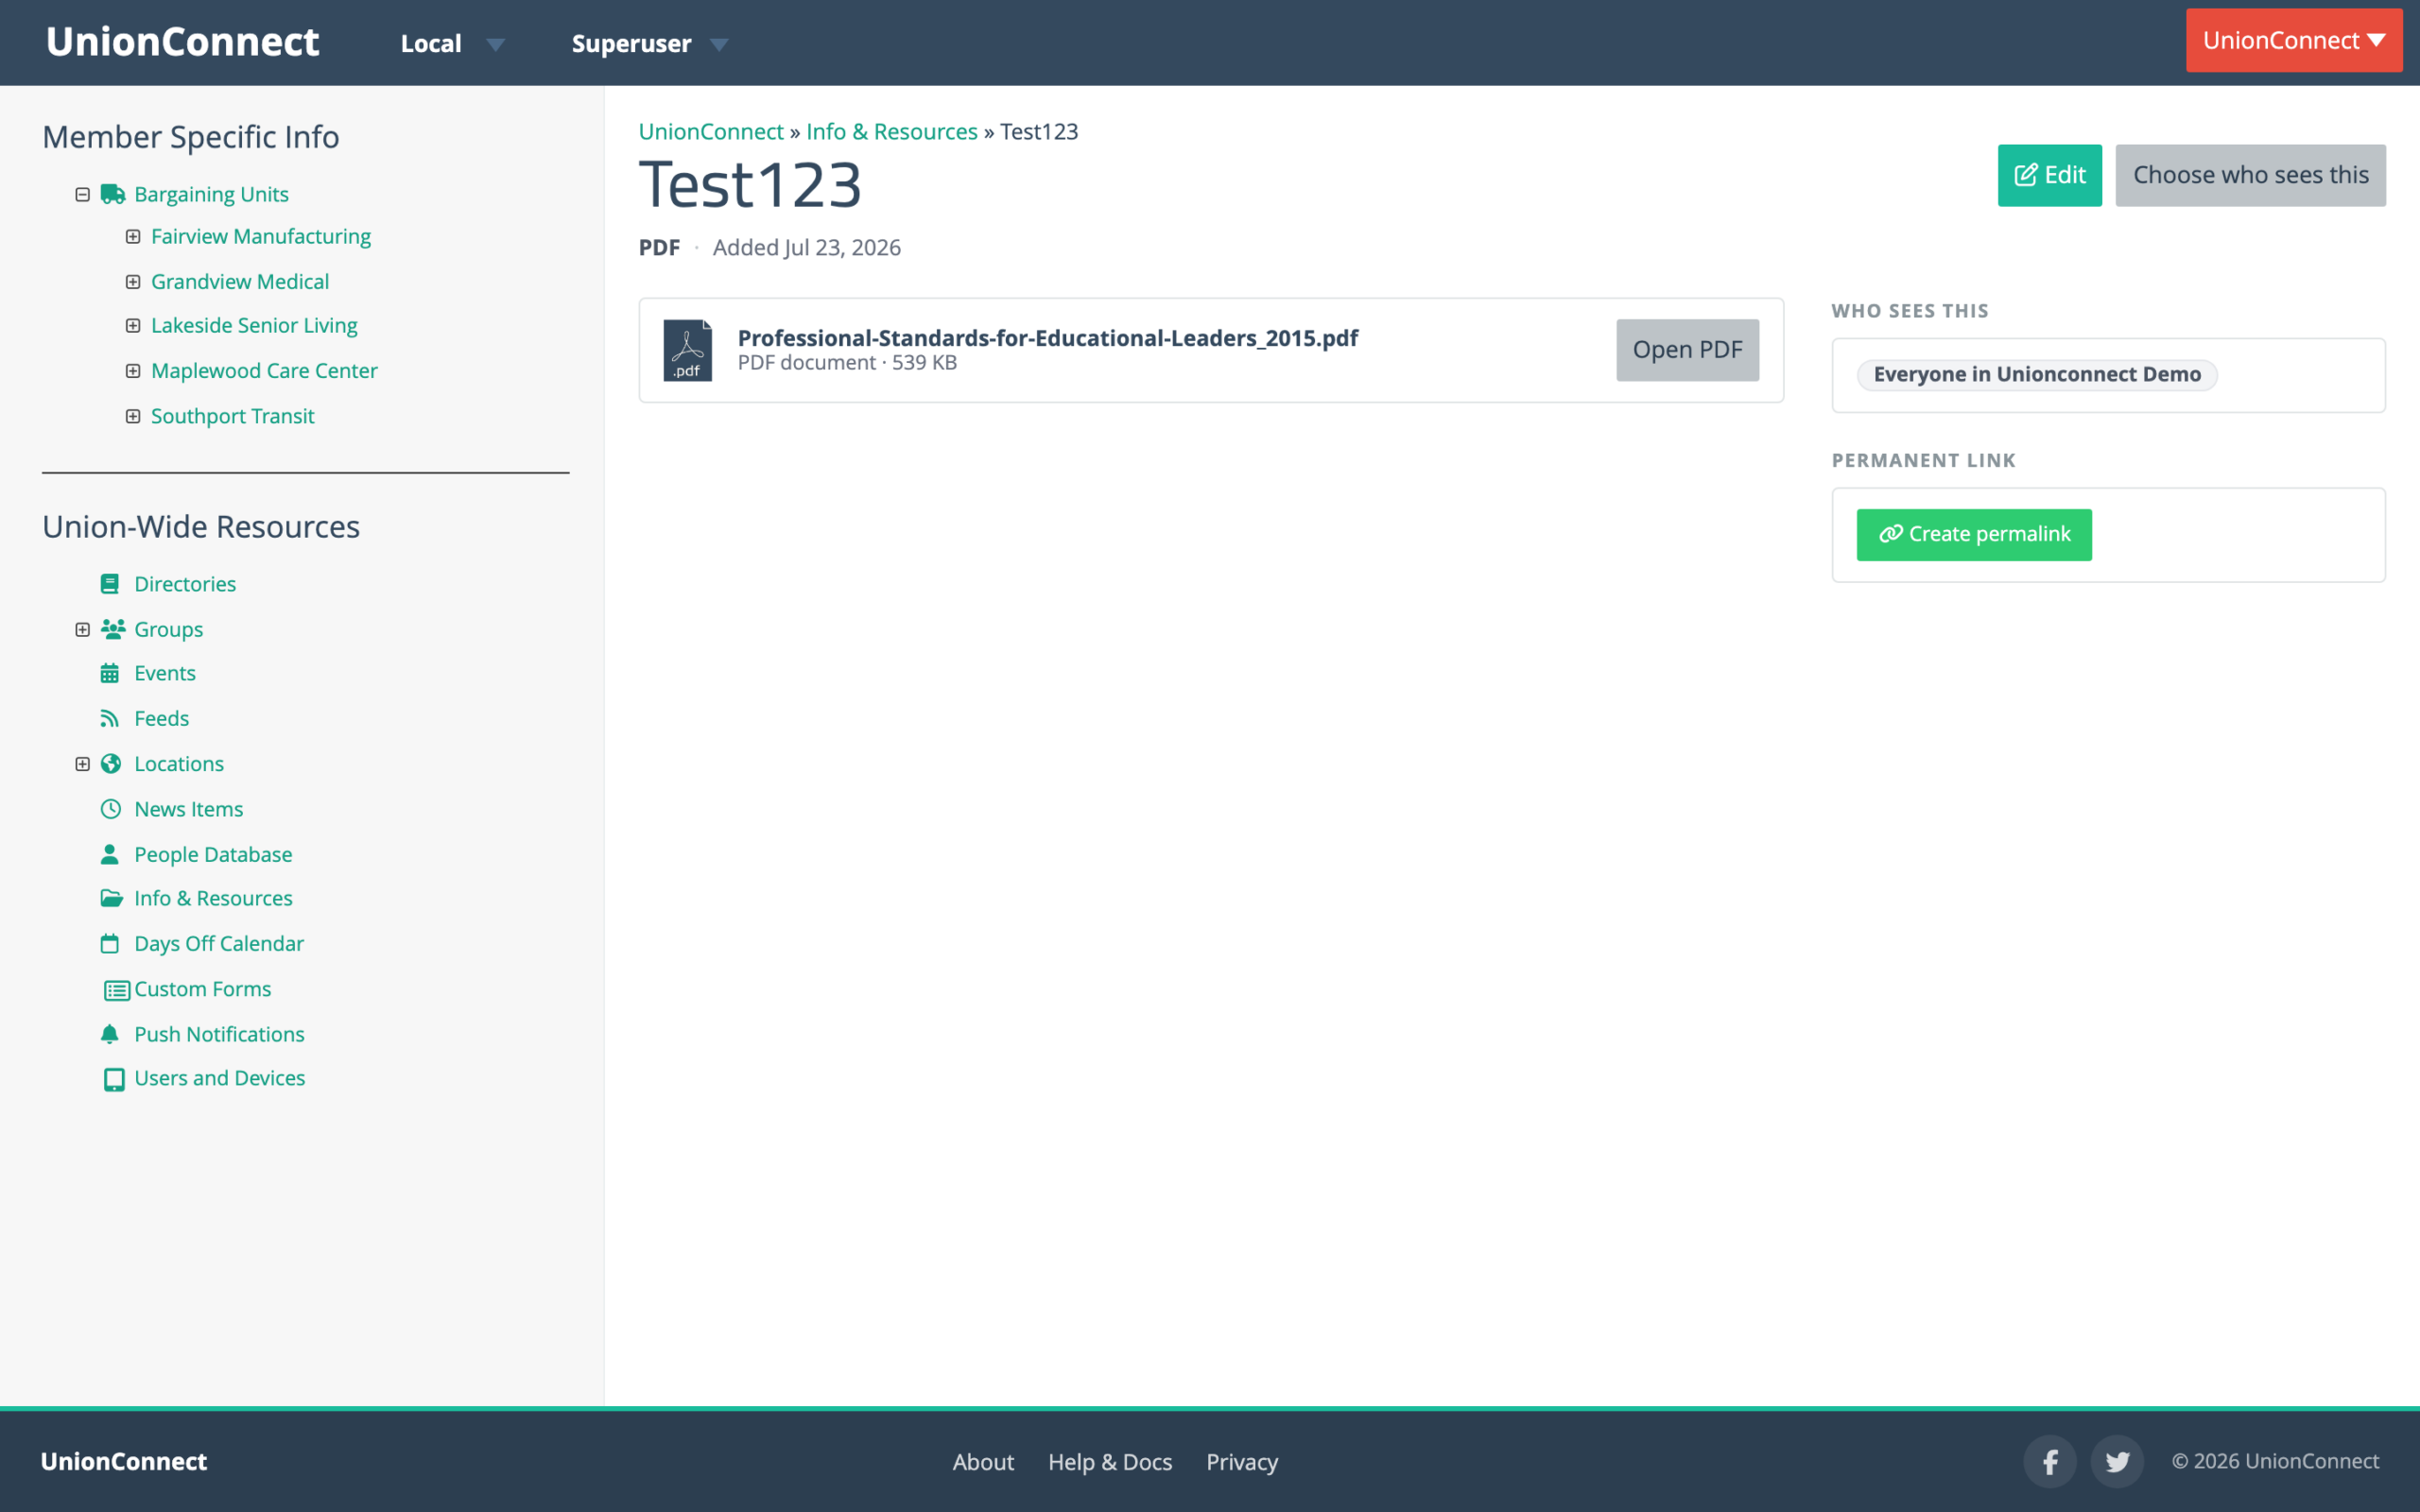
Click the arrow (▼) next to a resource and choose View to open its page in the app manager. (Categories say Open instead, which takes you inside the category.) The resource page shows:
- The type and dates — Page, Link, or PDF, followed by when it was added (and by whom) and when it was last edited.
- The content — a page’s text (or This page has no text yet.), a link’s address with an Open link button, or a PDF’s file name and size with an Open PDF button. A PDF that is still uploading shows Still processing. Any feature image and description are shown too.
- Who sees this — everyone in your local, or the bargaining units, groups, and locations the resource is shared with, plus the categories (folders) it’s filed in. If it’s also shared with other locals, you’ll see how many, but not their names.
- Permanent link (PDFs only) — create or copy a public link to the document.
- Edit and Choose who sees this buttons, if your role allows them.
Link resources no longer have a separate Goto Link menu item; use View and then Open link.
Adding a Category
- Login to the app manager
- Go to the Info & Resources section either under a specific bargaining unit or under Union-Wide Resources
- Click New Category
- Fill out the New Category form
- The Image will be the icon associated with the category
- Click Create Category
- You can now click on the category you created to add resources or subcategories to it
Choosing who sees a resource (audiences & categories)
Sometimes you may want the same resource accessible to different groups of members, but not all members at once — or you may want to file it under one or more categories. The Choose who sees this window lets you control both from one place. It’s available on both resources and categories.
- Login to the app manager
- Go to the Info & Resources section
- Click the arrow (▼) next to the resource or category you want to change, then click Choose who sees this. The window opens titled Choose who sees “<title>”.
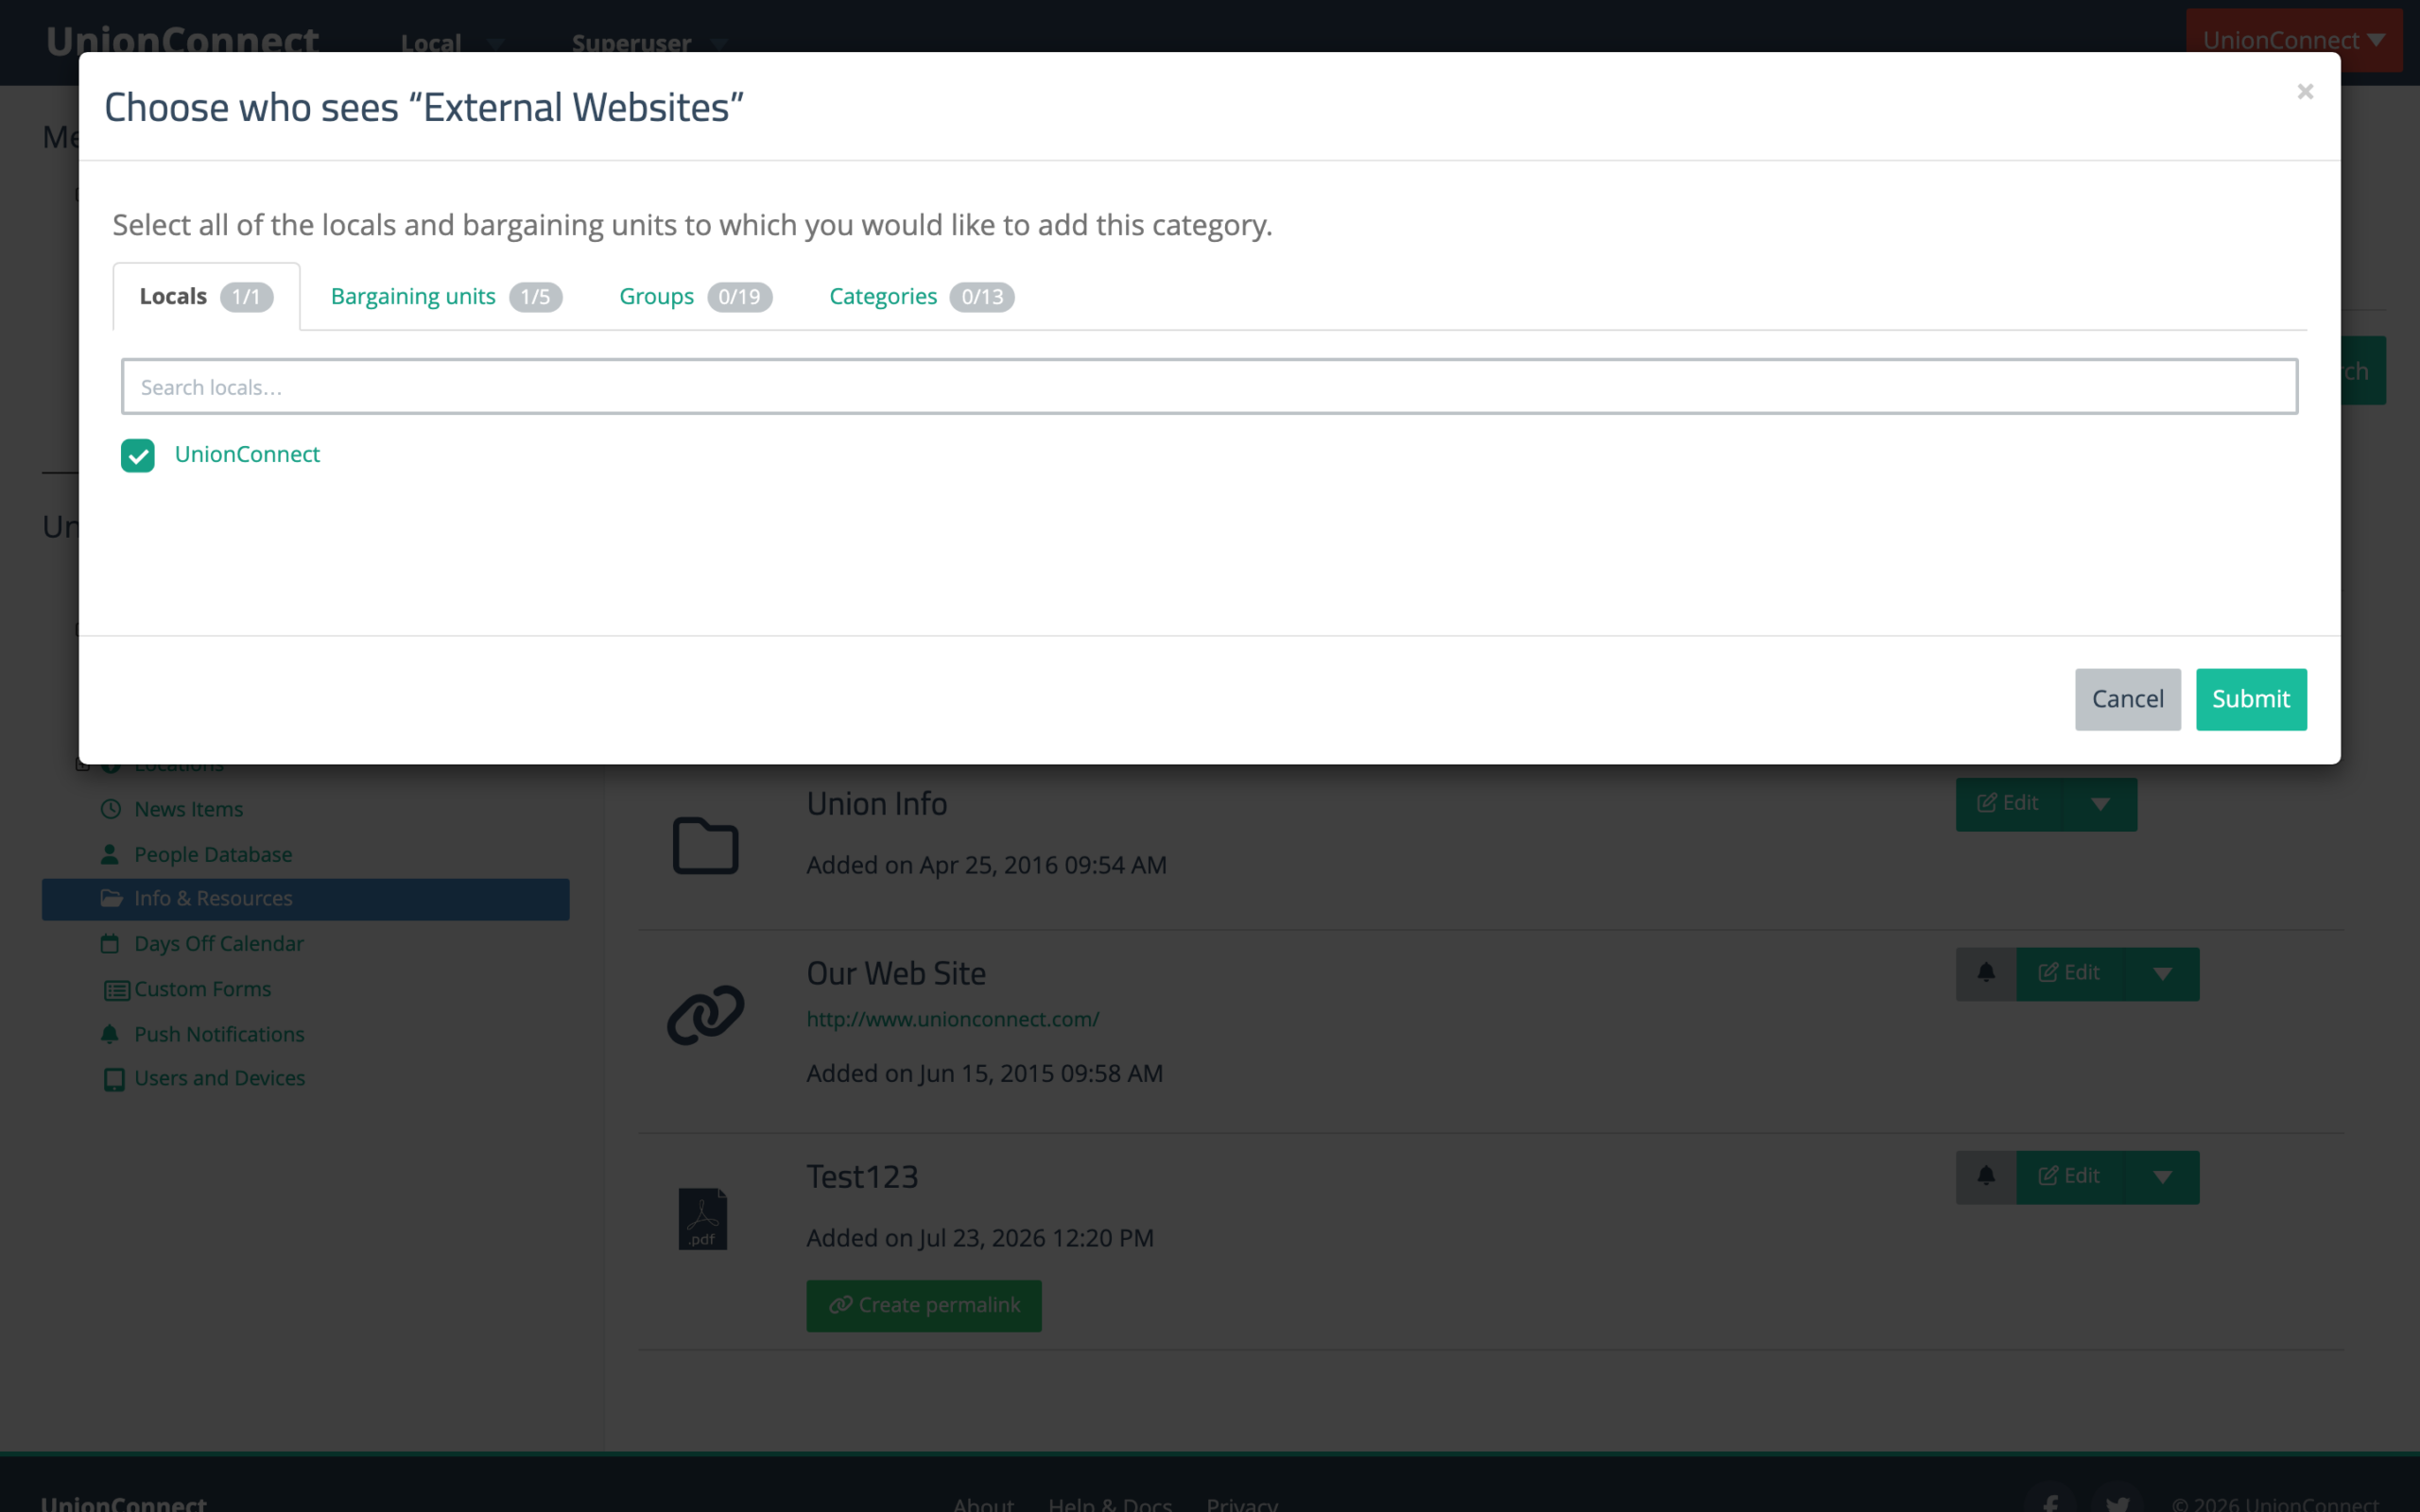
The window is organized into tabs. Each tab shows a count badge (selected / total, e.g. 0/5) so you can see at a glance where the item currently appears, and each tab has a search box to filter long lists as you type:
- Locals — make the item available union-wide.
- Bargaining units — choose specific bargaining units. Rows are grouped under the local they belong to.
- Groups — choose specific groups or committees (e.g. Shop Stewards, Executive Board).
- Categories — file the item under one or more categories. Categories are grouped by the audience they belong to, with sub-categories indented beneath their parent.
- Locations — if UnionConnect has turned on Info & Resources for locations for your local, a Locations tab lets you target them too.
Check off everywhere you’d like the item to appear, then click Submit. The count badges update as you go.
Something has to stay ticked: a local, bargaining unit, group, location, or category. If you click Submit with nothing selected, the window shows Pick at least one group, or delete this instead. and nothing is saved. To take an item down for everyone, delete it instead.
Nesting a category: When you open Choose who sees this on a category, the Categories tab lets you nest it as a sub-category of another top-level category. A category that already has its own sub-categories can’t be nested.