
Event check-in records who actually attended an event. You put a code up on a screen at the meeting, members check themselves in from the app by scanning it or typing it, and the attendance list fills in as they arrive. Anyone who shows up without the app can be added by hand.
Check-in is separate from RSVPs. An RSVP is what a member said they would do; a check-in is what they actually did. A member can check in without ever RSVPing, and an RSVP never checks anyone in. The attendance list shows both side by side.
Before you start
- Check-in is turned on per local. If you don’t see an Attendance button on your events, contact UnionConnect support to have it switched on for your local.
- Your members need a recent version of the app. Members on older builds won’t see a Check In button, but you can still add them to the attendance list by hand.
- You need a screen at the venue — a laptop at the check-in table, a tablet, or a projector. That’s where the code is displayed.
- Anyone who can manage events can run check-in. There’s no separate permission. If a role is limited to one bargaining unit, group, or location, it sees attendance only for that area’s events.
Finding the attendance page
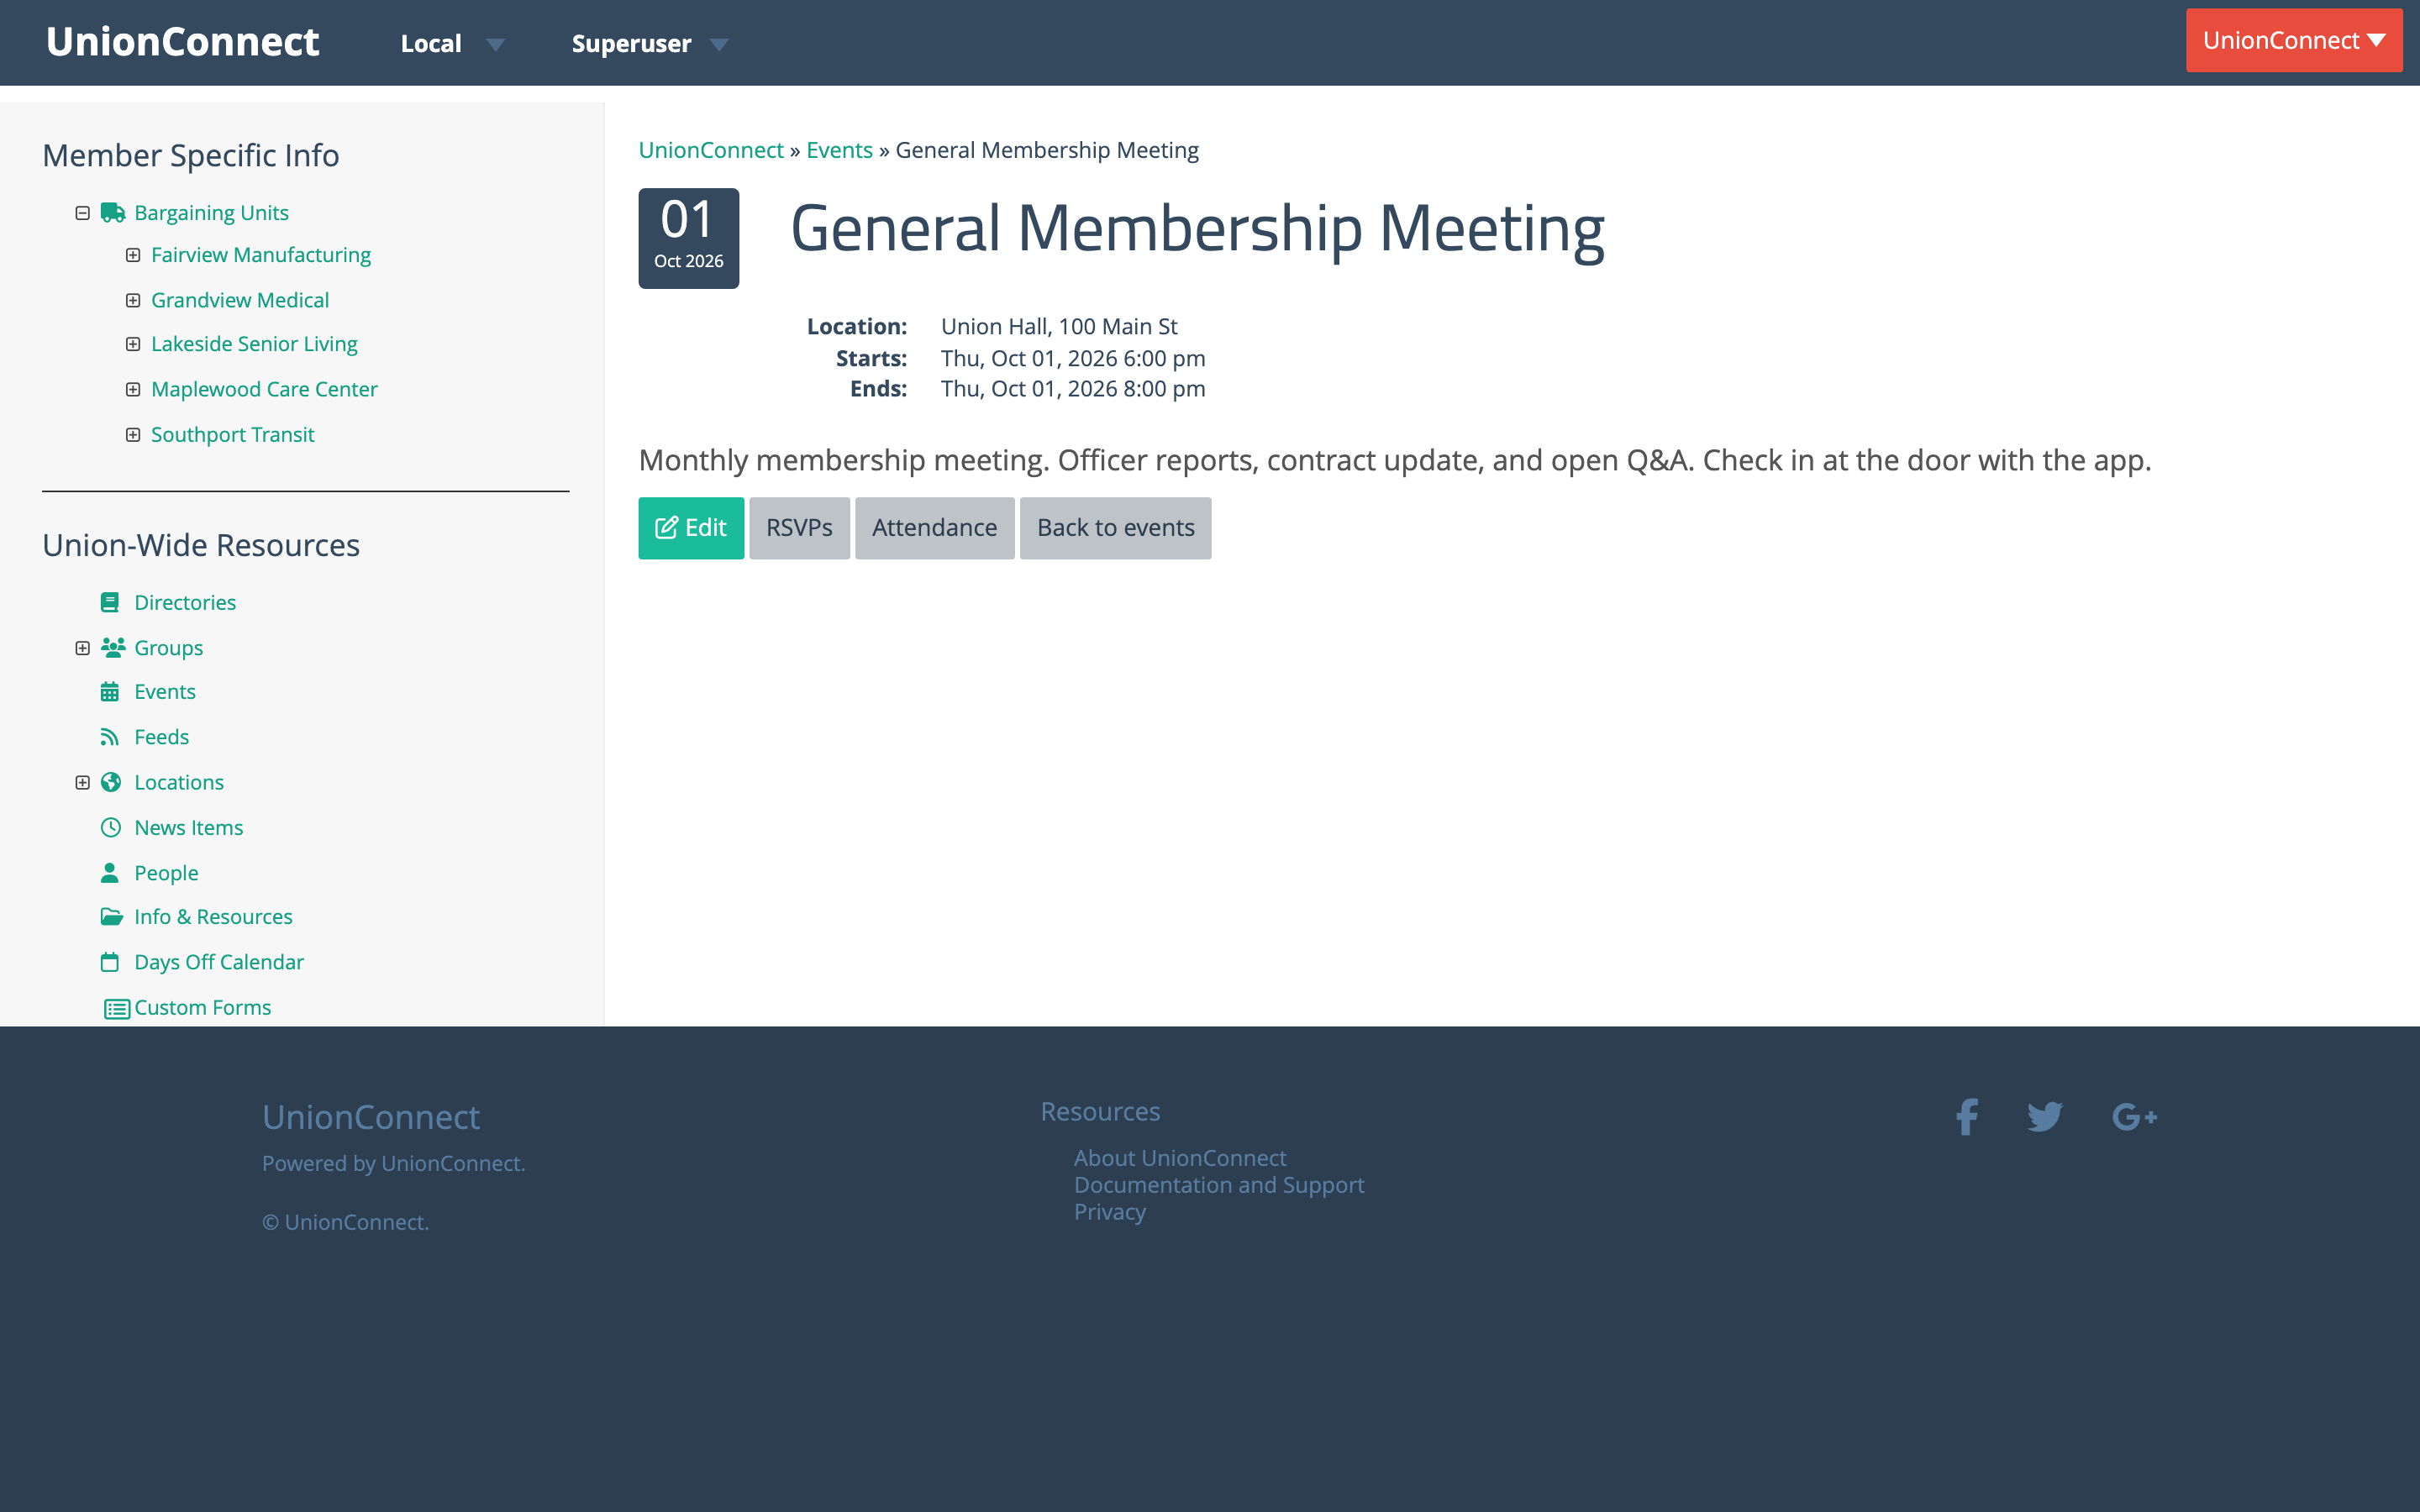
Everything to do with check-in starts from the event’s Attendance page. You can get there two ways:
- From the events list, click the arrow beside an event and choose Attendance.
- From the event itself, click the Attendance button.
For a repeating event, each occurrence has its own attendance list — the June meeting and the July meeting are counted separately. Click Manage series on the series row, open the Dates tab, and click Attendance next to the date you want.
Starting check-in at the event
- Open the event’s Attendance page on the computer you’re using at the venue.
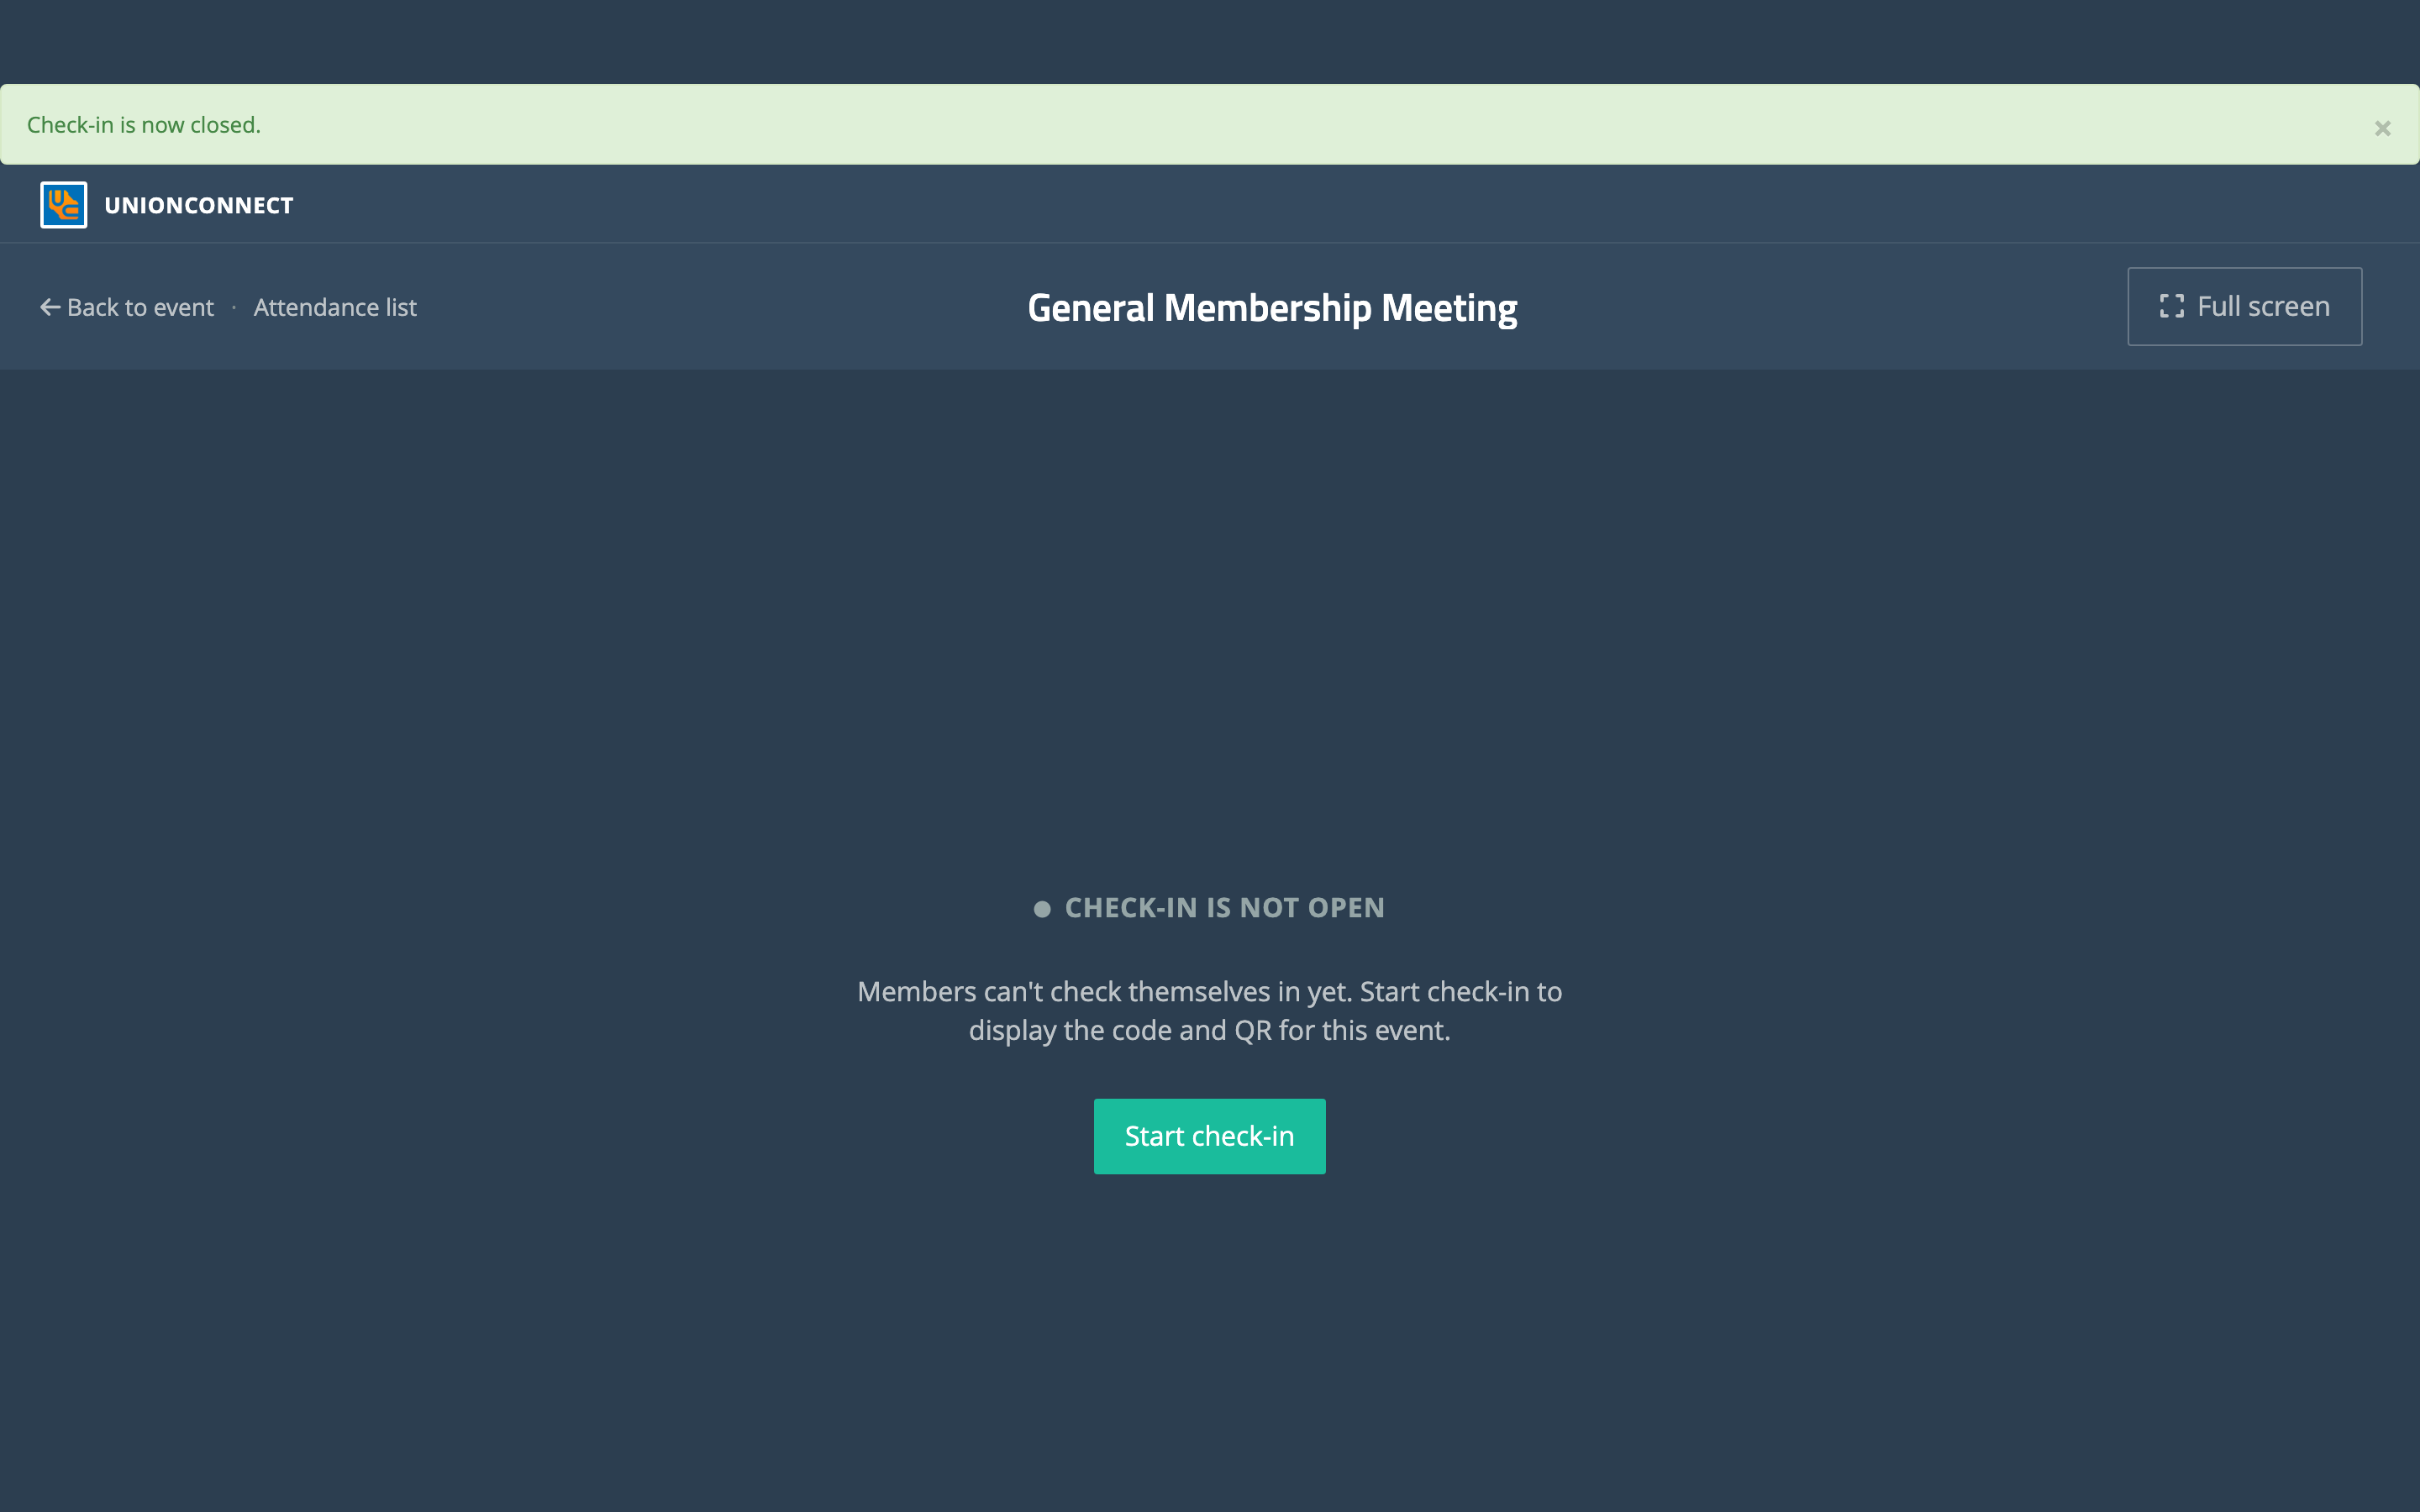
- Click Set up check-in at the top of the page. This opens the check-in display — a full-screen page with no menus, meant to be projected or propped up on the check-in table.
- Click Start check-in.
The display then shows a large QR code and a six-digit number. Both carry the same code — the QR is just a faster way to enter it.
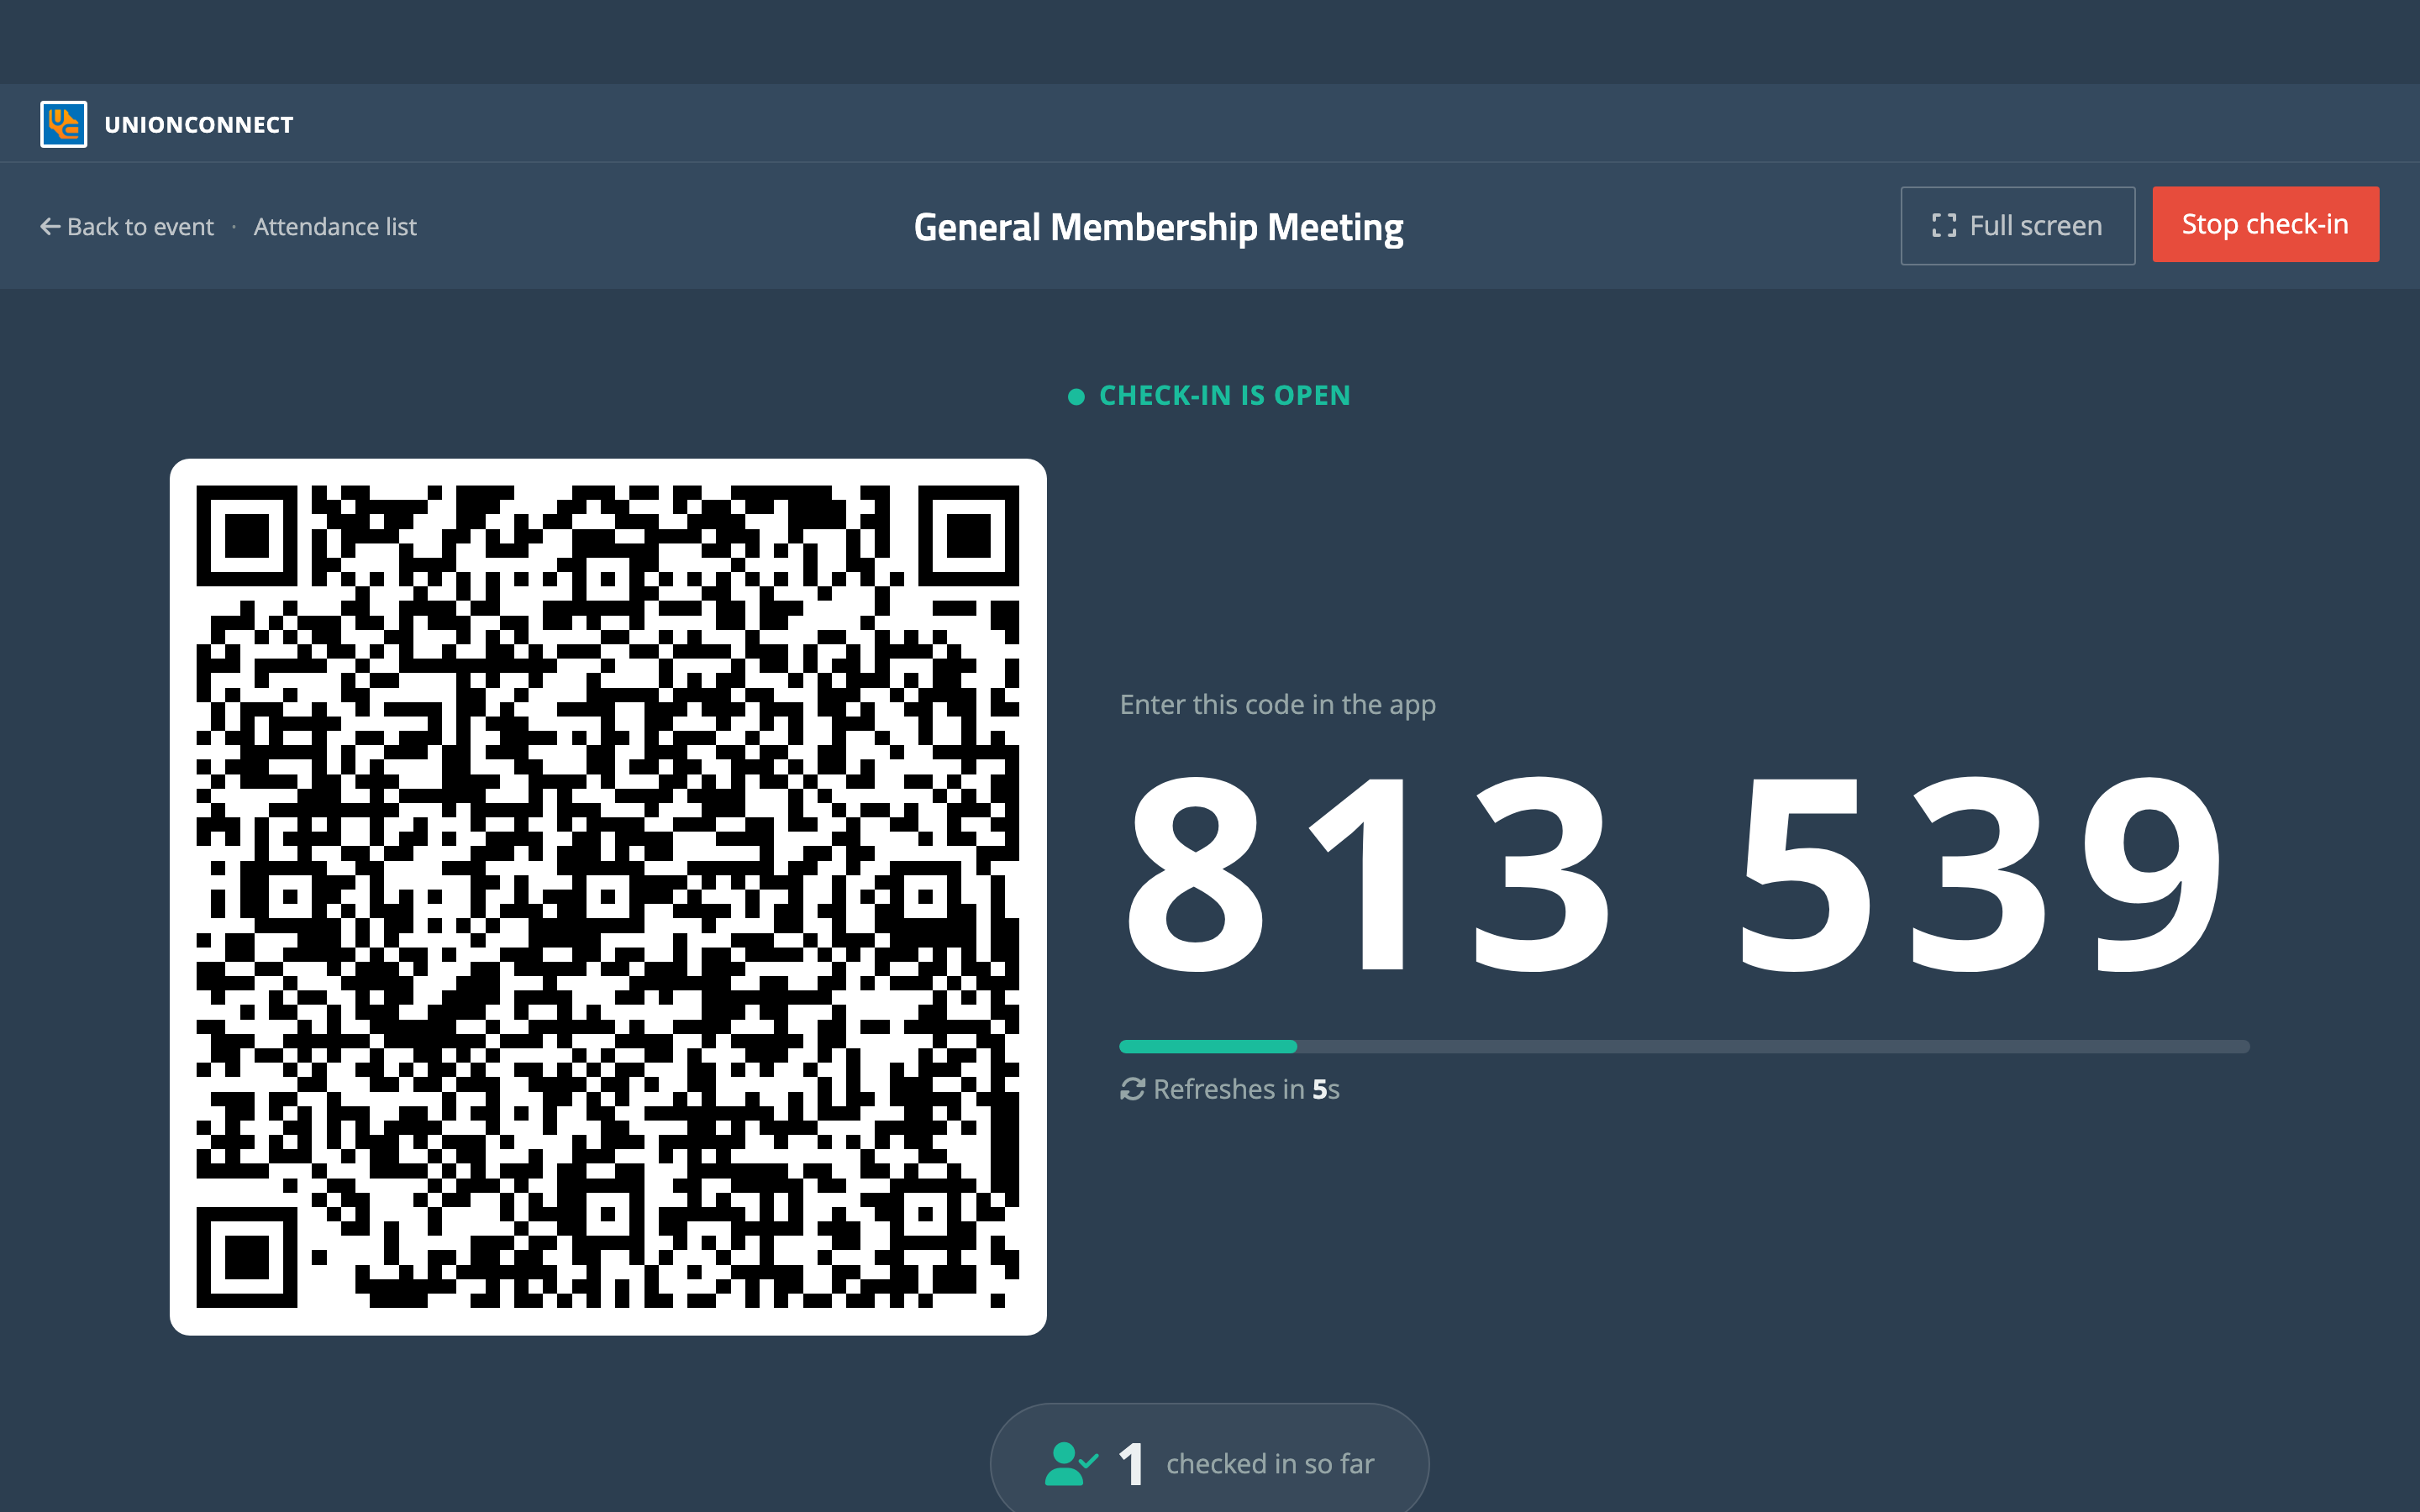
A few things to know about this screen:
- The code changes every 30 seconds. The bar underneath counts down to the next one. A member who started scanning just as it changed is still fine — the code that just expired keeps working for another half minute.
- The running count updates on its own. The badge at the bottom shows how many people have checked in so far, so you can watch the room fill up without leaving the screen.
- Full screen hides the browser’s own toolbars, which is worth doing before members start arriving.
- Attendance list at the top left takes you to the roster at any time, and Back to event returns to the event.
Leave the display up for as long as you’re accepting check-ins. When you’re done, click Stop check-in. Members can no longer check themselves in, but everything already recorded stays on the attendance list. You can start check-in again later if you need to — latecomers pick up right where everyone else left off.
How members check in
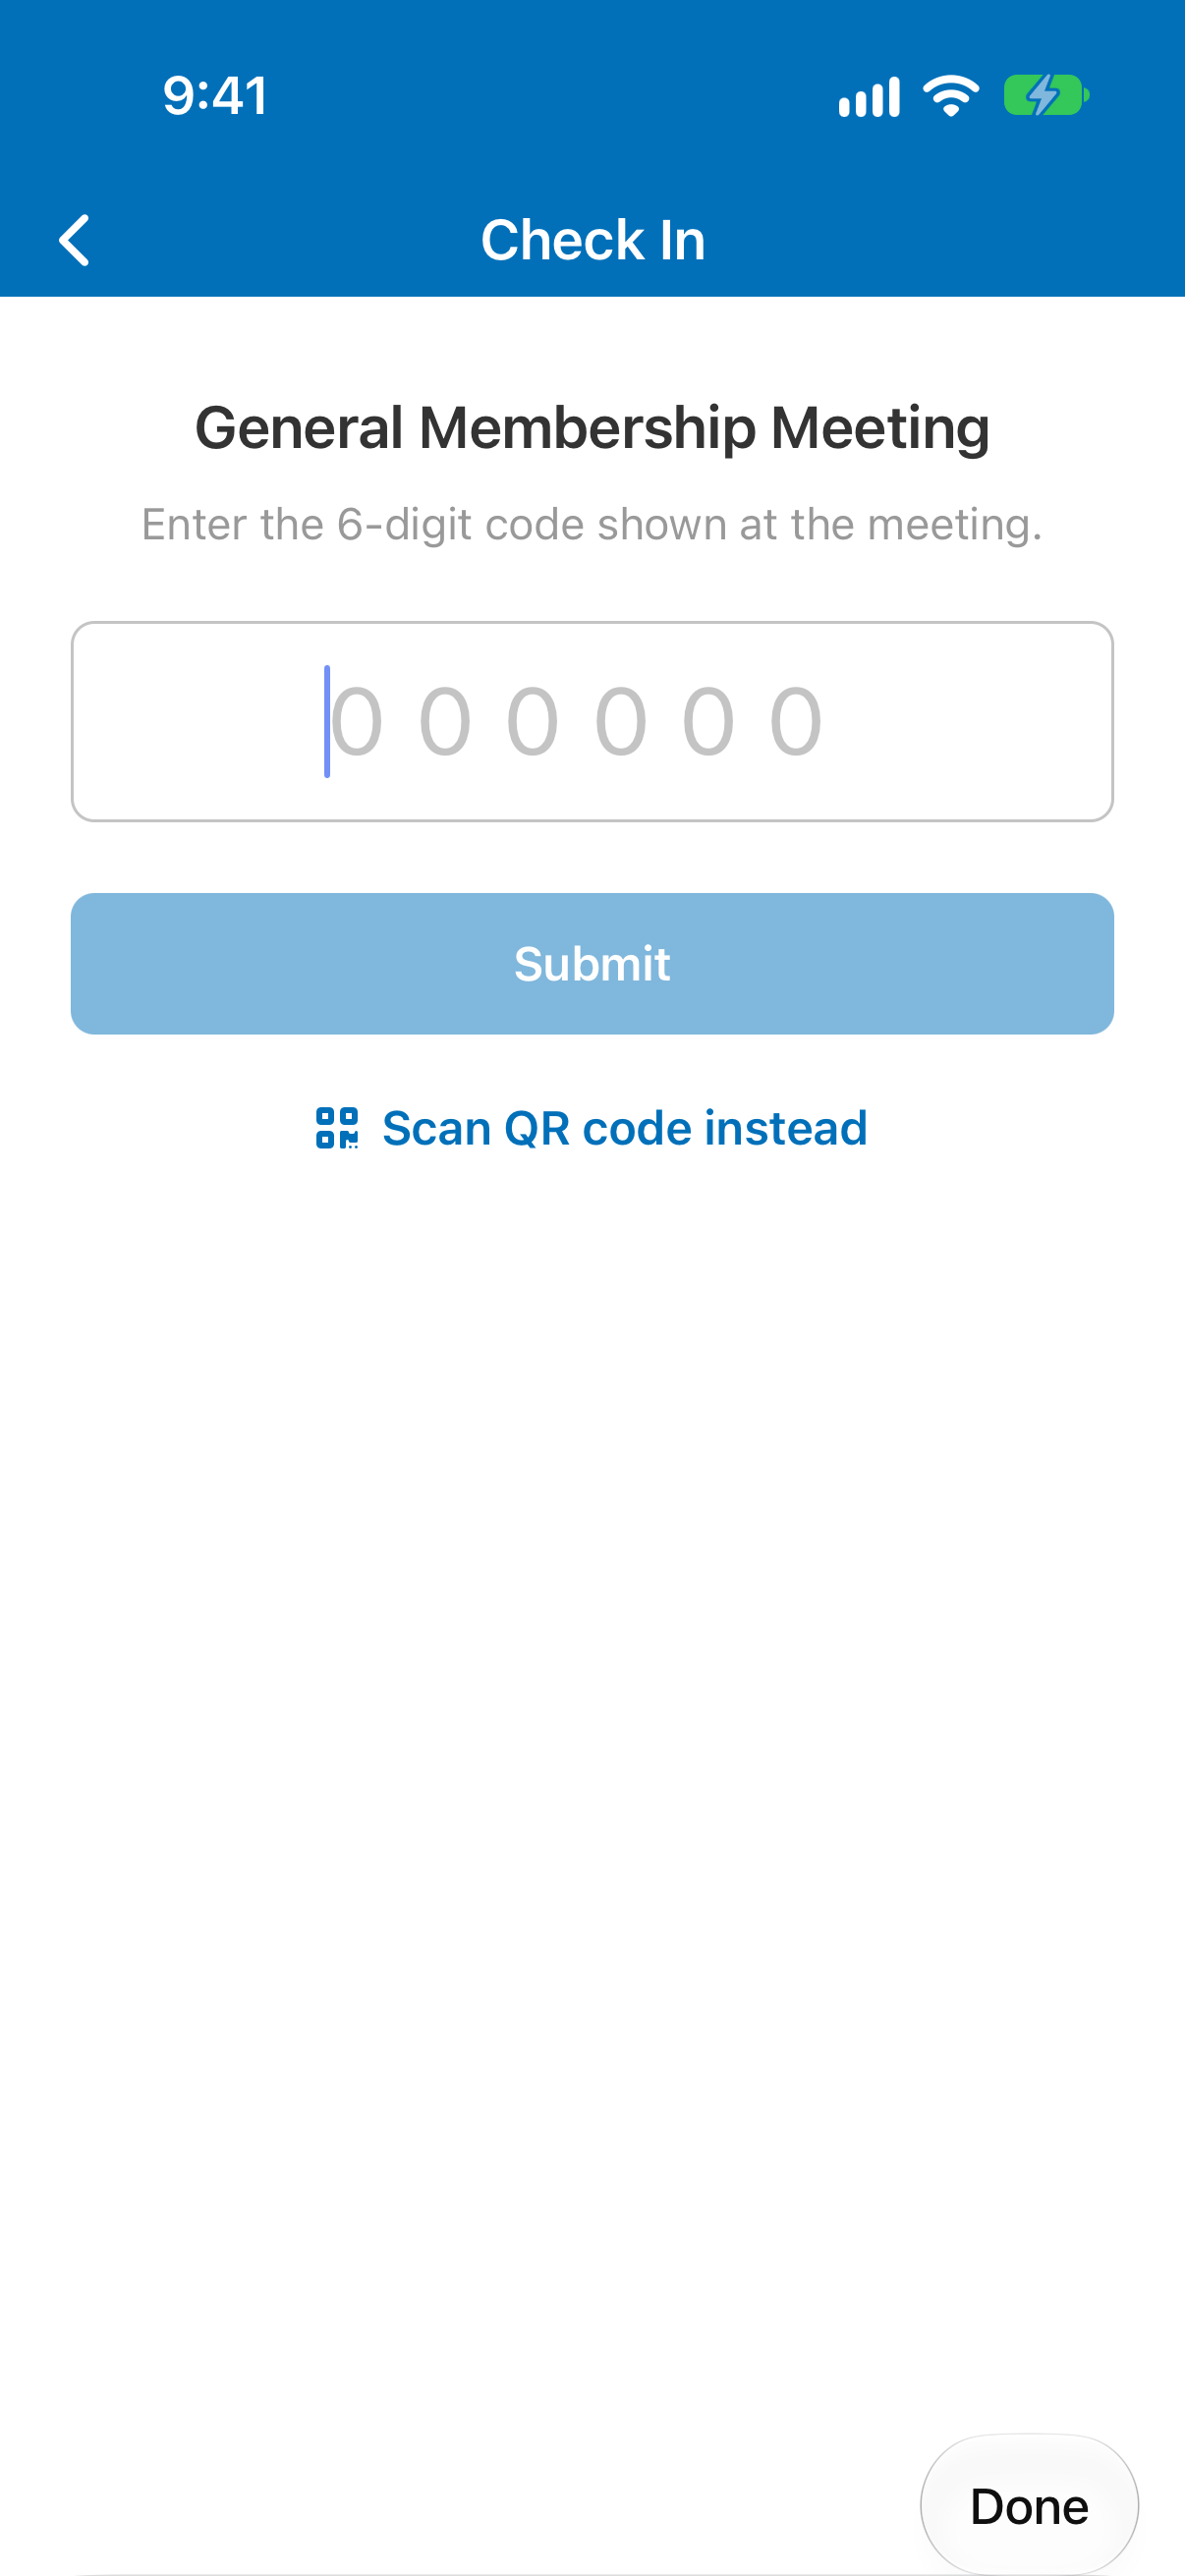
While check-in is open, a Check In button appears on that event in the app. Members tap it and then either:
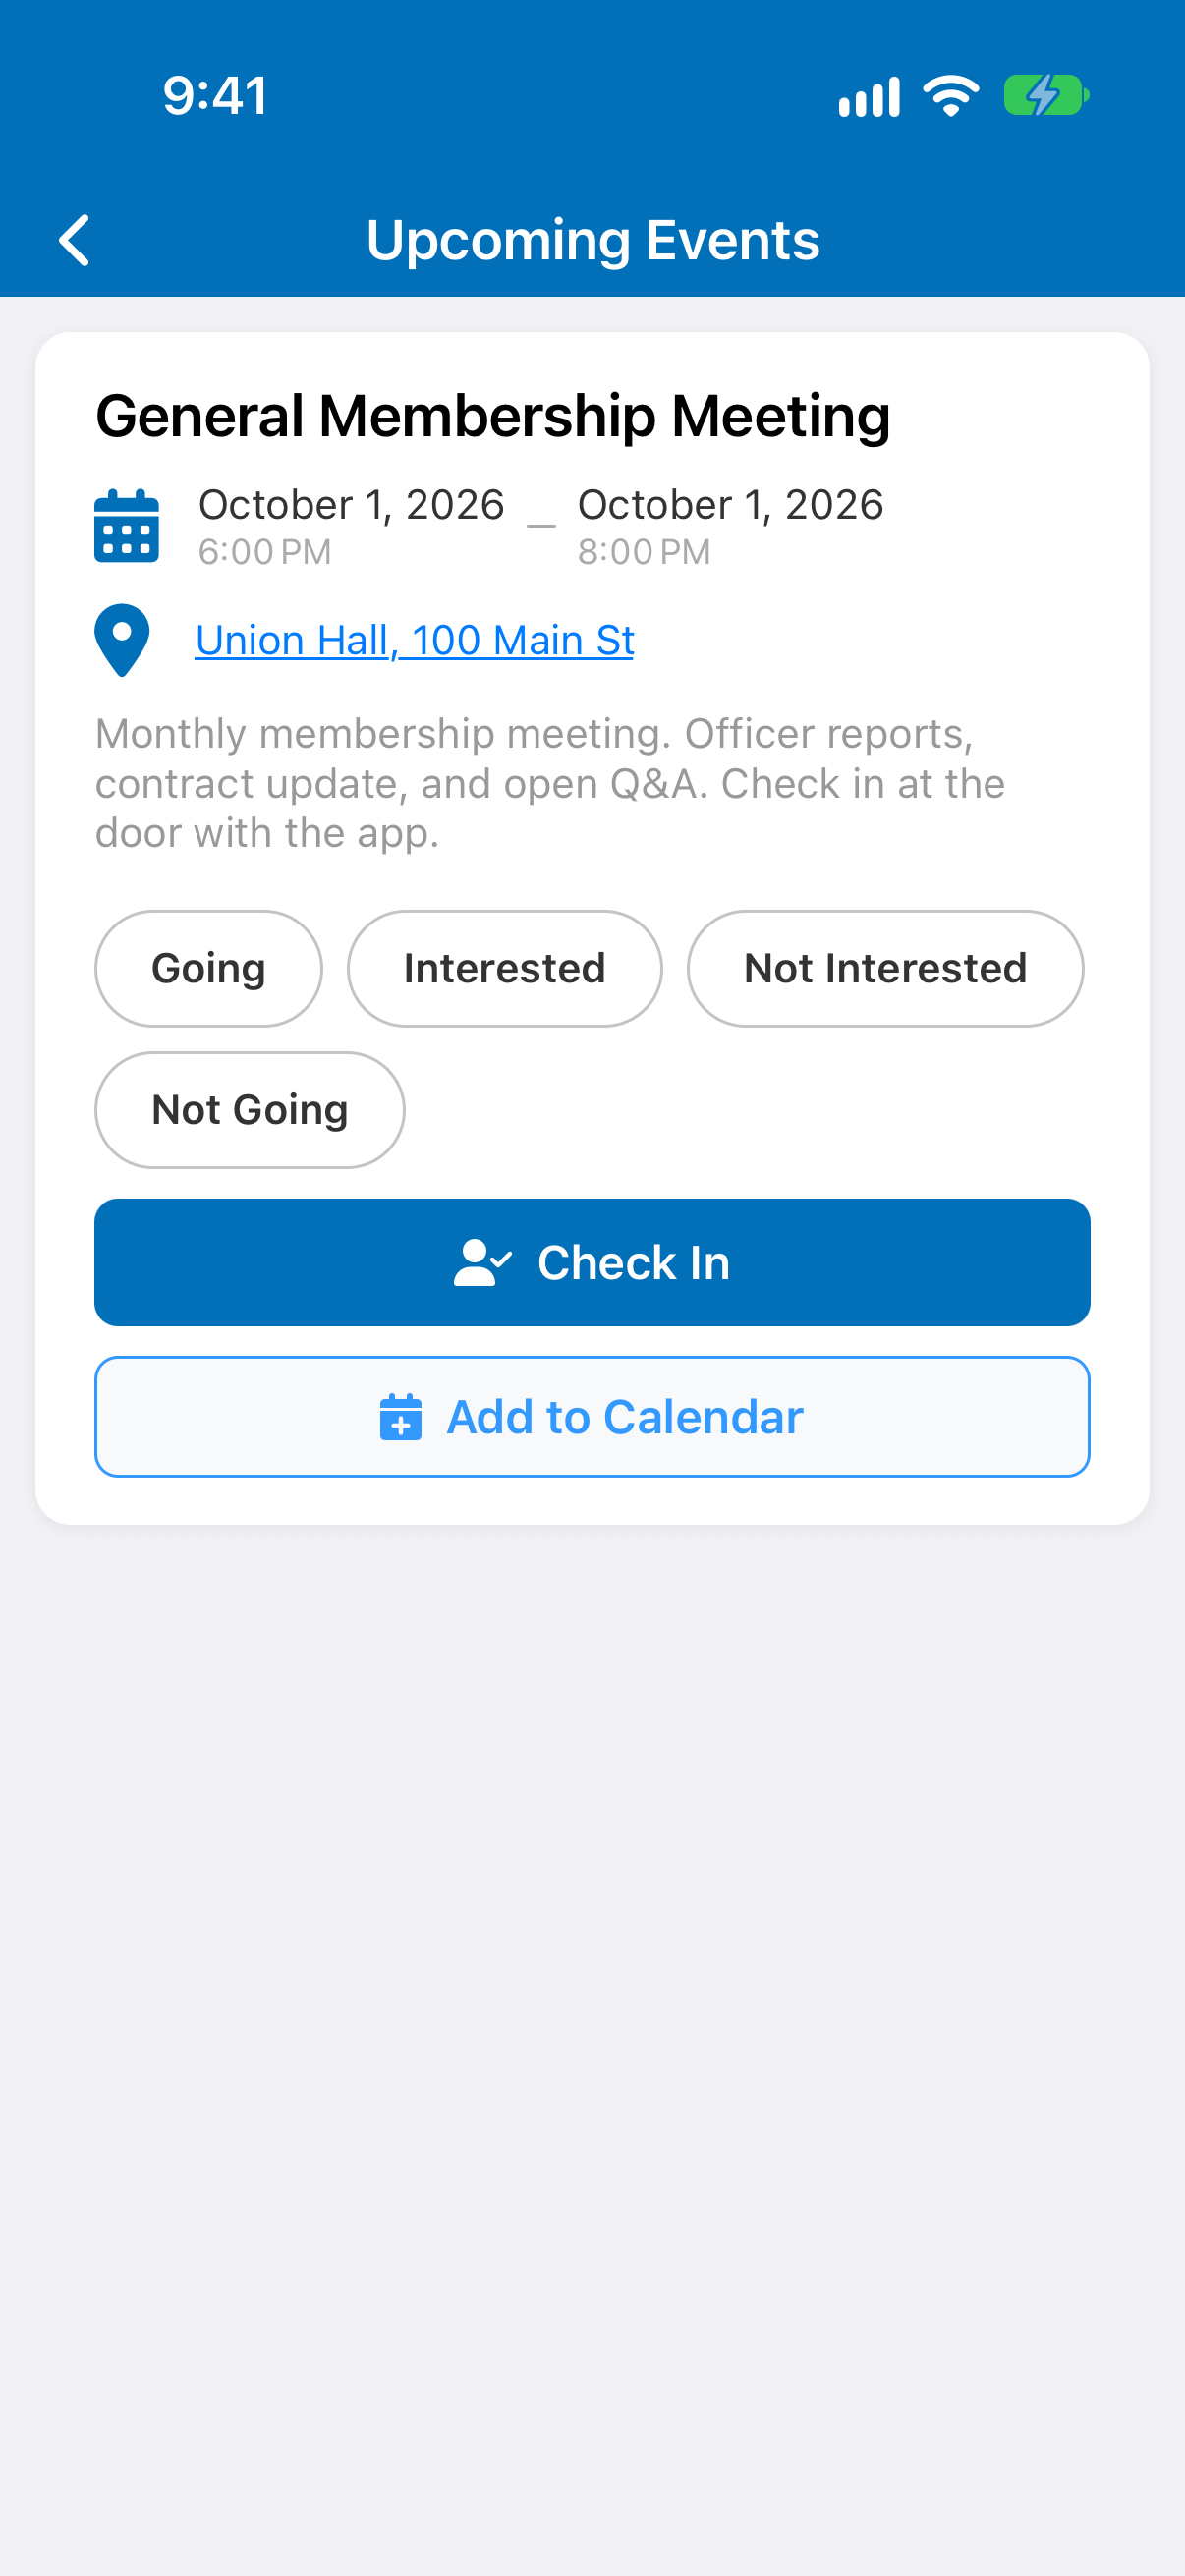
- Scan the QR code on your display with the camera, or
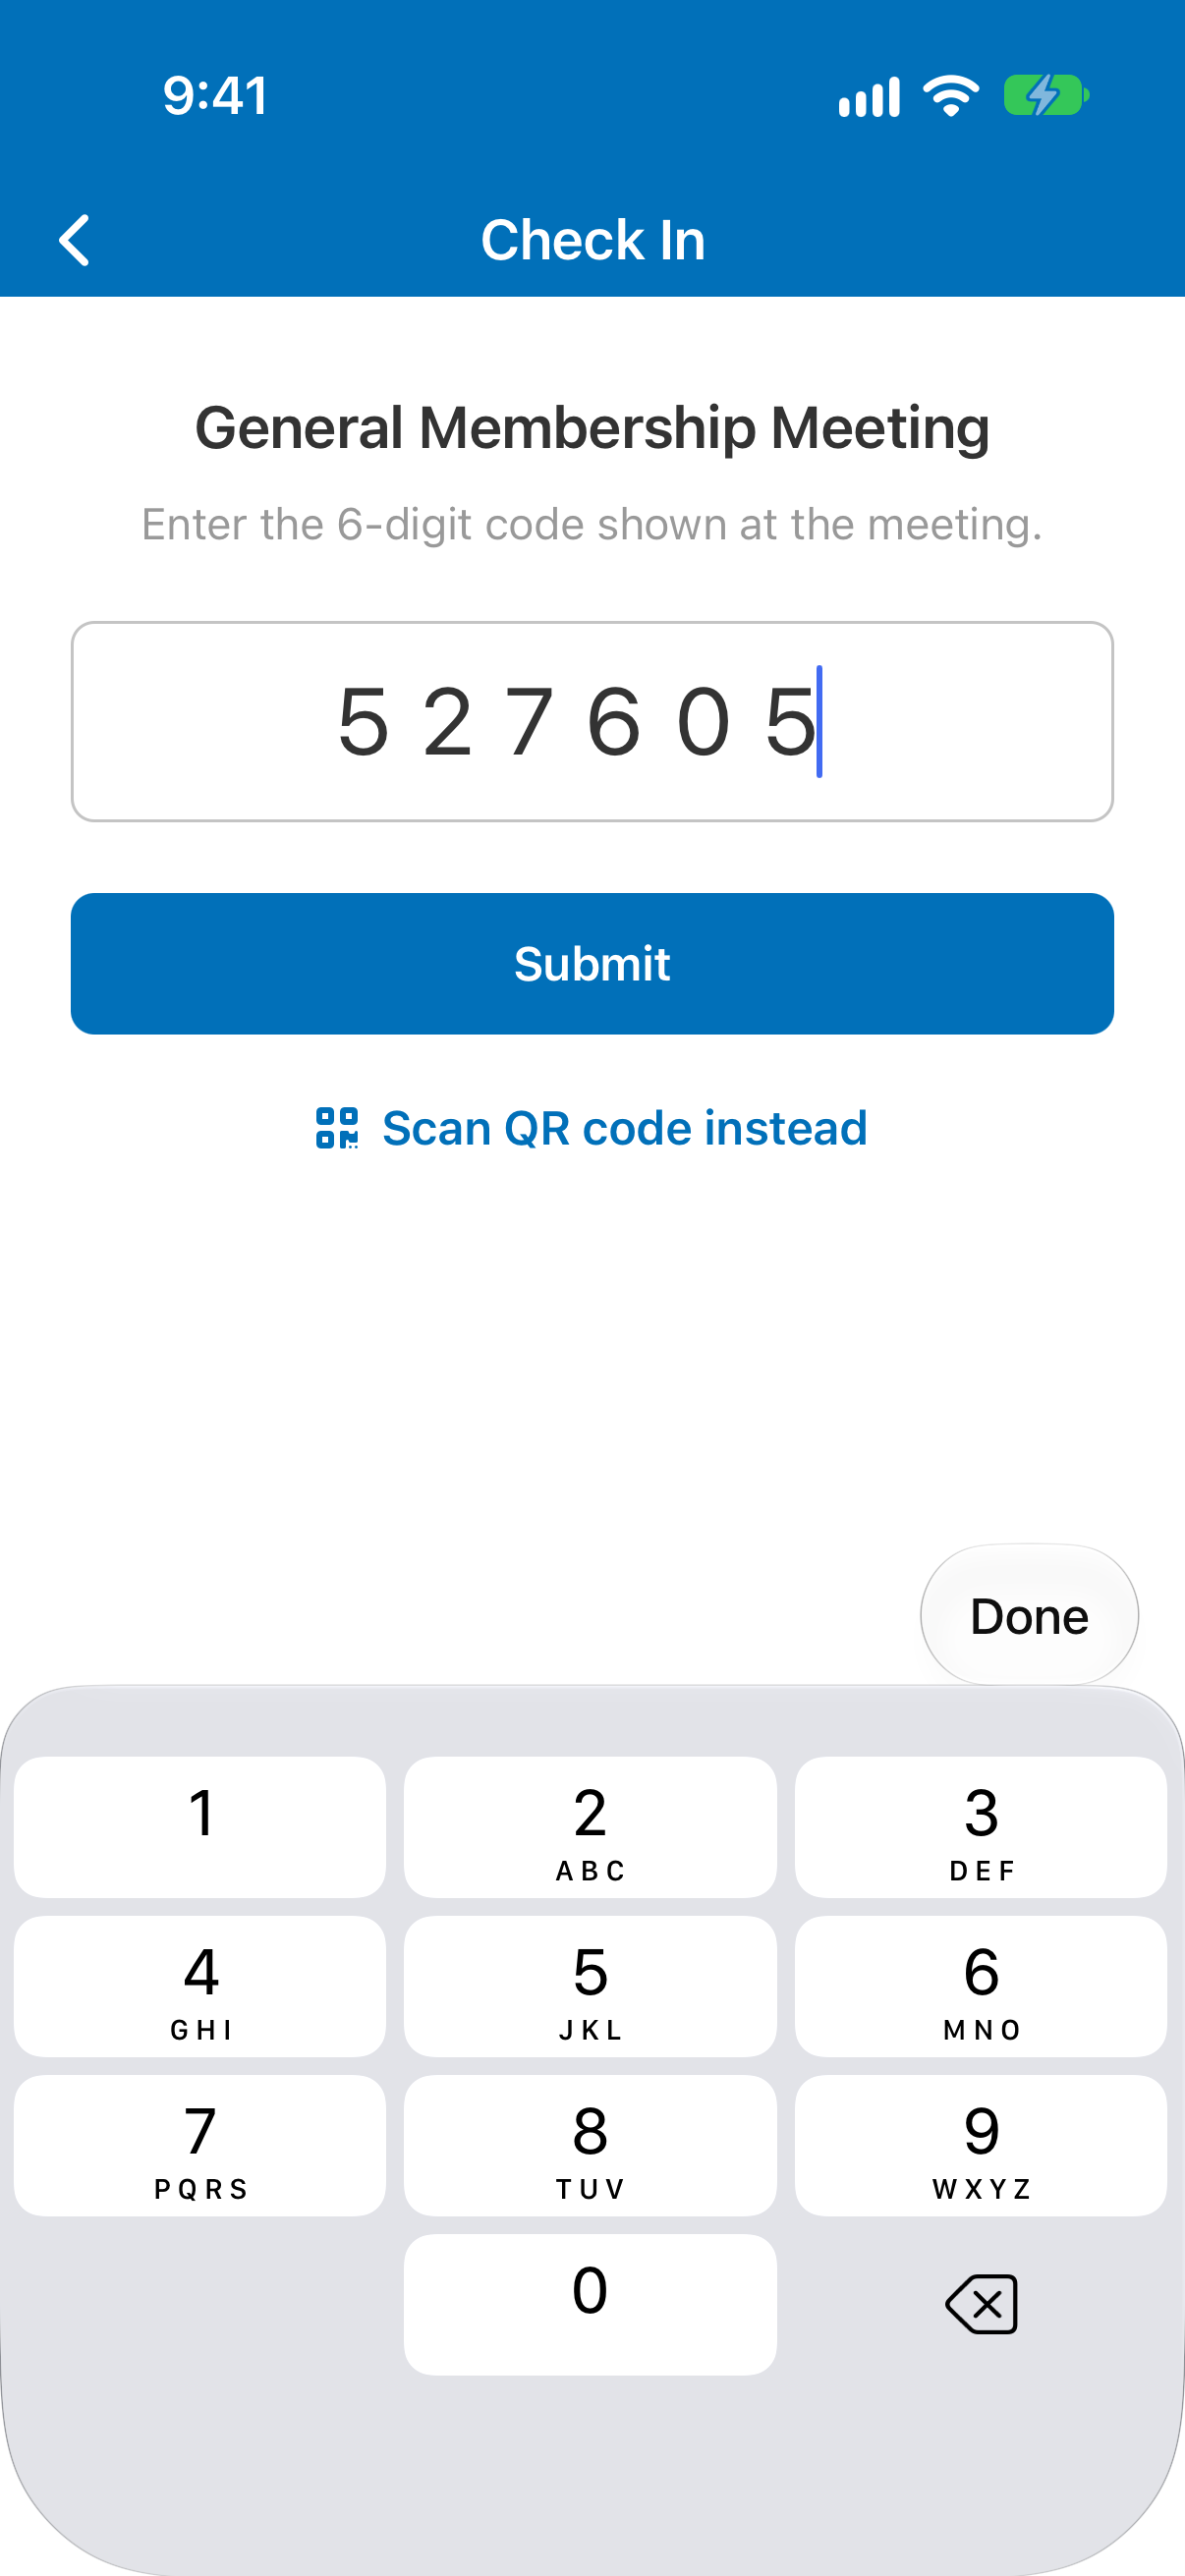
- Type the six digits — there’s an option for this on the same screen, for members who won’t give the app camera access, whose camera can’t focus on the screen, or who are sitting too far back to frame it.
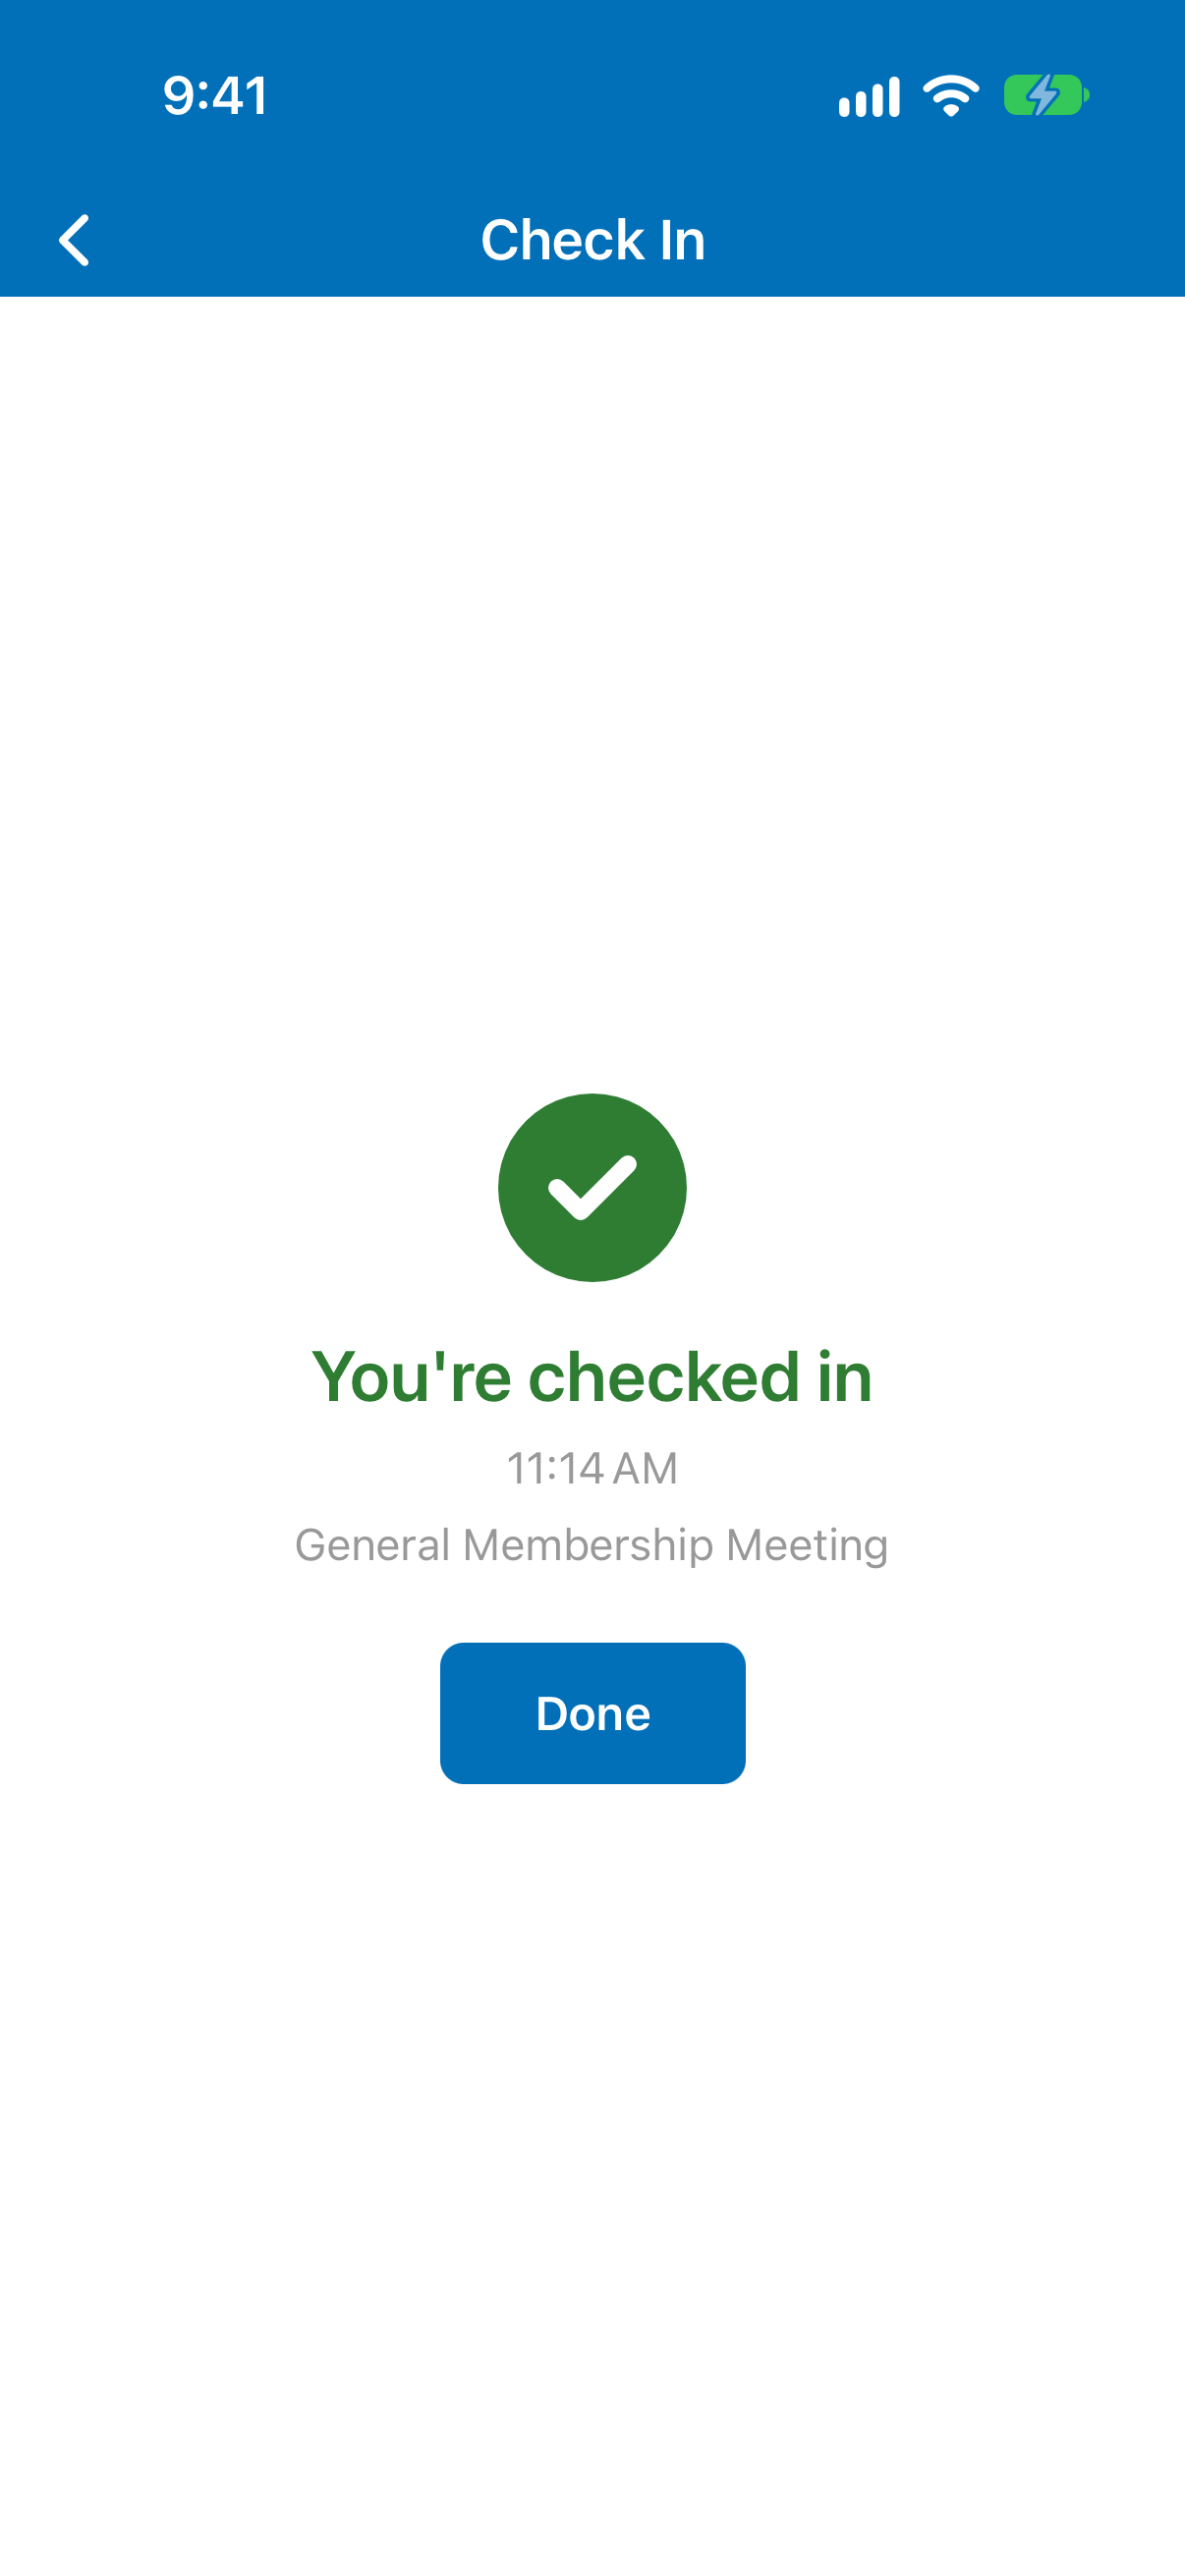
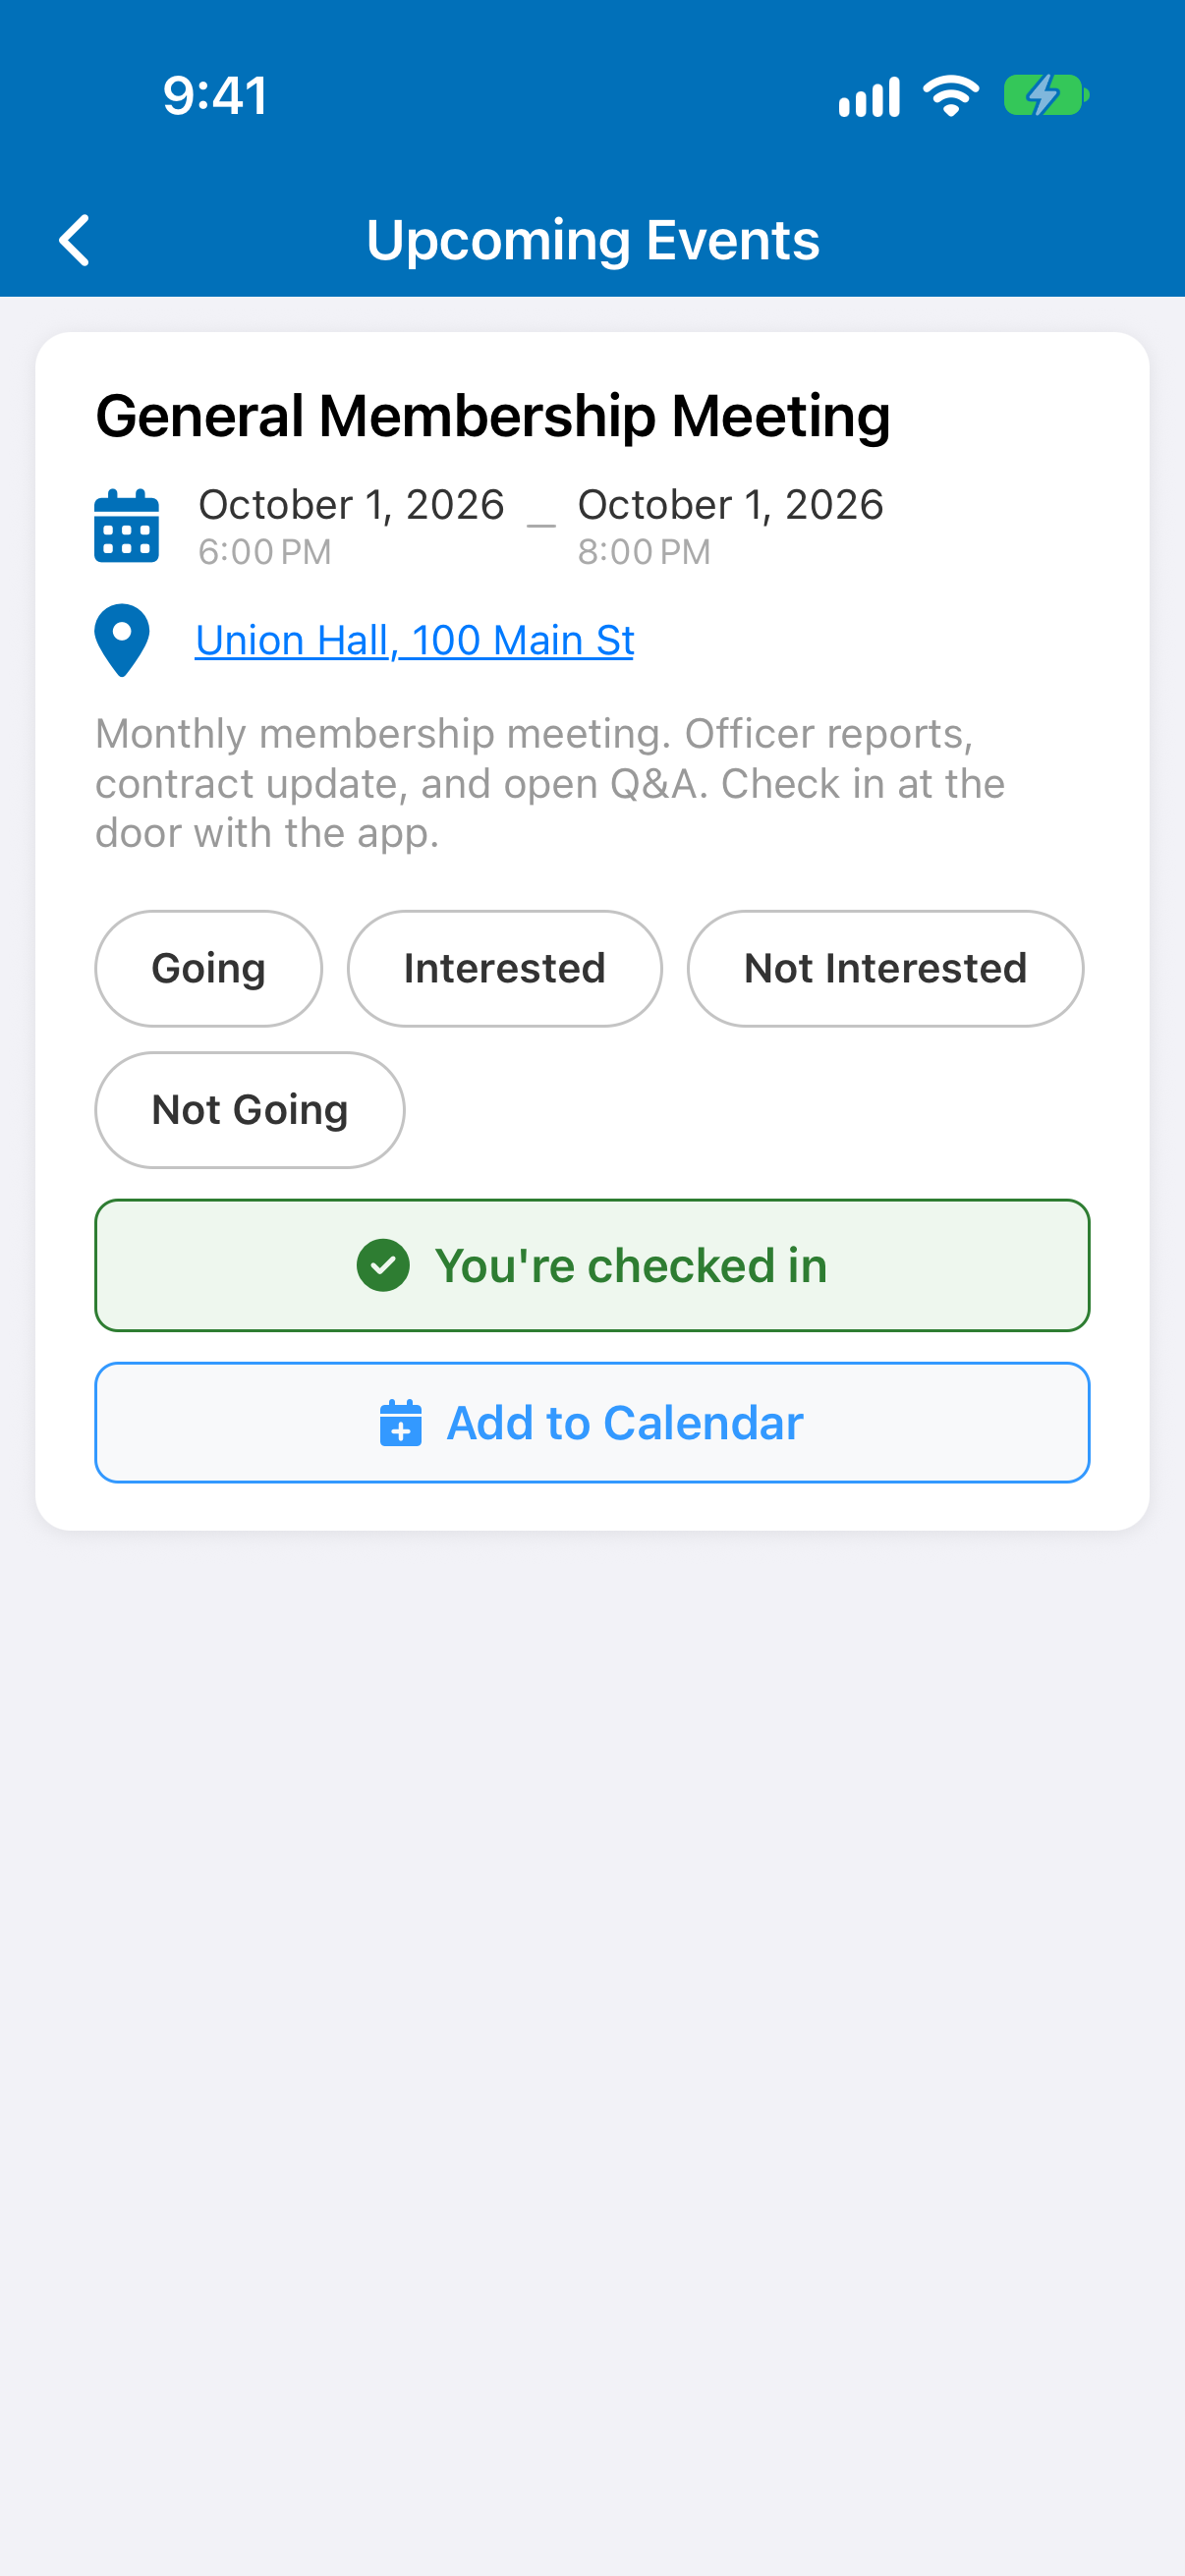
Either way they get a You’re checked in confirmation with the time, and the event now shows You’re checked in instead of the button. A member who taps Check In again just sees the confirmation again — they aren’t counted twice, and nothing breaks.
Members don’t need to have RSVP’d, and they don’t need to be on any list beforehand. Anyone who is a member of your local and is standing in the room with the code in front of them can check in.
If a member reports that their code was rejected, the usual causes are: they typed the code from a previous refresh, they mistyped a digit, or check-in has already been stopped. After five wrong codes in a minute the app asks them to wait a moment before trying again — this is there to stop anyone guessing codes, and it clears on its own.
The attendance list
The Attendance page is the roster for the event, newest check-in first. It updates as people arrive — refresh the page to see the latest.
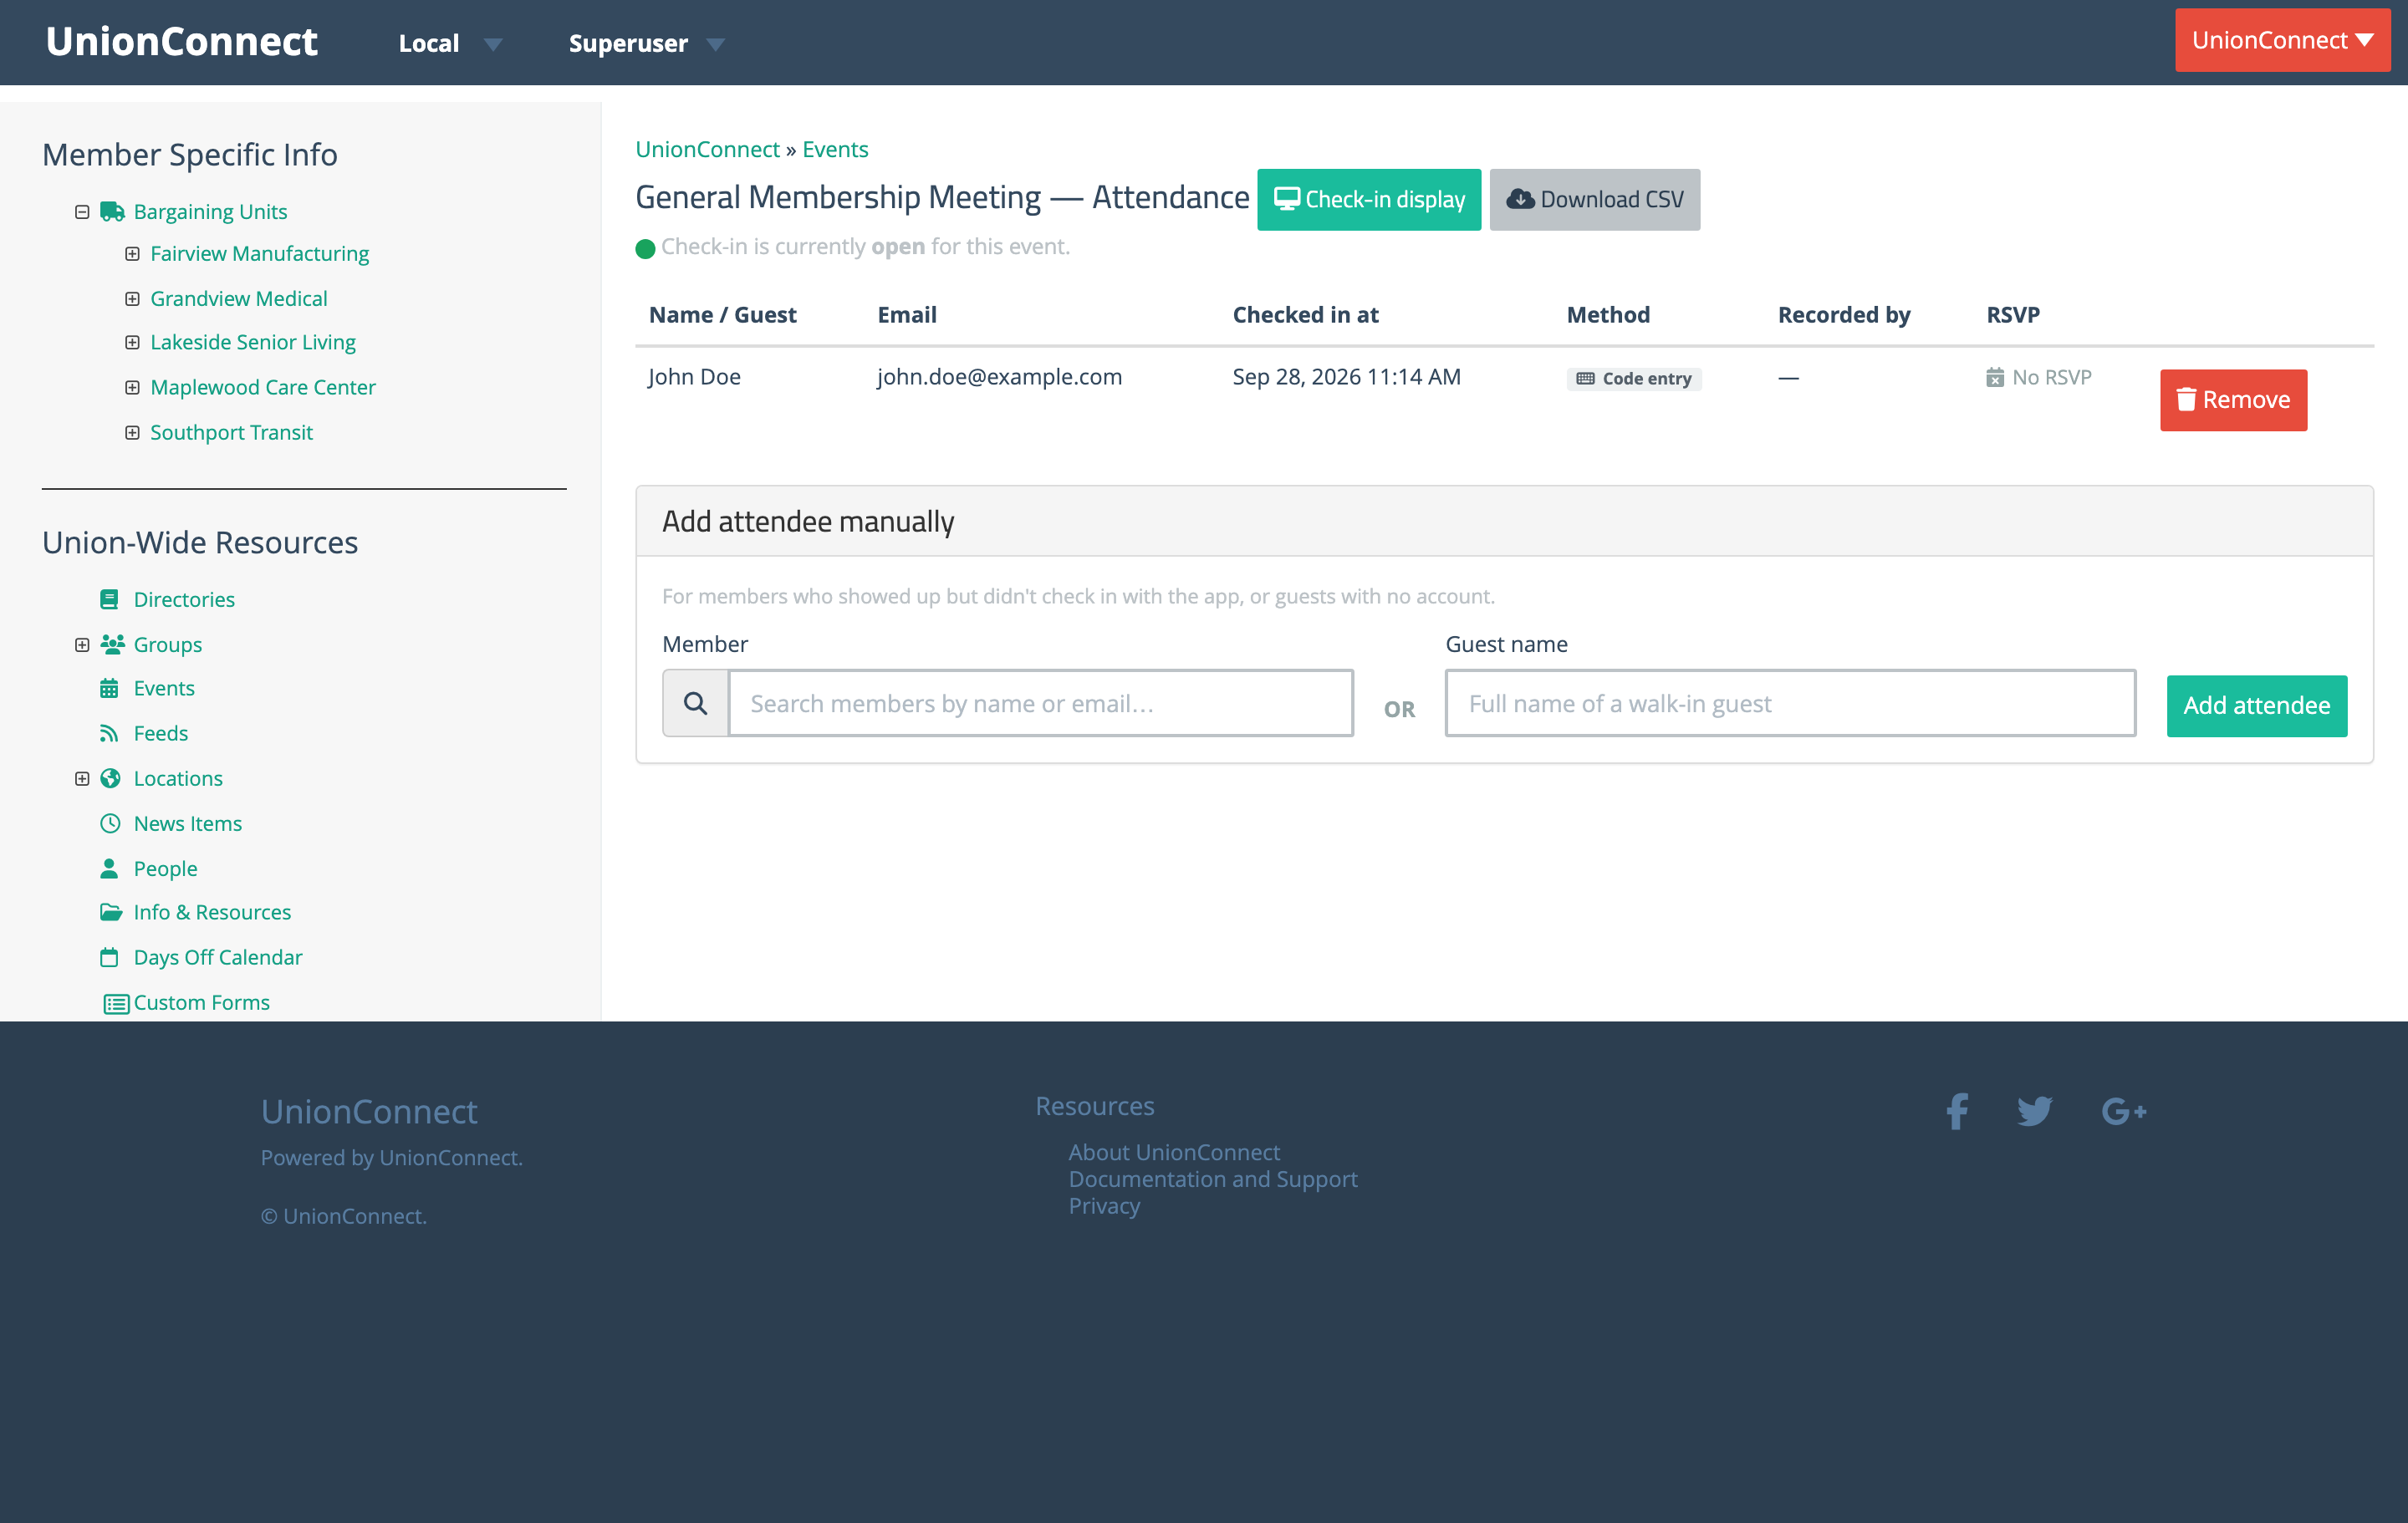
- Name / Guest — the member’s name, or the name you typed for a walk-in guest. Guests are labelled.
- Checked in at — the exact time they were recorded.
- Method — QR scan, Code entry, or Manual for someone you added by hand.
- Recorded by — which admin added the row, for manual entries.
- RSVP — what that member said before the event, or No RSVP if they never responded. This is the column that answers “who said they’d come and didn’t, and who came without saying anything?”
Remove strikes a row from the list — use it if someone was checked in by mistake. It can’t be undone, so if the person really did attend you’ll need to add them again by hand.
Adding someone by hand
Use Add attendee manually at the bottom of the page for anyone who showed up but didn’t check in with the app — a member without a smartphone, someone whose phone died, or a guest from another local.
- For a member: start typing a name or email in the Member box and pick them from the list that appears, then click Add attendee.
- For a guest: type their full name in the Guest name box instead and click Add attendee. Guests have no account, so only the name is recorded.
Use one box or the other, not both. If a member is already on the list, you’ll be told so rather than getting a second row for them.
You don’t have to have check-in open to add people this way, which means you can also use the attendance list on its own — take a paper sign-in sheet at the door and enter the names afterwards.
Downloading the attendance list
Download CSV at the top of the attendance page exports the roster as a spreadsheet. Alongside the check-in details it carries each attendee’s full member record, so the file works on its own without cross-referencing anything else:
- Check-in columns — Checked in at, Method, Recorded by, Guest name, RSVP.
- Member columns — Last Name, First Name, Email, Phone, Verified, Birthday, Bargaining Unit, Location, Employee Number, plus every custom field on your local’s registration form.
Guest rows have no member record behind them, so their member columns are blank.
Because the export contains full member contact details, treat a downloaded attendance file the same way you’d treat a membership list.
What check-in does and doesn’t prove
Check-in is a solid record of who was in the room, and it’s far better than a clipboard. It is not proof of physical presence: a member could photograph the screen and send the code to someone at home. The 30-second rotation makes that hard — a relayed code expires almost immediately — but it isn’t impossible.
That matters if your local plans to attach something consequential to attendance, such as quorum, meeting credit, or a stipend. If you do, keep the display in view of whoever is running the meeting, and remember that you can strike any row you know to be wrong.