
Directories are for showing information about leaders and other important people in your union. You may want to create a way for your membership to view information about their executive board, committees, stewards at a particular location, or business agents. The directories should help your members find the people that might be able to help them solve a problem and give recognition to the people building the union.
Directories can be Marked as Representation for a specific bargaining unit. Any directory marked as representation will appear under the Find My Representation section of the app for members of that bargaining unit.
Directories can only display people you have already added to the People Database. Once a person has been added there, they can be added to one or more directories.
Creating a Directory
- Log in to the app manager.
- Open the Directories listing under the bargaining unit, group, location, or Union-Wide Resources where you want the directory to live. A directory under a bargaining unit is only visible to members of that unit; one under Union-Wide Resources is visible to the entire local.
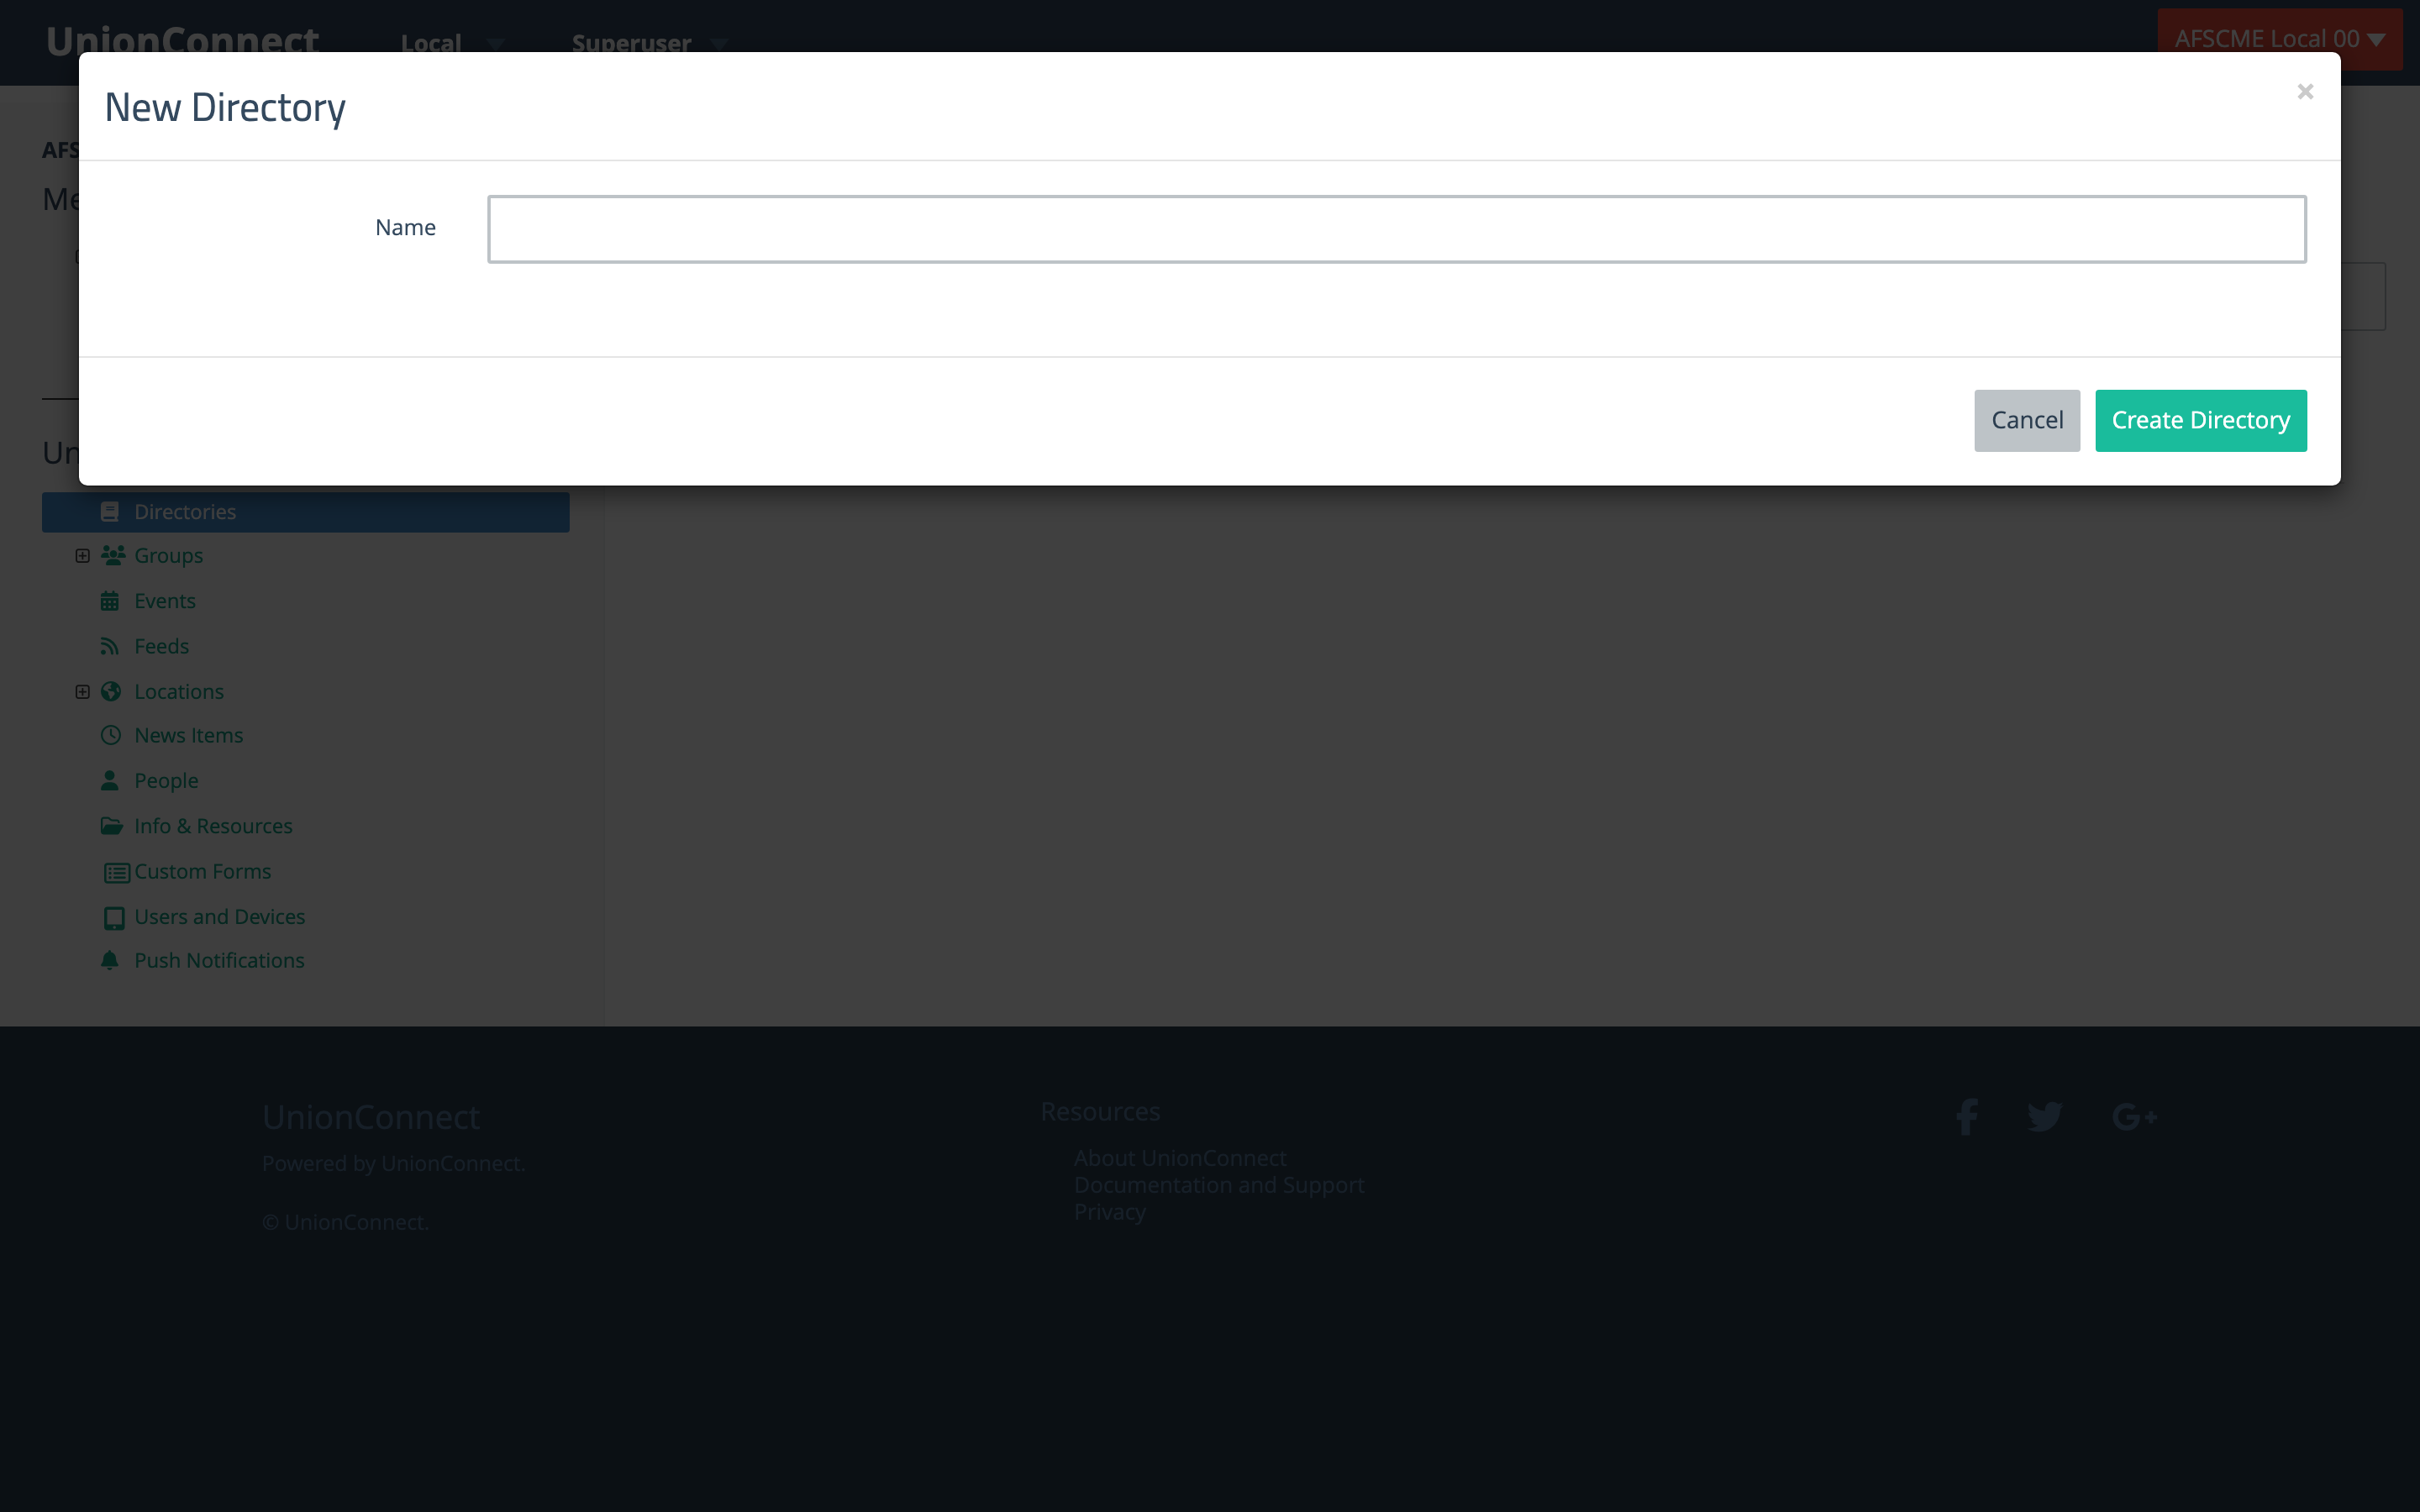
- Click New Directory in your section name.
- Enter a Name and click Create Directory.
Finding a Directory
Each directory listing shows the directories in that section. Use the search box at the top to filter by name, and check the people-count badge next to each directory name to see how many people are in it. Clicking a directory’s name opens its Manage/Reorder People page (see below).
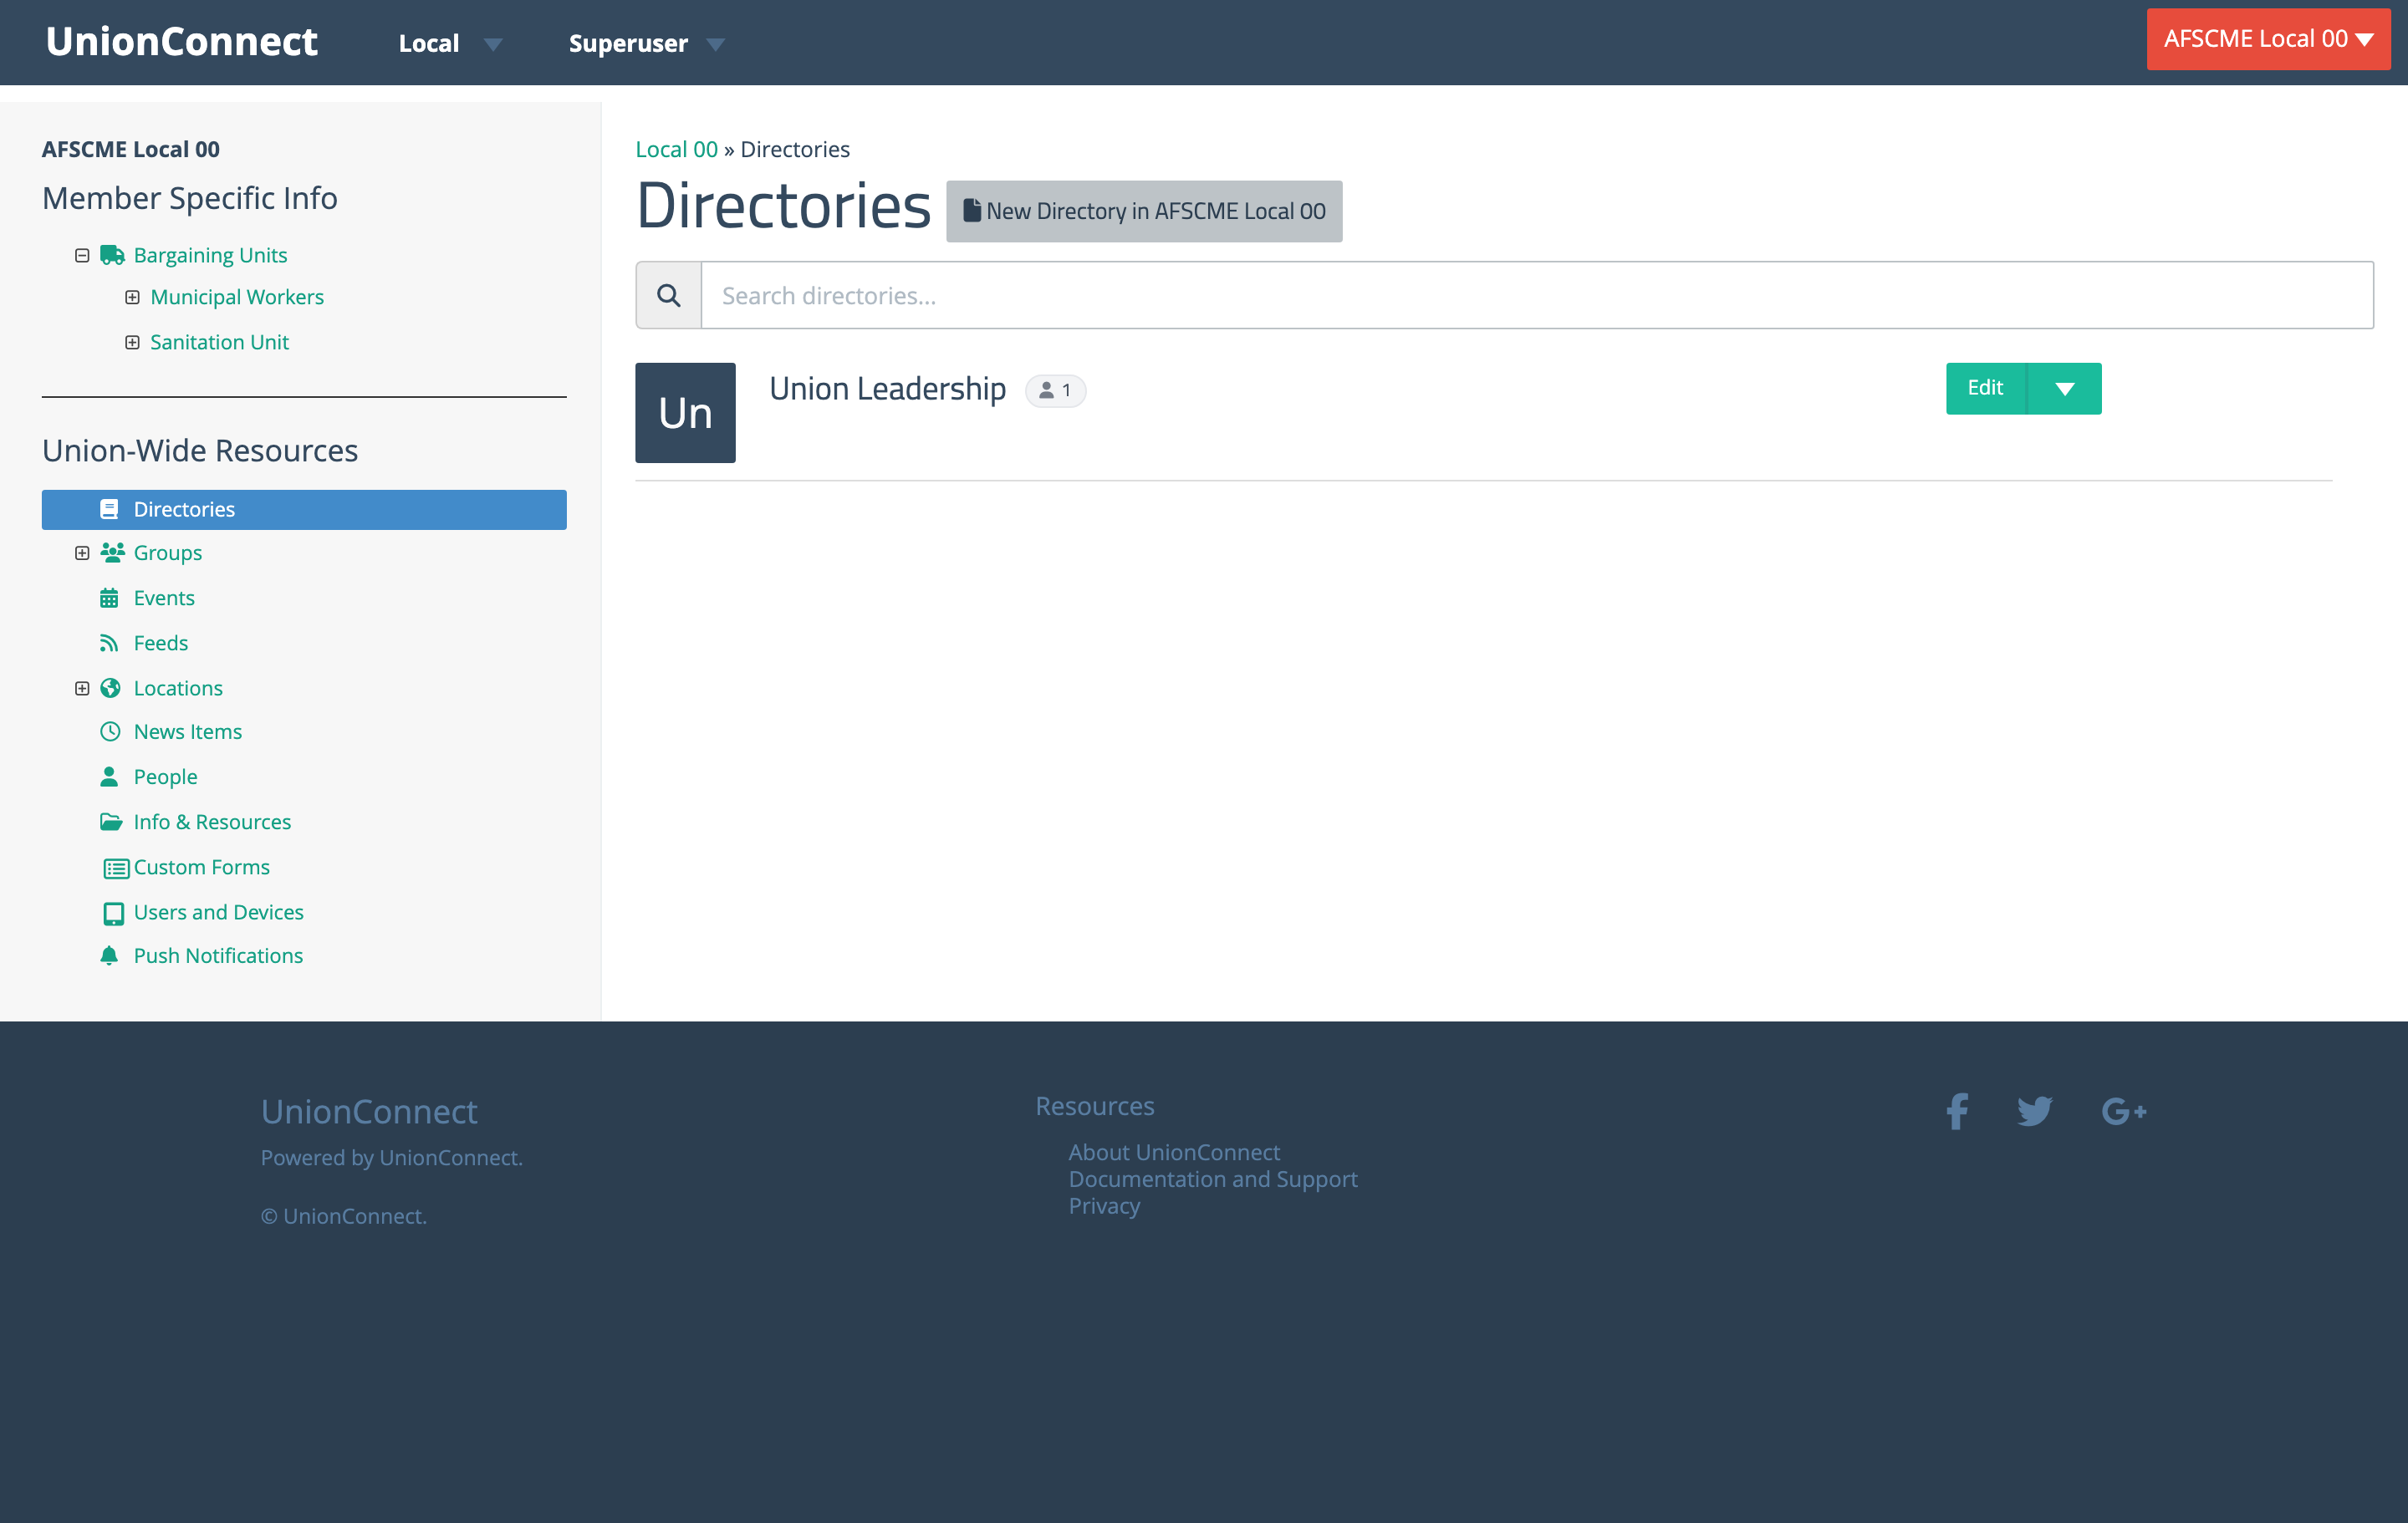
The green dropdown arrow next to a directory’s Edit button holds View directory, Manage/Reorder People, and the directory’s other options (such as Make Representation, Choose who sees this, and Delete).
Viewing a Directory as Members See It
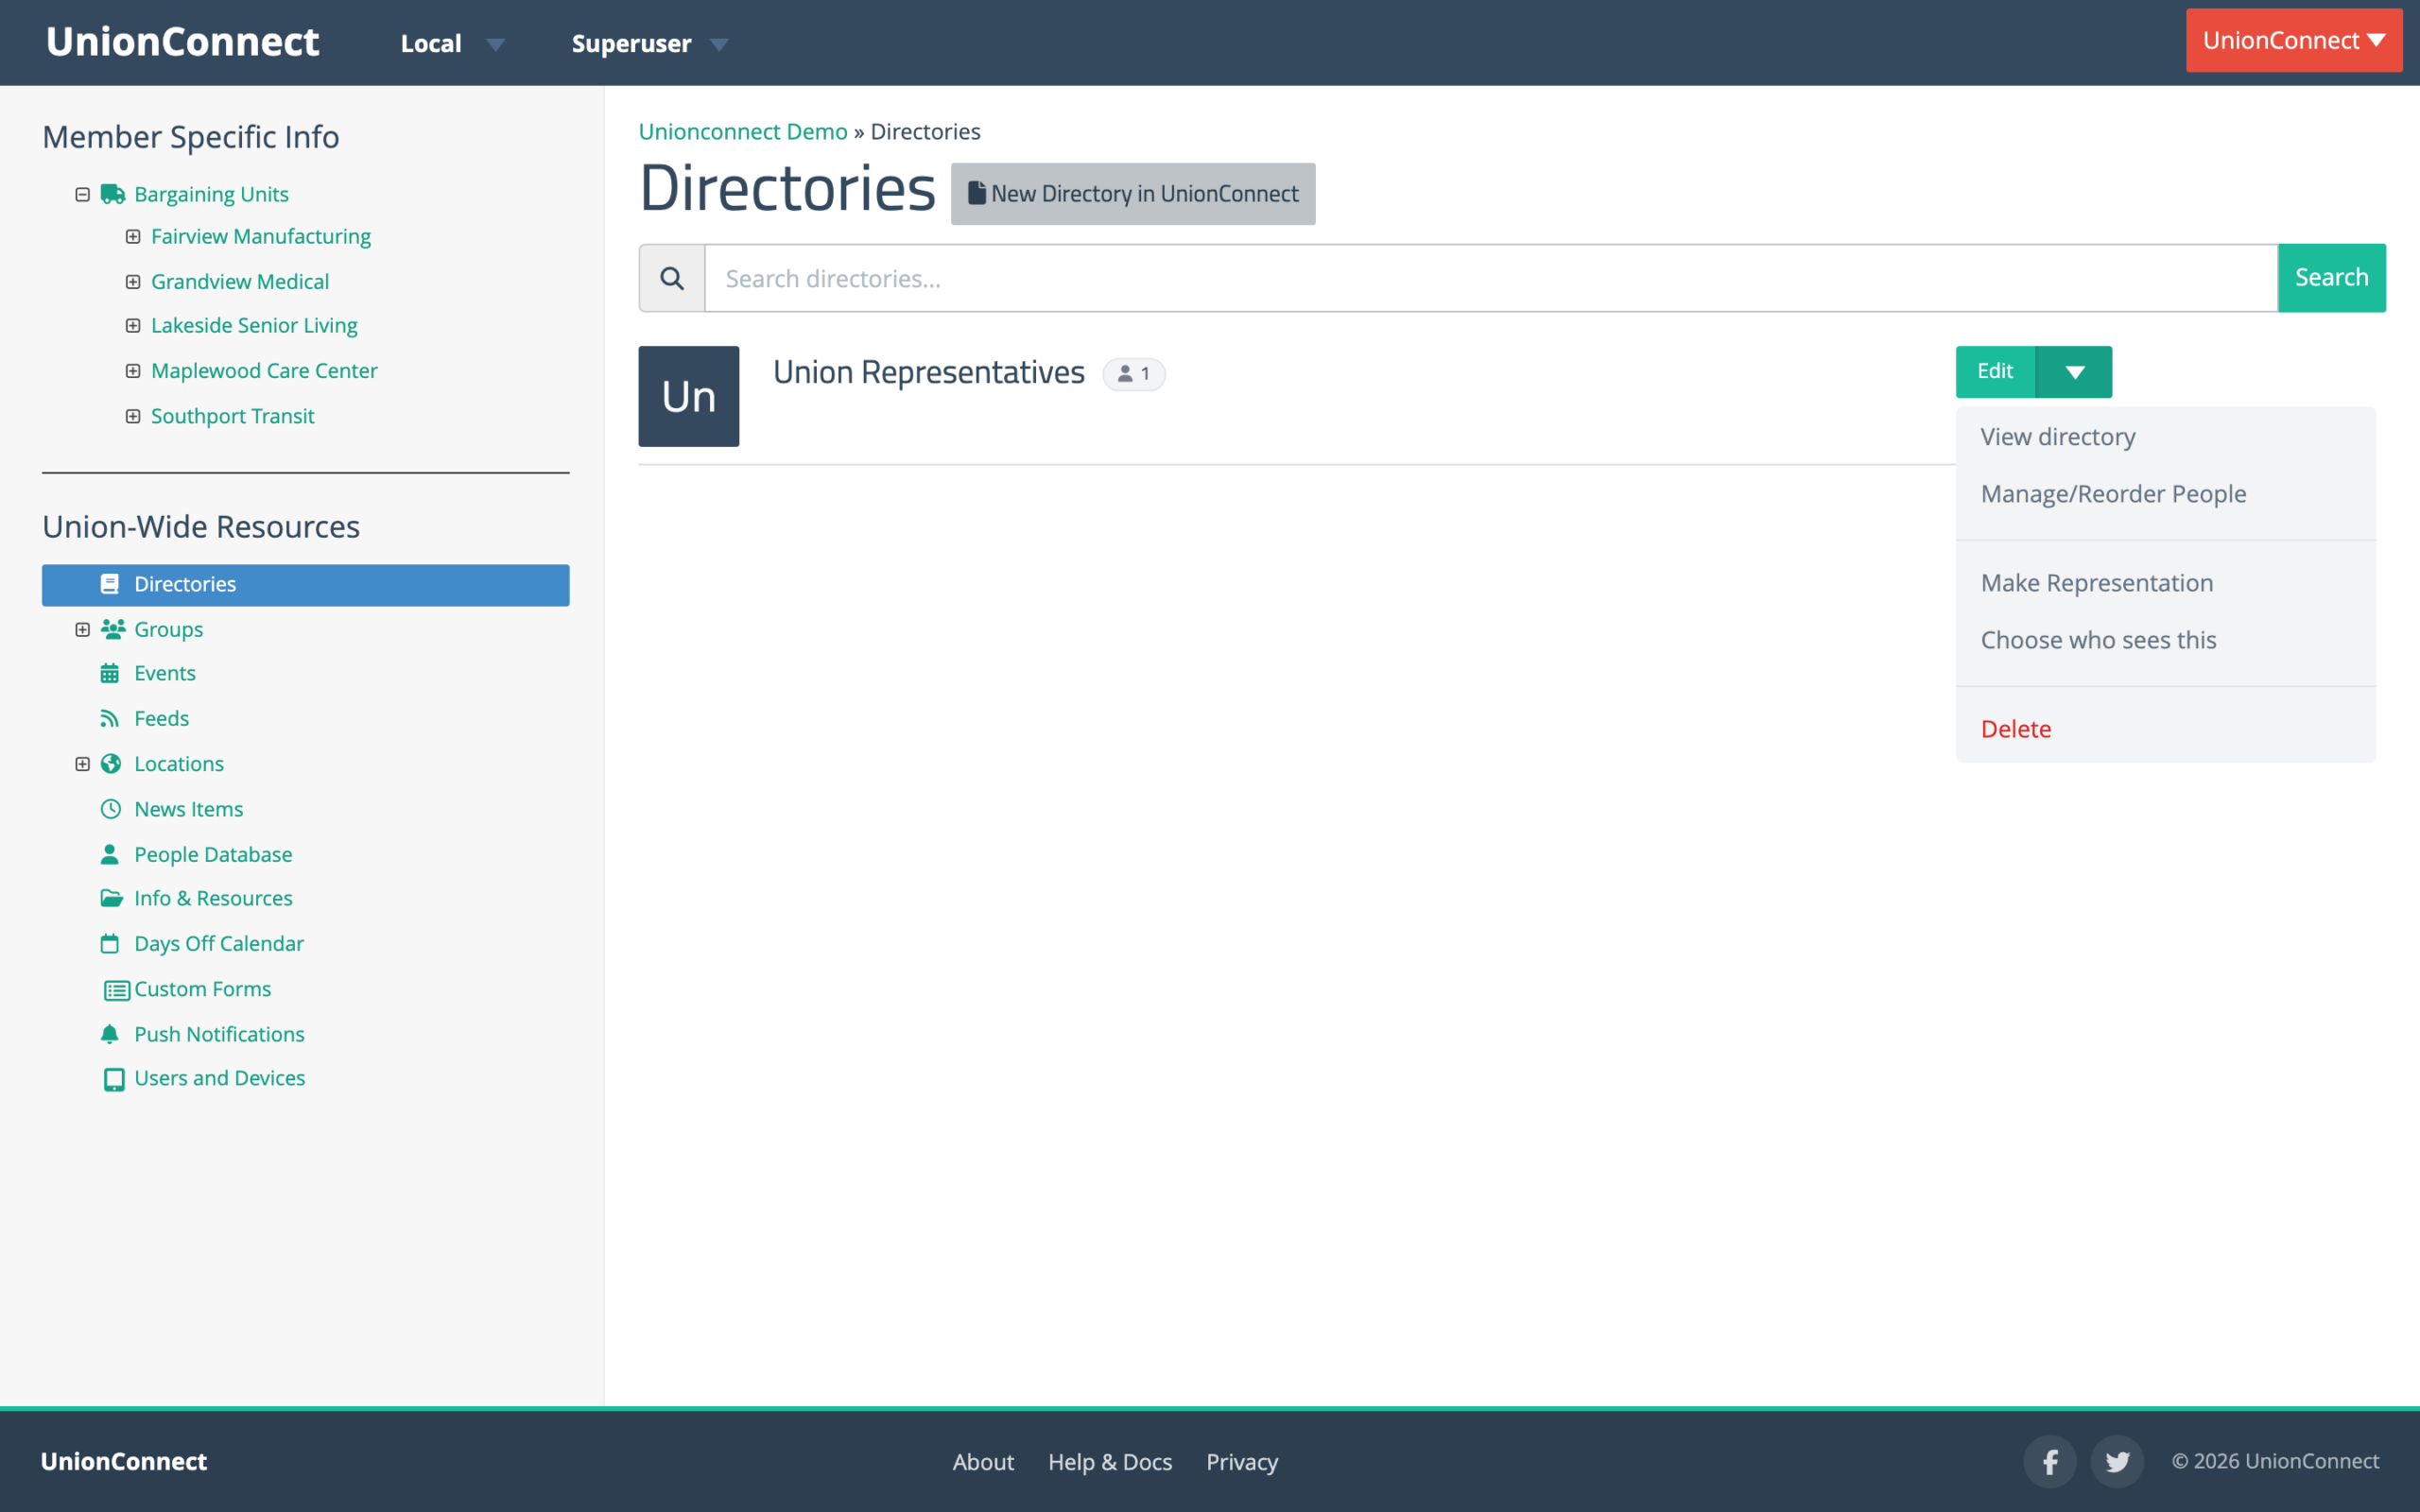
Choose View directory from the dropdown to see the directory the way members see it in the app.
- In this directory (left) lists everyone in the order the app shows them, numbered. A title set for this directory only is marked · this directory, and a chat bubble marks people members can chat with.
- In the app (right) is a preview of the phone screen: the list with its Search by title or name box. Click someone on either side to see their screen in the app, then Contact to see the options members get. It shows Email, Call, and Chat only when they’re available for that person, including what’s ticked under How members can contact them on their People Database entry.
- Pills under the name show where the directory lives (for example Local-wide or a bargaining unit name), Shared from another local if it is shared, and Representation directory if it is marked as representation.
- Buttons at the top go to Manage/Reorder People and Edit directory. An empty directory says “No one is in this directory yet” with an Add people link.
Manage/Reorder People
Adding people to a directory, removing them, setting their titles, and putting them in order are all done on one page. Open it by clicking the directory’s name in the listing, choosing Manage/Reorder People from the dropdown, or clicking Manage/Reorder People on the directory view page.
The page has two panels:
- In this directory (left) — the people in the directory, in display order. Drag the handle on the left of a row to move it. The ··· menu on each row has Move to top, Move up, Move down, Move to bottom, and Remove from directory. Each row’s Title applies to this directory only; editing it never changes the person’s People Database entry.
- People Database (right) — everyone who can be added, in last-name order. The number next to the heading is how many people that is. Type in Filter by name or title to narrow the list, then click a person (or their green +) to add them. New Entry creates a new People Database entry without leaving the page. If your People Database has more than 100 people who aren’t in the directory, the list shows only the first 100, with a note such as Showing 100 of 250. Type a name to find anyone else. Typing in the box then searches all of them by first name, last name, or email address (not by title).
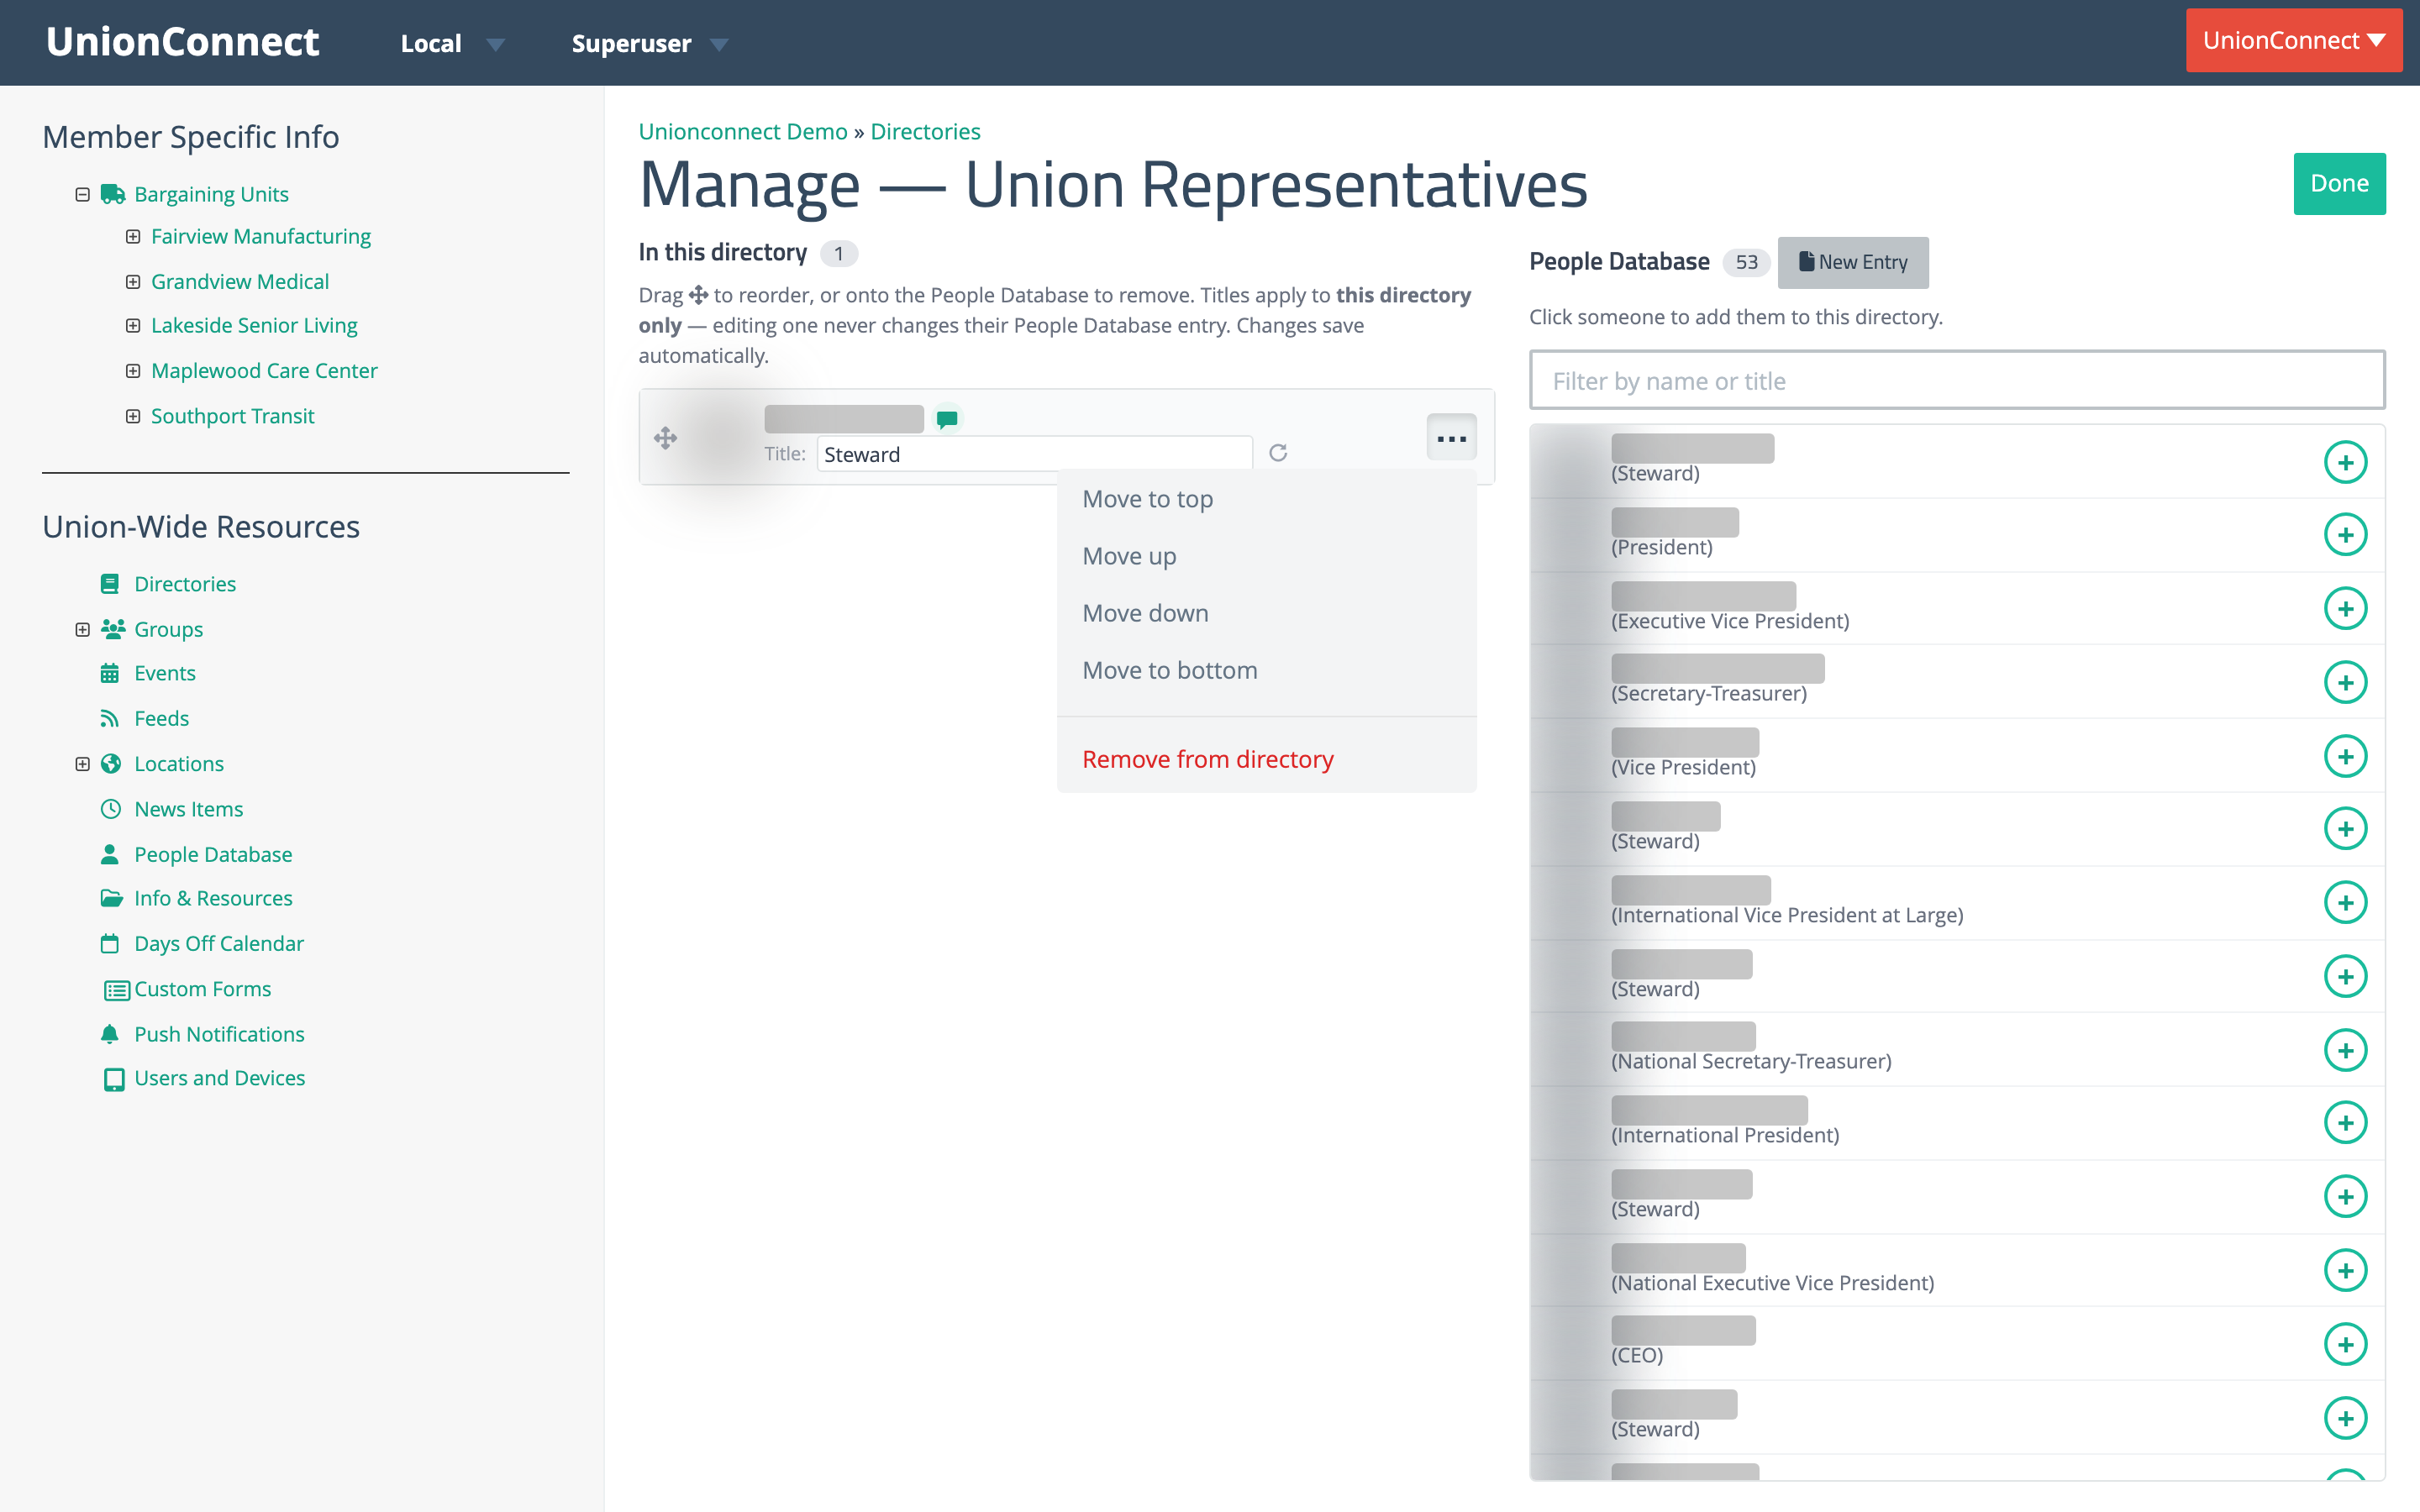
- New people go to the top of the directory. Drag or use the menu to move them.
- To remove someone, choose Remove from directory from their menu, or drag their row onto the People Database panel. They show up at the top of the People Database list right away, and a message offers Undo for 6 seconds (clicking them in the People Database during that time also undoes it). Removing someone from a directory does not delete their People Database entry.
Changes save automatically — there is no Save button. When you’re finished, click Done in the upper right to go to the directory view.
To assign one person to several directories at once, see Managing Directory Assignments. To add several people to one directory at once, tick them on the People Database list and use Add to Directory.
A Group’s Membership Directory
If UnionConnect has turned on group membership directories for your local, every group has one membership directory: a list of the group’s members that builds itself from whoever is in the group. You don’t add people to it. Add or remove them from the group instead (see Groups), and the directory follows. It is created with the group, named after it, and removed only when the group is.
It appears on the group’s Directories listing with a Membership Directory badge, and a yellow Hidden badge while members can’t see it.
Renaming or Hiding It
- Click Edit on the membership directory’s row.
- Change the Name if you like. If you leave it blank, the current name is kept.
- Tick Hide from members to take it out of the app, or untick it to show it again. Admins still see it in the app manager while it is hidden.
- Click Save.
To hide or show it without opening the Edit window, click the dropdown arrow next to Edit and choose Hide from members (or Show to members while it is hidden). The name stays as it is.
A membership directory can’t be deleted. If you don’t want members to see it, hide it instead.
When you rename the group, the directory gets the new name too, as long as you haven’t given it a different name of its own.
Some older groups were given a membership directory later, and those start out hidden (look for the yellow Hidden badge). Nothing new shows up in the app for those groups until you untick Hide from members. Membership directories that used to be called “Membership Directory” now carry their group’s name.
Viewing It as Members See It
Click the directory’s name, or choose View directory from the dropdown arrow next to Edit. The page is laid out like the directory view above:
- The heading is the directory’s name, with an Edit button beside it. A note underneath says the list is automatically generated from the group’s members. To change who is in it, change the group’s members (see Groups).
- Under the name are a Membership Directory pill, a Hidden from members pill while it is hidden, and the number of members.
- In this directory (left) lists the group’s members in alphabetical order by last name, 100 per page. No title appears under members’ names, here or in the app.
- In the app (right) previews the phone screen. Click someone to see their screen, then Contact to see the options members get: Email, Call (using the phone number on their app account), and Chat when they can be reached by chat.
- If the group has no members yet, the page says “No one is in this group yet.”