Use this the first time your local uploads a roster.
1. Open the hub. From Users and Devices, click Configure Roster. Before you upload anything, it looks like this:
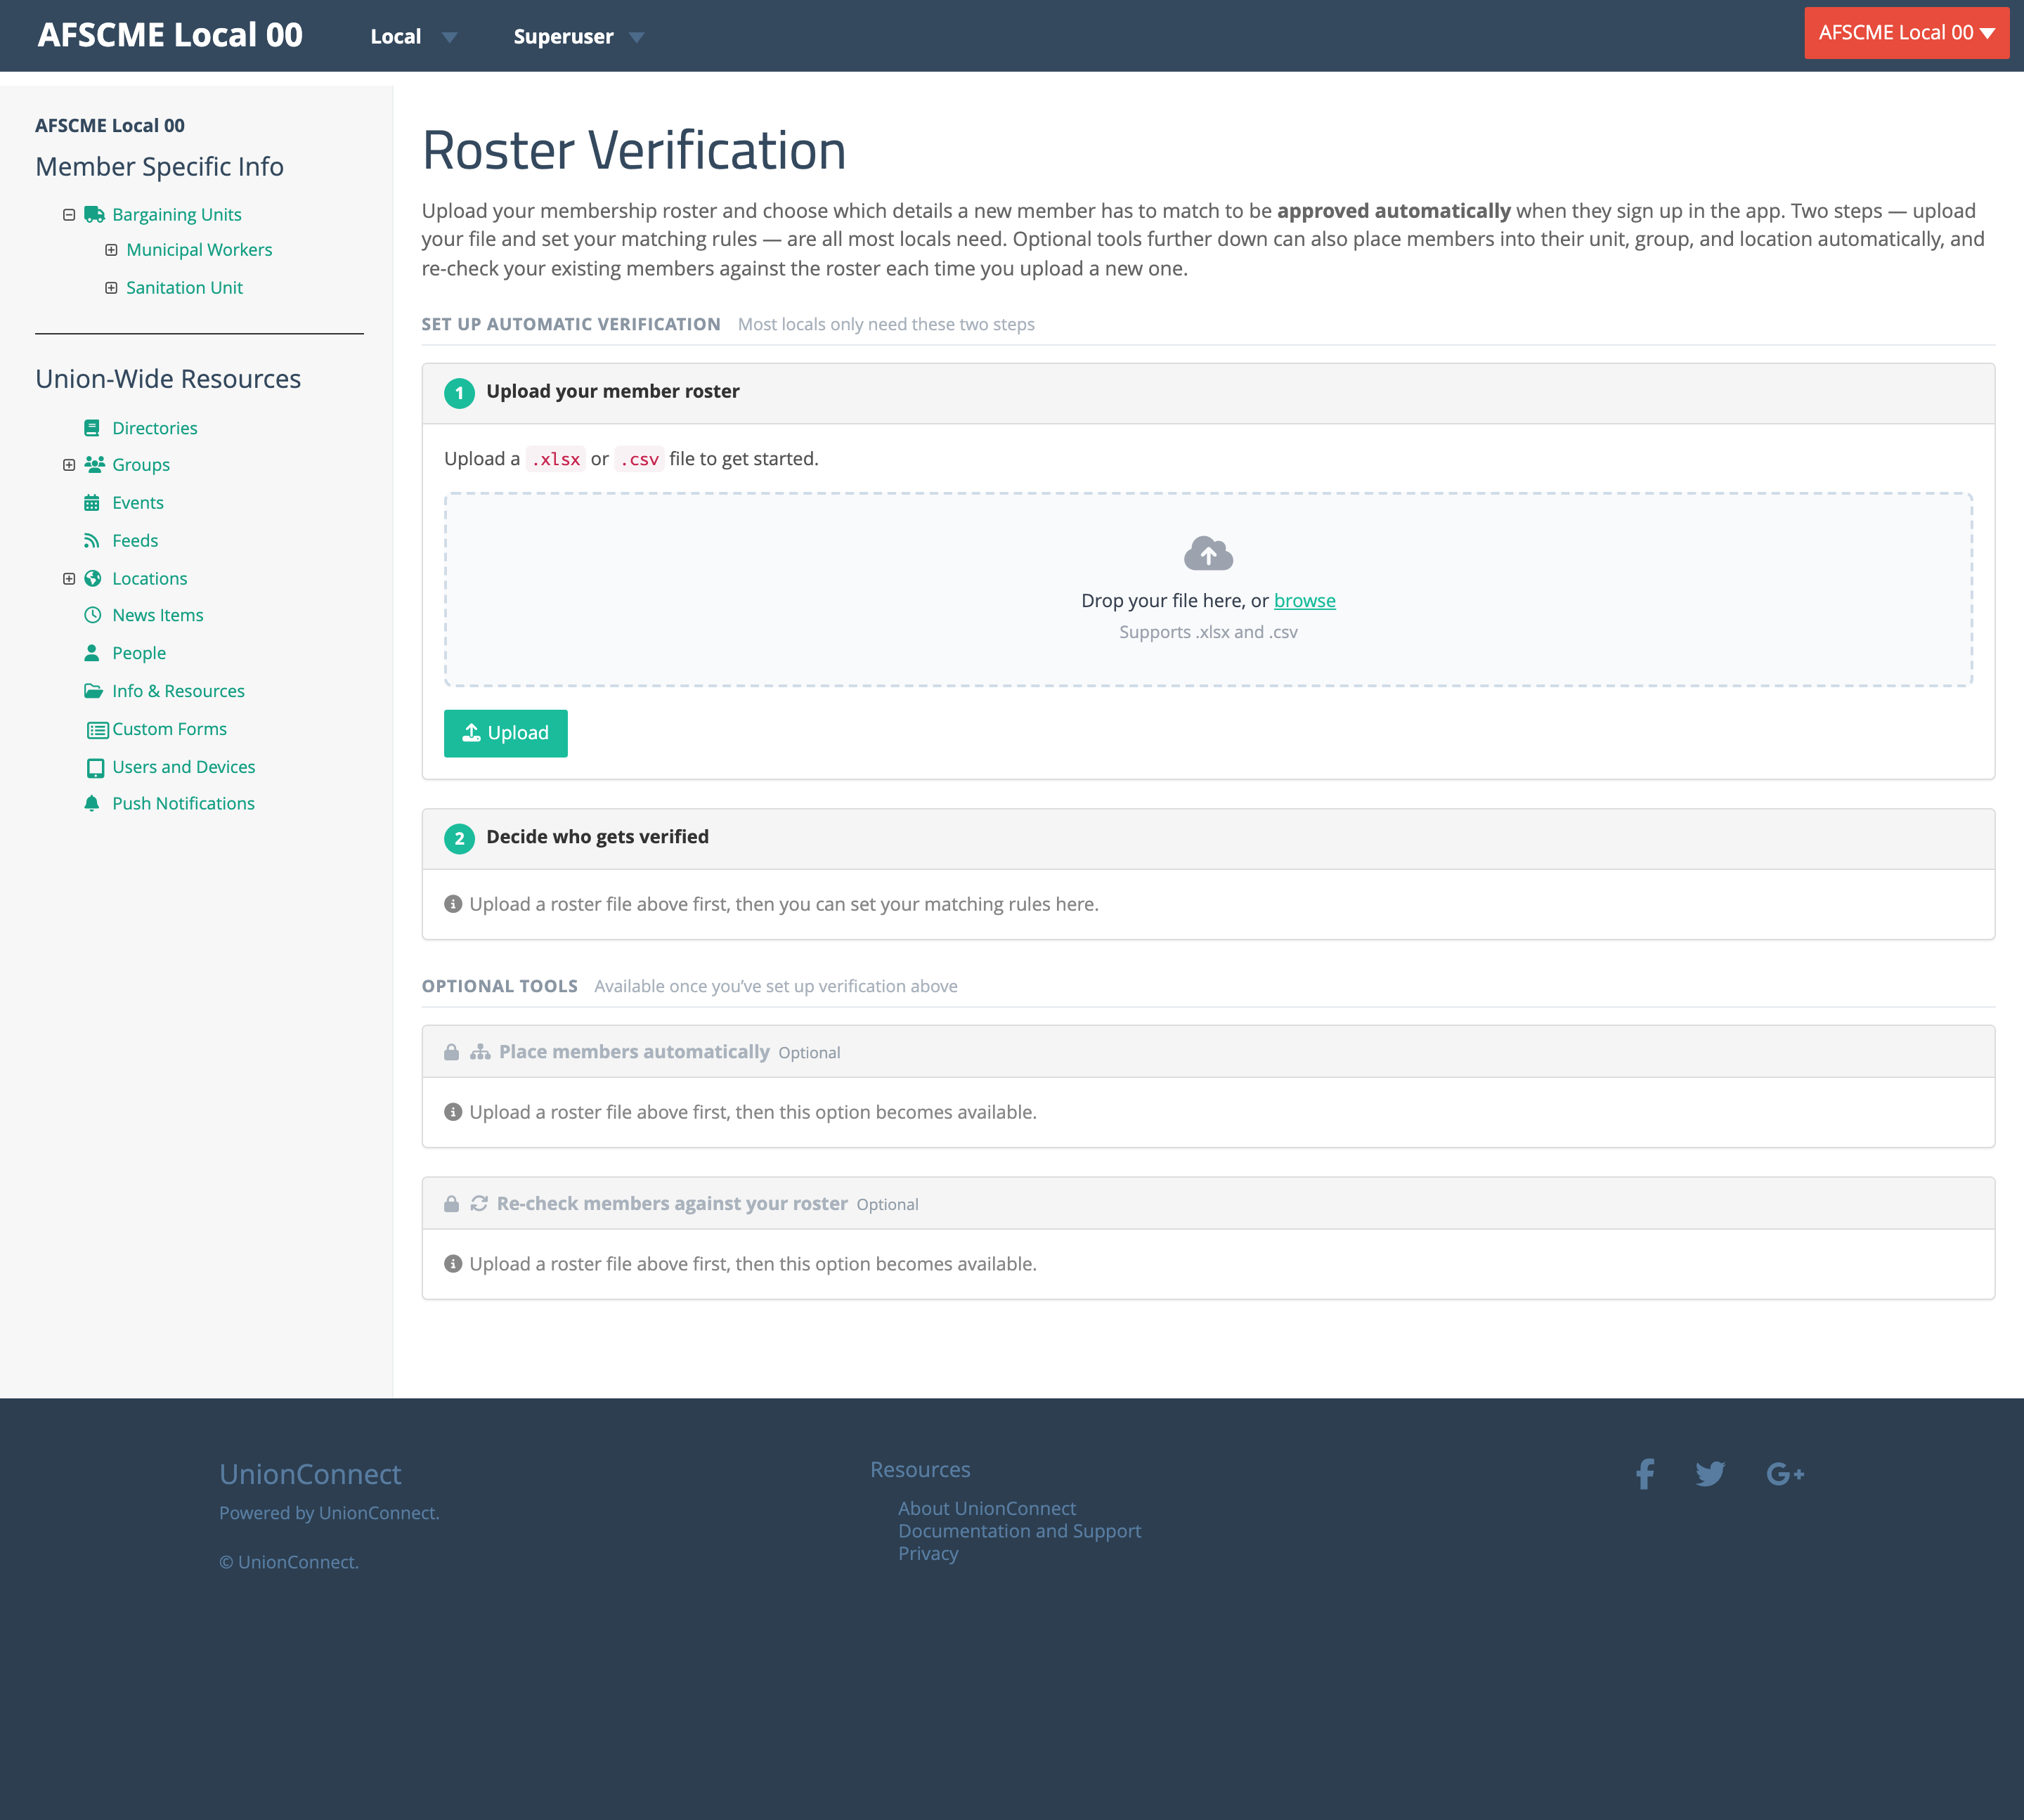
2. Upload your member roster (Step 1). Drag a .csv or .xlsx file onto the box (“Drop your file here, or browse”), or click browse. Use one row per member, and include the details you want to match on (for example email and last name) plus any columns that hold their unit, group, or location.

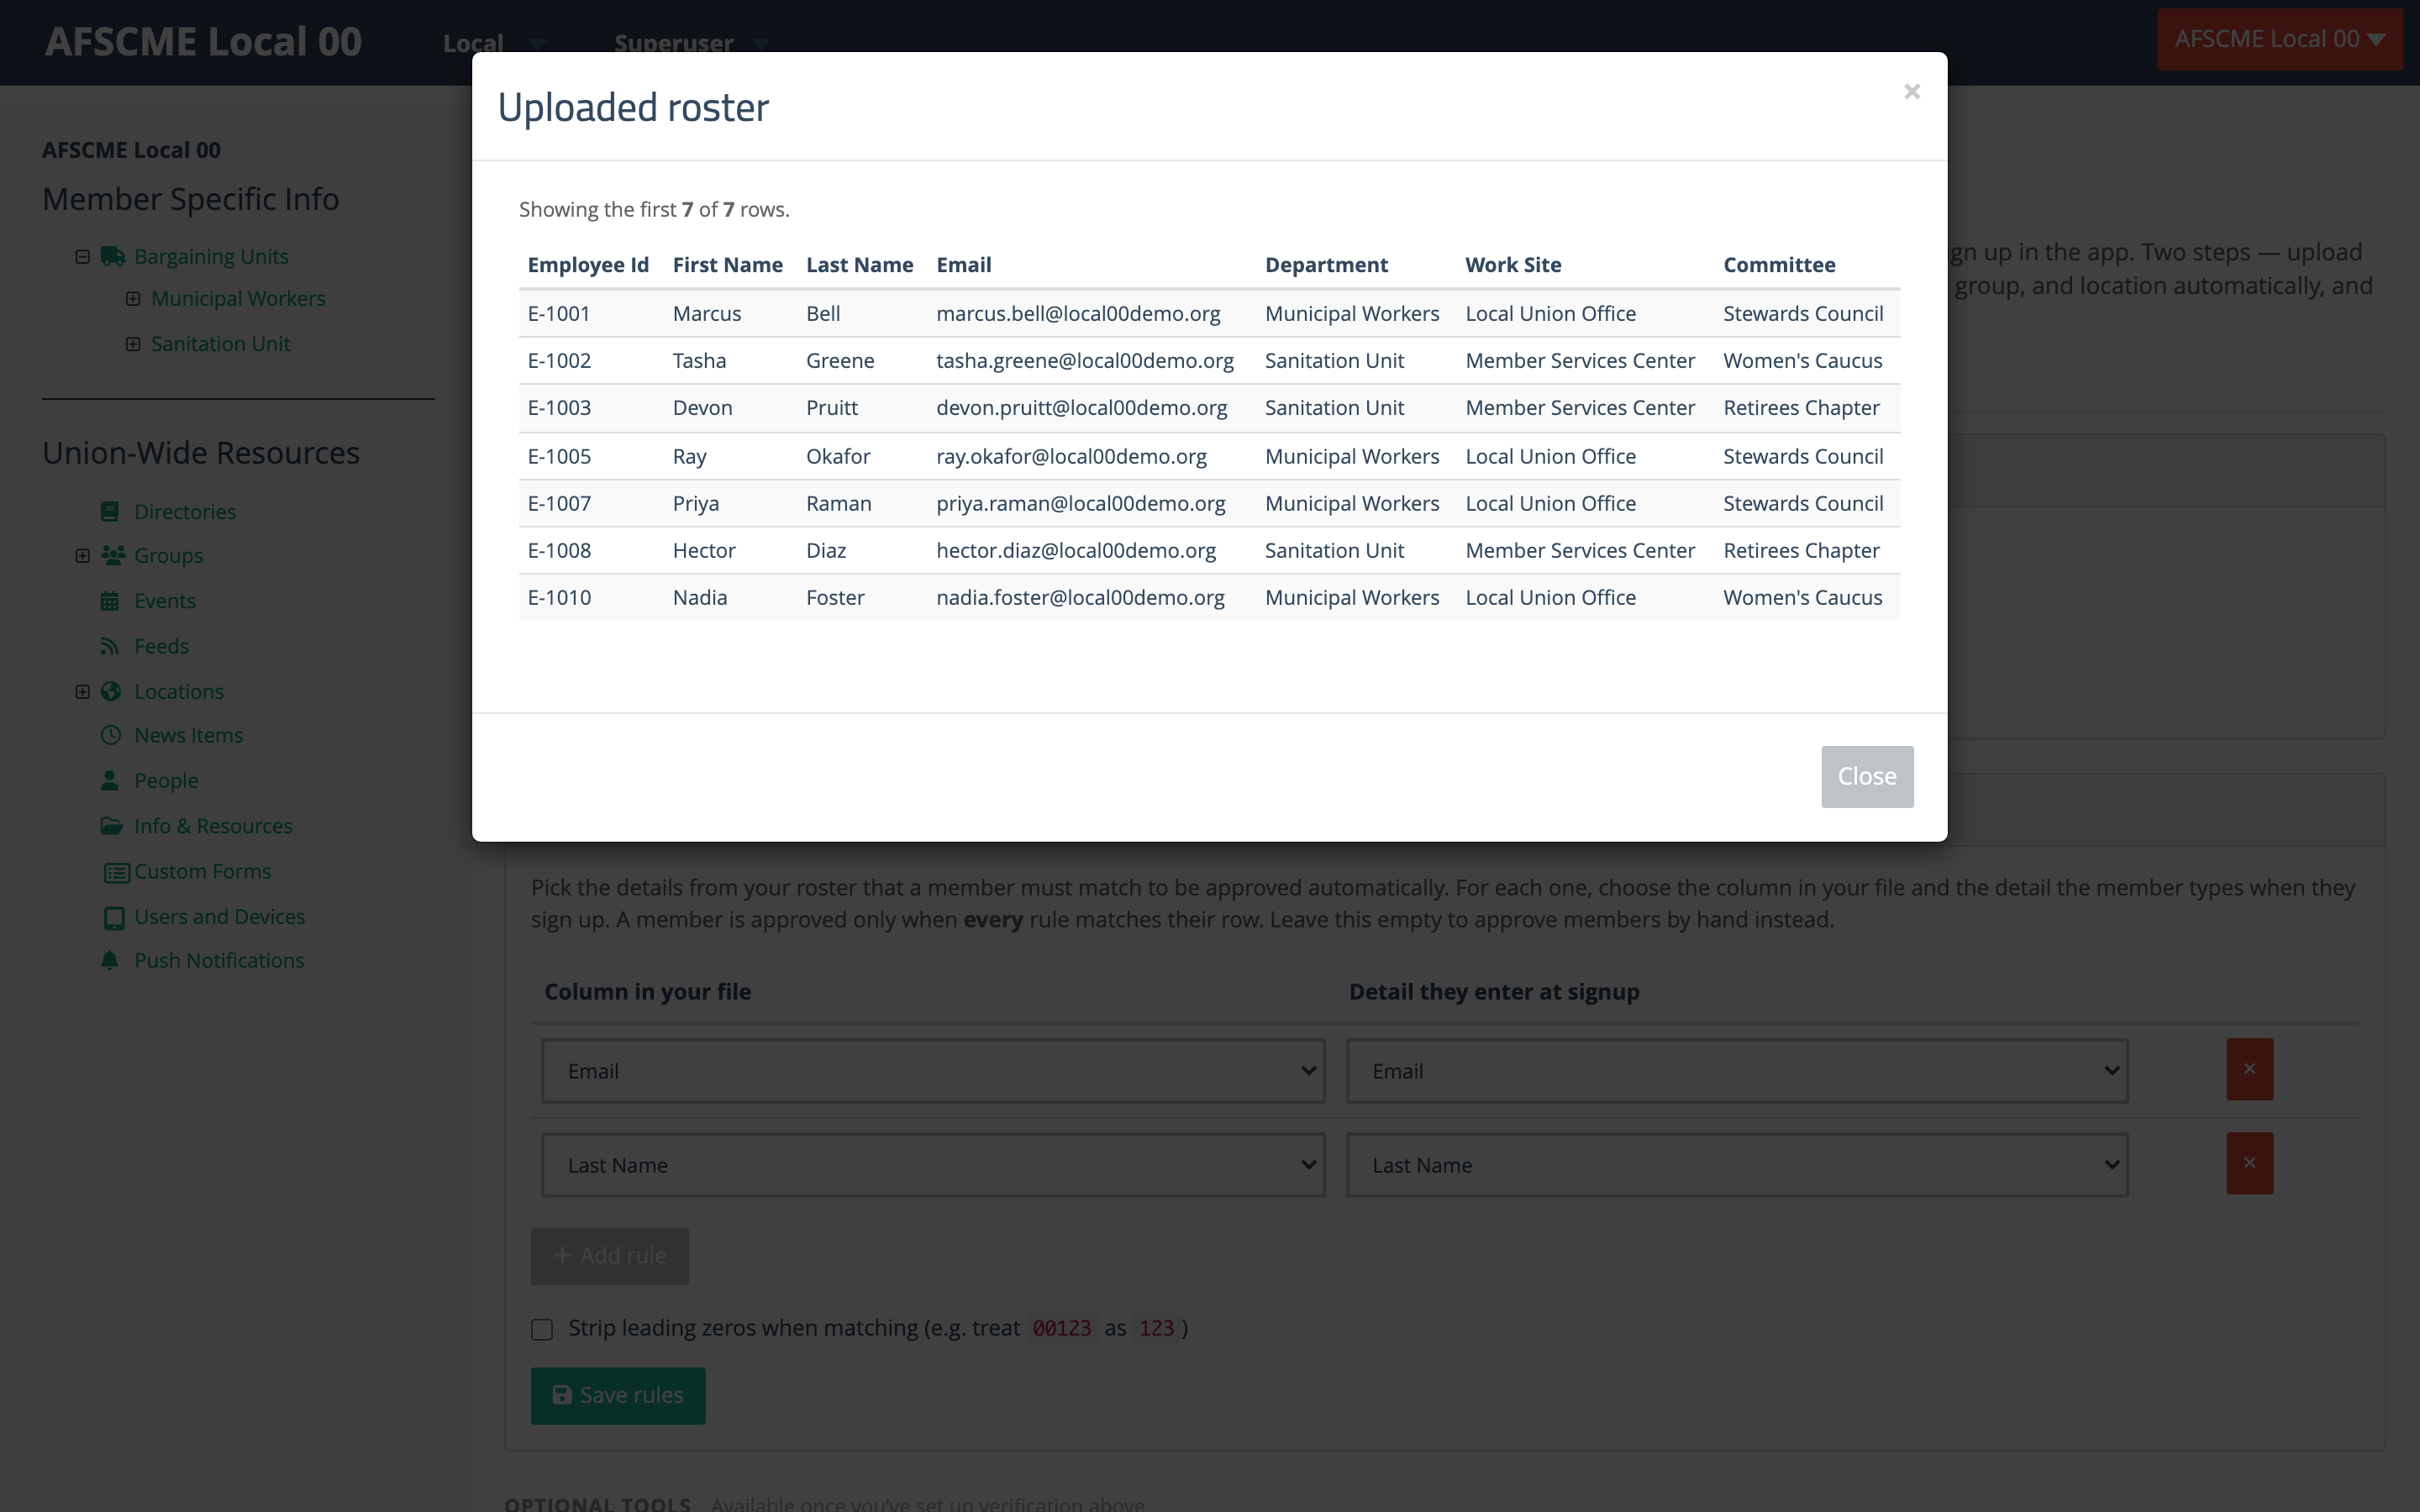
Click View roster any time to preview what the app read from your file:
3. Decide who gets verified (Step 2). Click + Add rule. For each rule, choose the column in your file and the detail the member enters at sign-up that it should match. A member is approved automatically only when every rule matches their row. In the example below, a member must match both their Email and their Last Name:
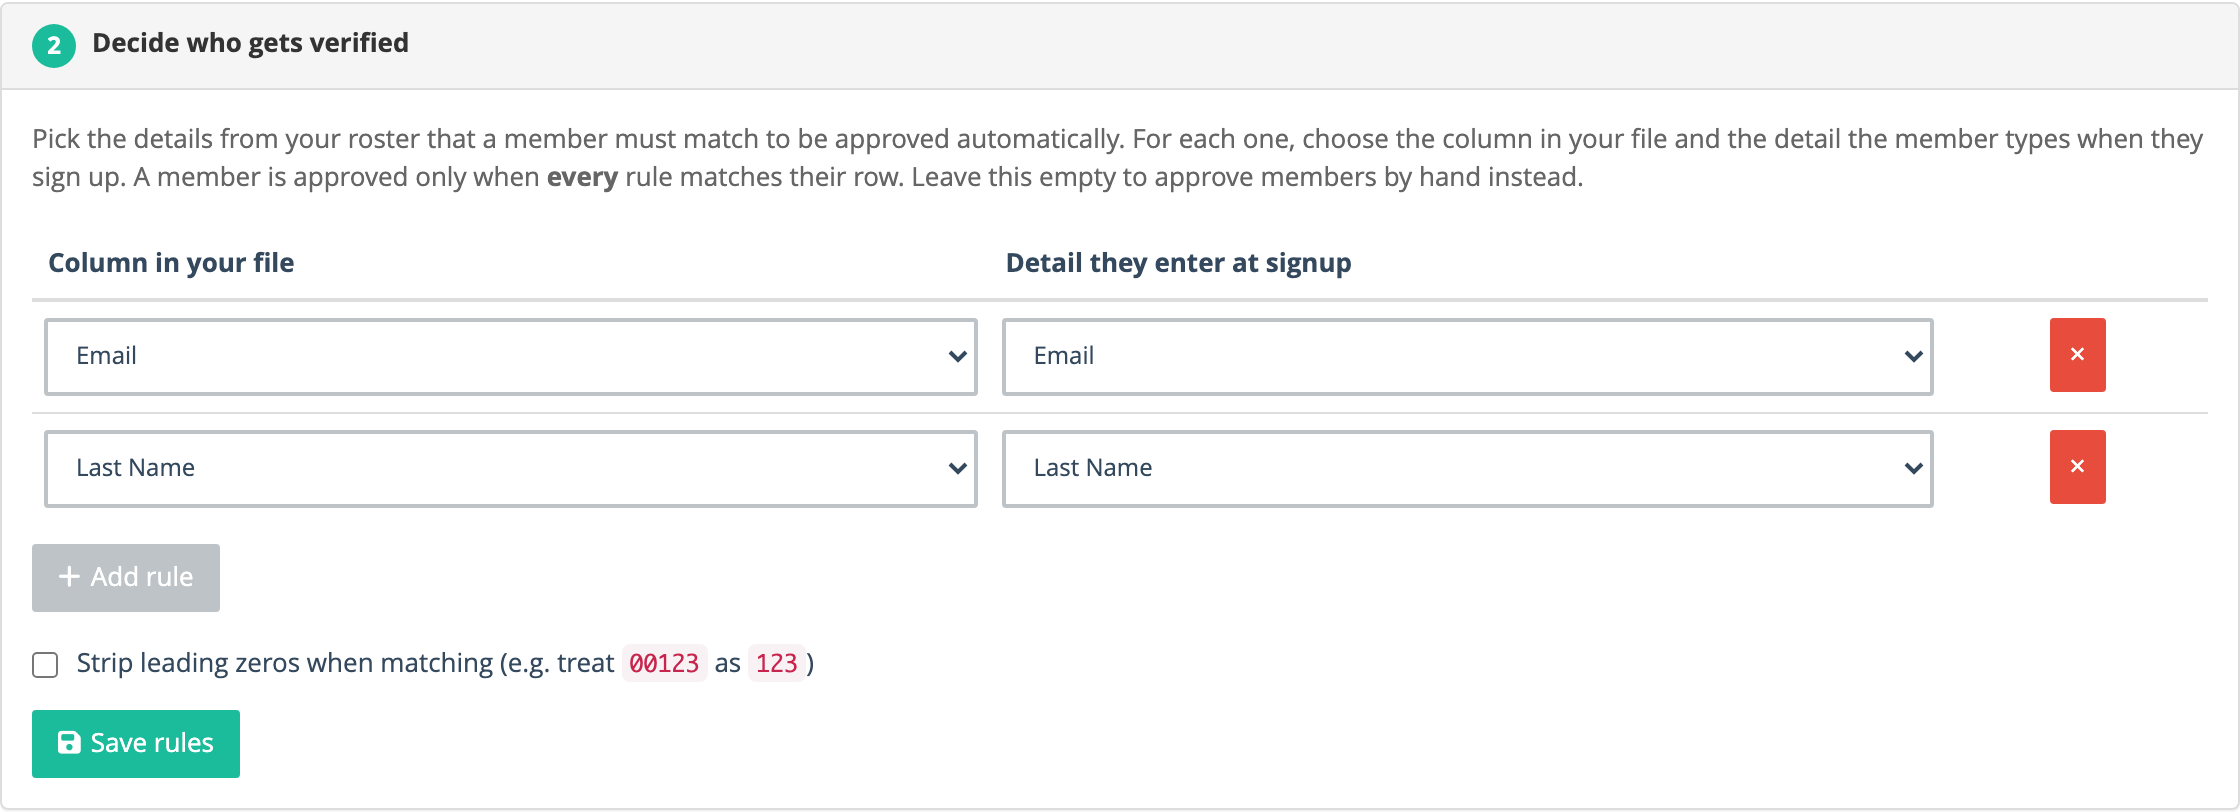
Tick Strip leading zeros when matching if your IDs sometimes have leading zeros (so 00123 matches 123). Click Save rules. (Leave the rules empty if you’d rather keep approving members by hand.) The two optional tools below stay locked until you’ve saved at least one rule.
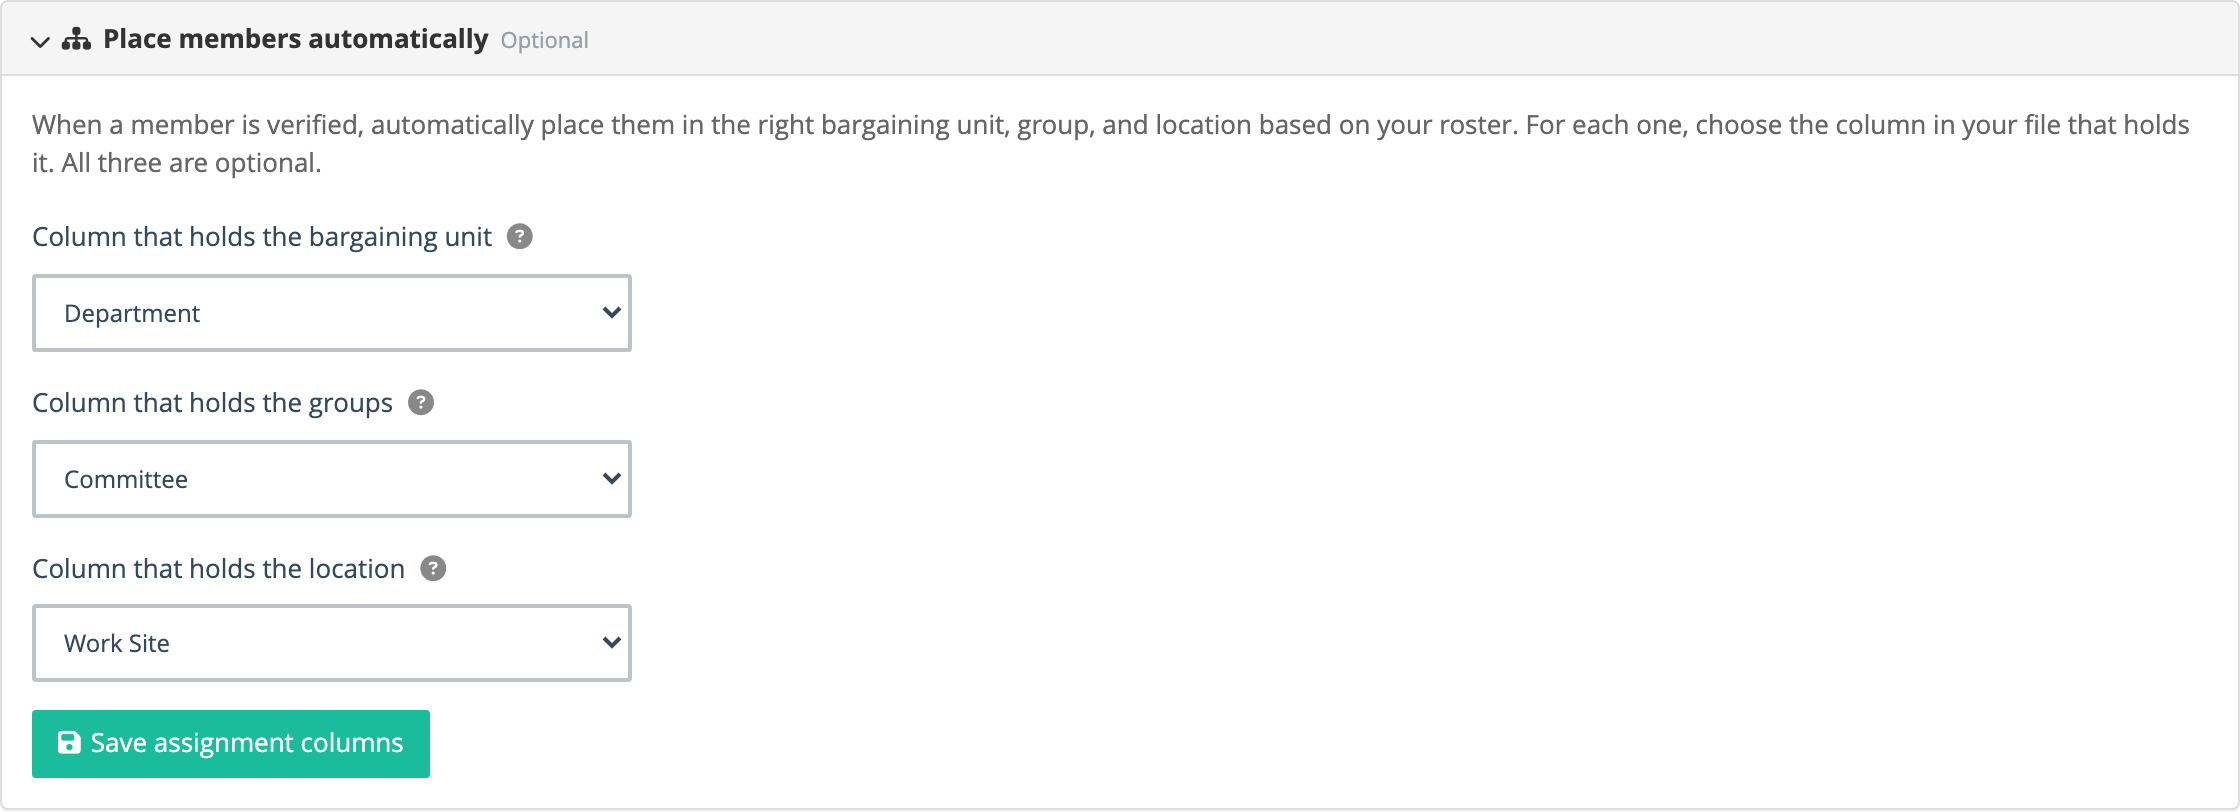
4. Place members automatically (optional). Once you’ve saved a rule, you can map the columns that hold each member’s bargaining unit, group, and location, then click Save assignment columns. Verified members are then filed into those automatically. The values in your file must match records that already exist in your local.
5. Re-check members against your roster (optional). Choose the column that holds a unique member ID (for example Employee ID). This anchors each member to their row, so when you upload a new roster later the app can tell who changed or left. Click Save ID column.

That’s it. From now on, members who match your rules are approved automatically when they sign up.