
You can run attendance check-in for a meeting, rally, or training entirely inside the app — no clipboard, no sign-in sheet. Members tap a menu item on the app’s home screen, fill out a short form, and you get a roster you can search and export. When the event is over, one checkbox makes the menu item vanish.
This works because a custom menu item pointing at an inactive form is hidden from the app automatically. You don’t have to delete anything, and you don’t have to remember to put it back — reactivating the form brings the menu item back exactly as it was.
What you’ll use
- A custom form — see Forms
- A custom menu item — see Custom Menu Items
Step 1 — Build the check-in form
Click Custom Forms under Union-Wide Resources, then New Form. Give it a title members will recognise, like General Membership Meeting Check-In.
Keep the form short. Members are standing in a doorway when they fill this out. A useful check-in form is usually just a heading, a line of instructions, and one or two questions:
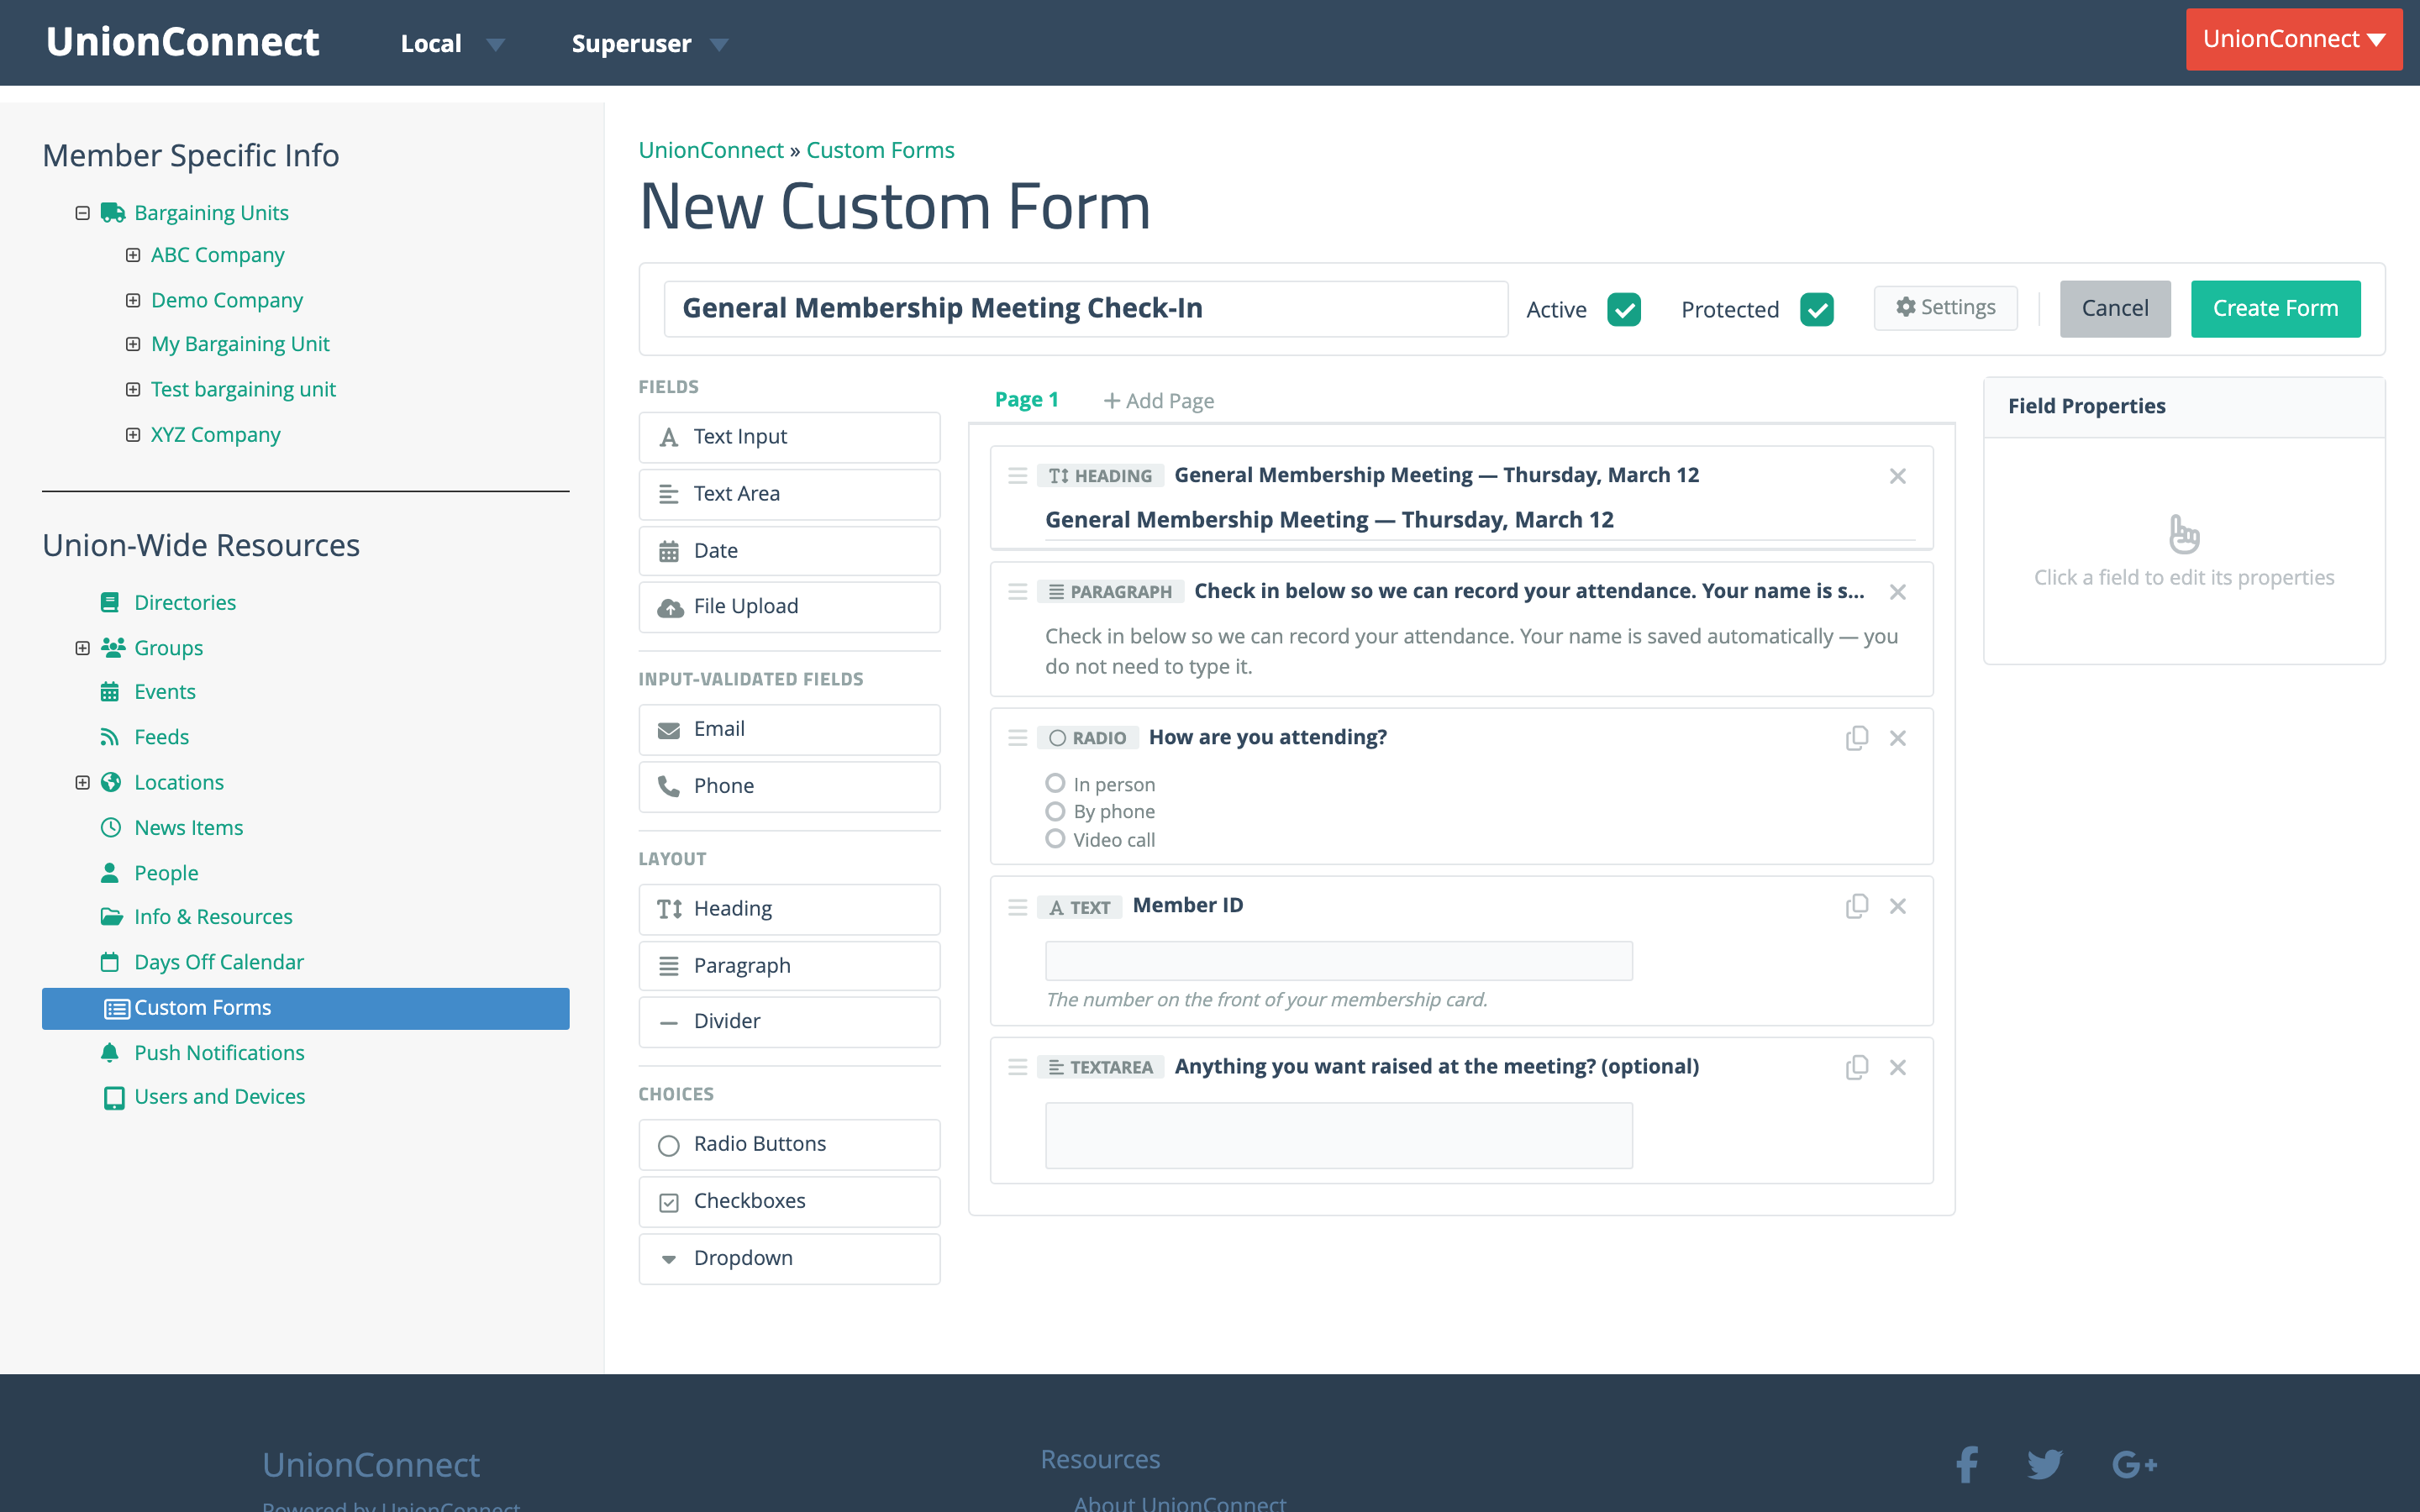
You do not need a “Name” field. The form records who submitted it automatically, so asking members to type their own name just slows the queue down and gives you misspellings to clean up later.
Two checkboxes at the top of the builder matter here:
- Active — leave this ticked. This is the checkbox you’ll come back and untick after the event. It also has to be ticked right now, because Step 2 can only pick from active forms.
- Protected — leave this ticked too. It requires members to be logged in and verified before they can submit, which is what makes the roster trustworthy.
Check the submission settings
Click Settings and stay on the Submissions tab. Make sure Anonymous Submissions is unticked — this is the single most important setting on the page. An anonymous form records every entry as “Anonymous”, which gives you an attendance count but no attendance roster.
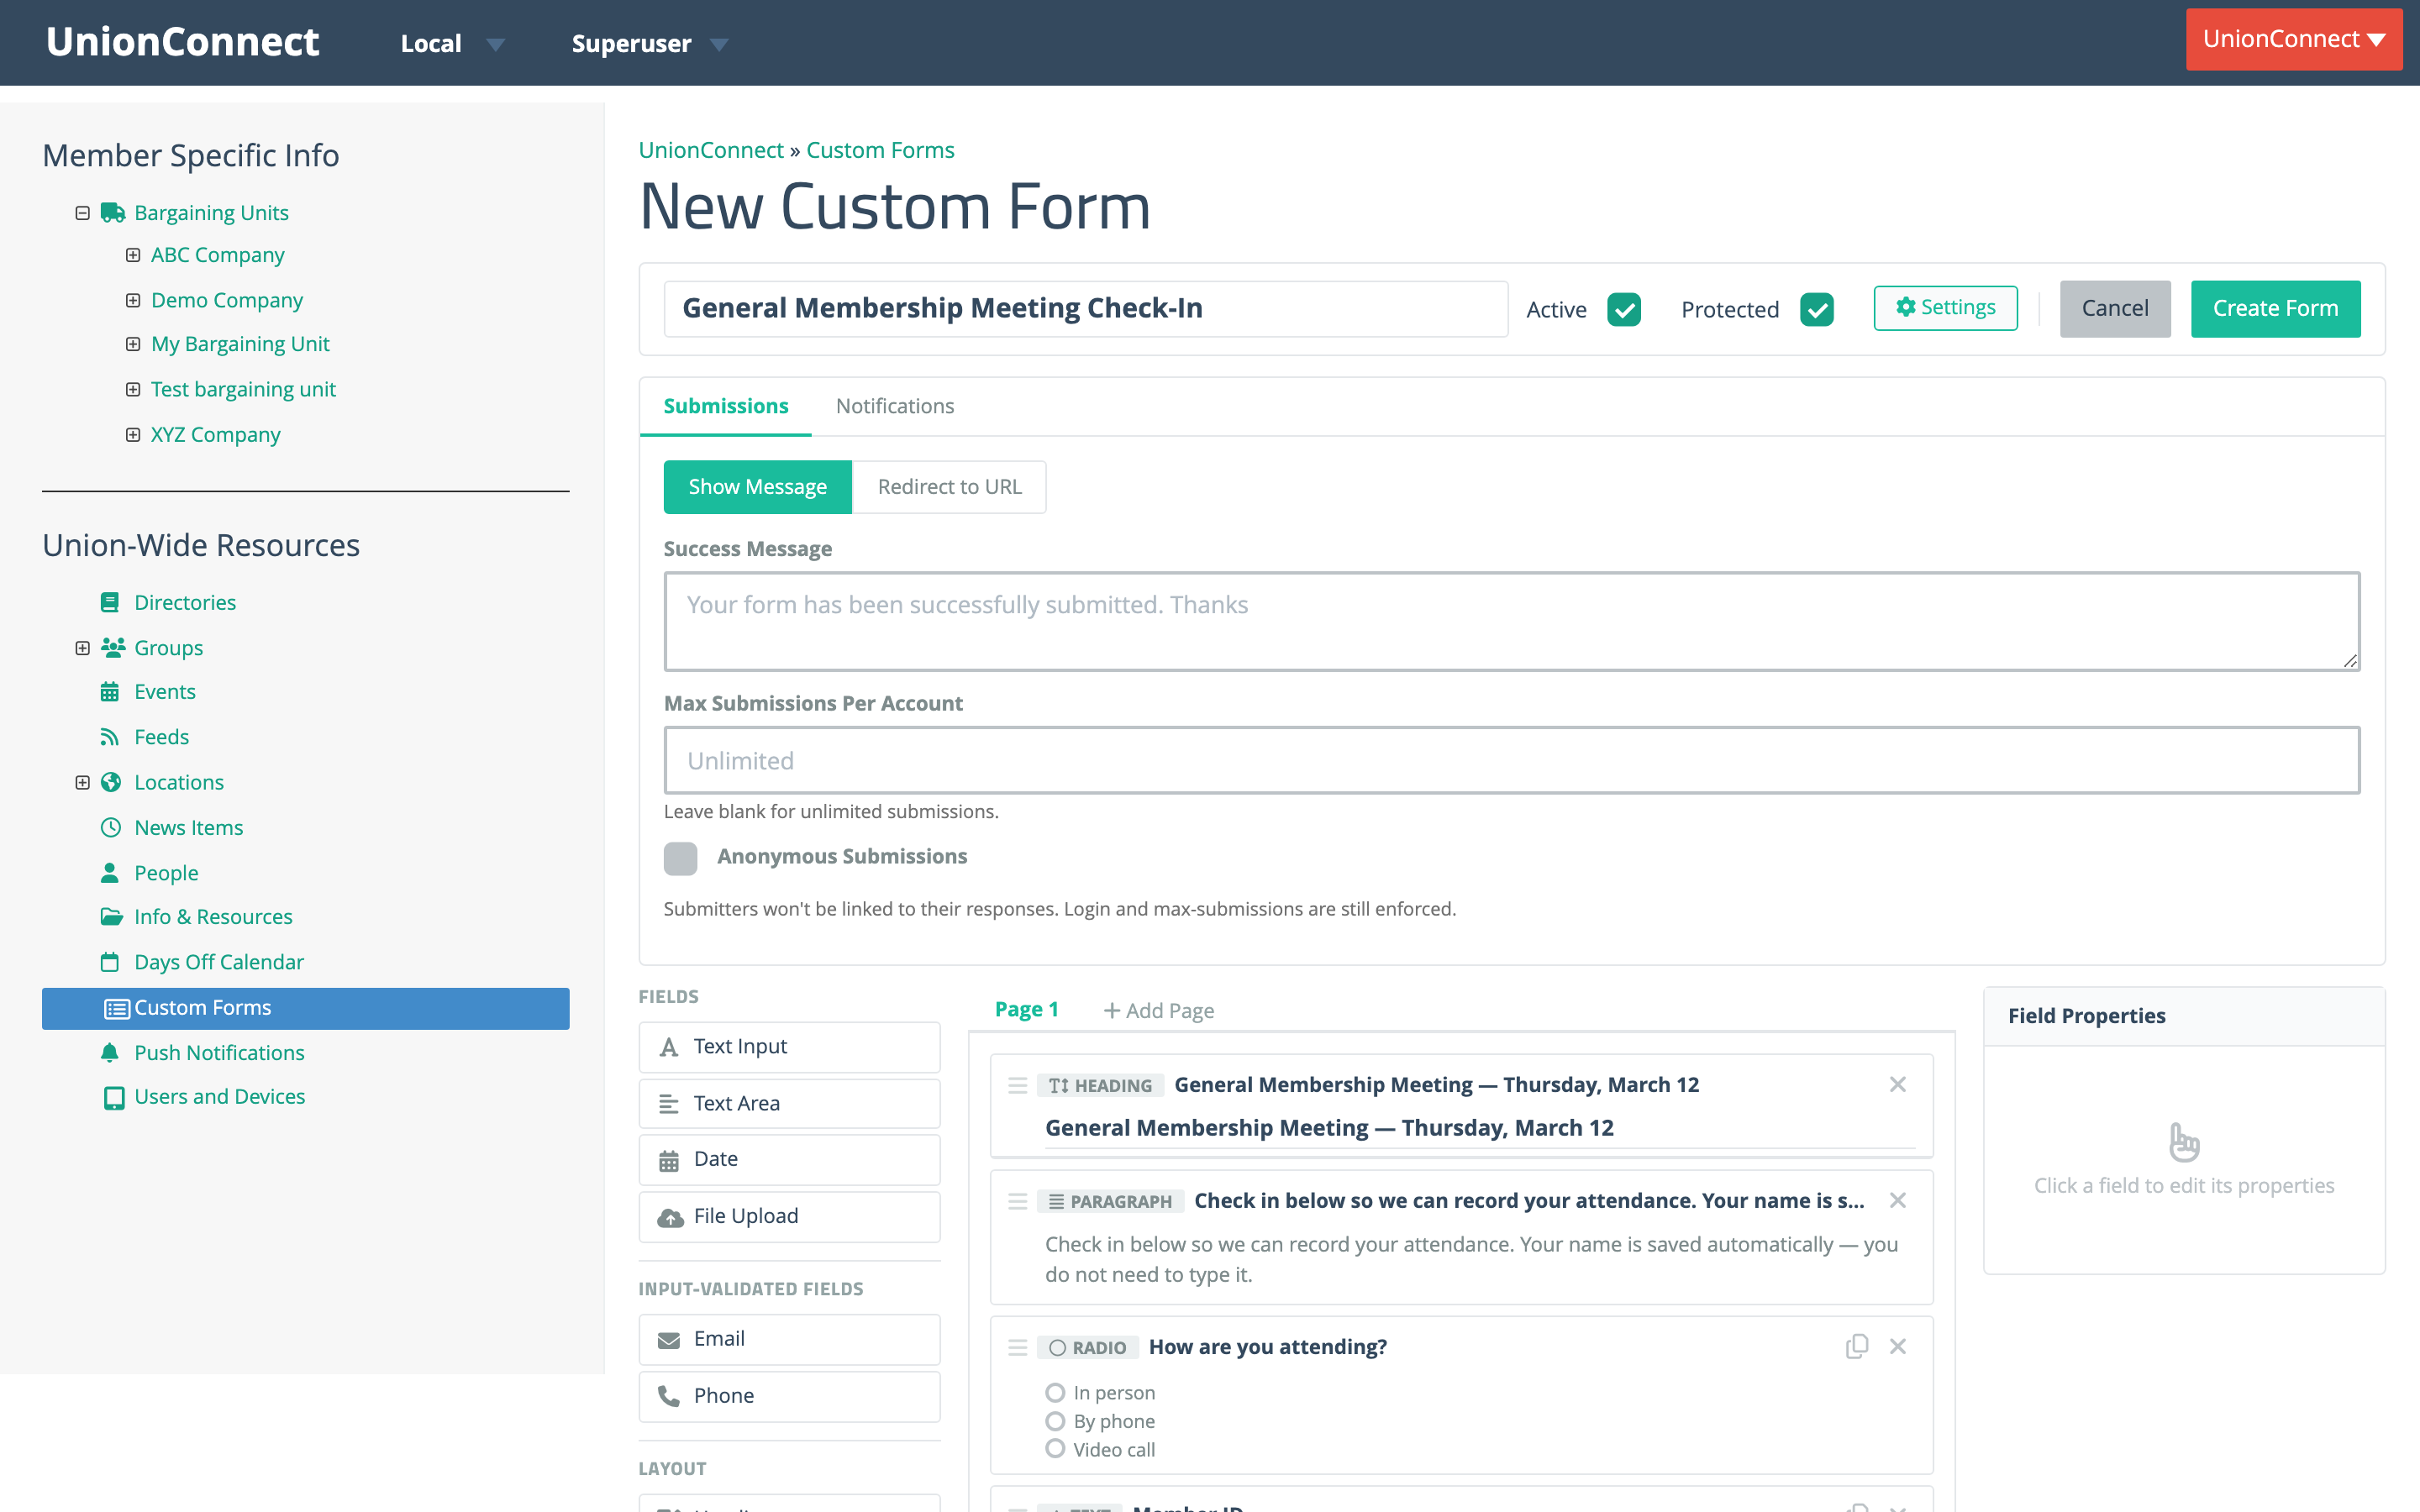
Two other settings are worth a moment:
- Max Submissions Per Account — set this to
1so nobody checks in twice by accident. - Success Message — write something a member can show a door steward, like You’re checked in. Thanks for coming!
Click Create Form to save.
Step 2 — Put it on the main menu
Members could find the form under My Forms, but for one night only you want it where nobody can miss it — on the main menu itself.
Go to Local → Edit local, open the Menu Items tab, and click + New Menu Item. Fill in the dialog:
- Label — something short and unmistakable, like Meeting Check-In.
- Description — the subtitle members see underneath, for example Check in at tonight’s membership meeting.
- Icon — search the picker for check and pick something obvious.
- Type — choose Forms, then search for your check-in form in the Select Item box and click it.
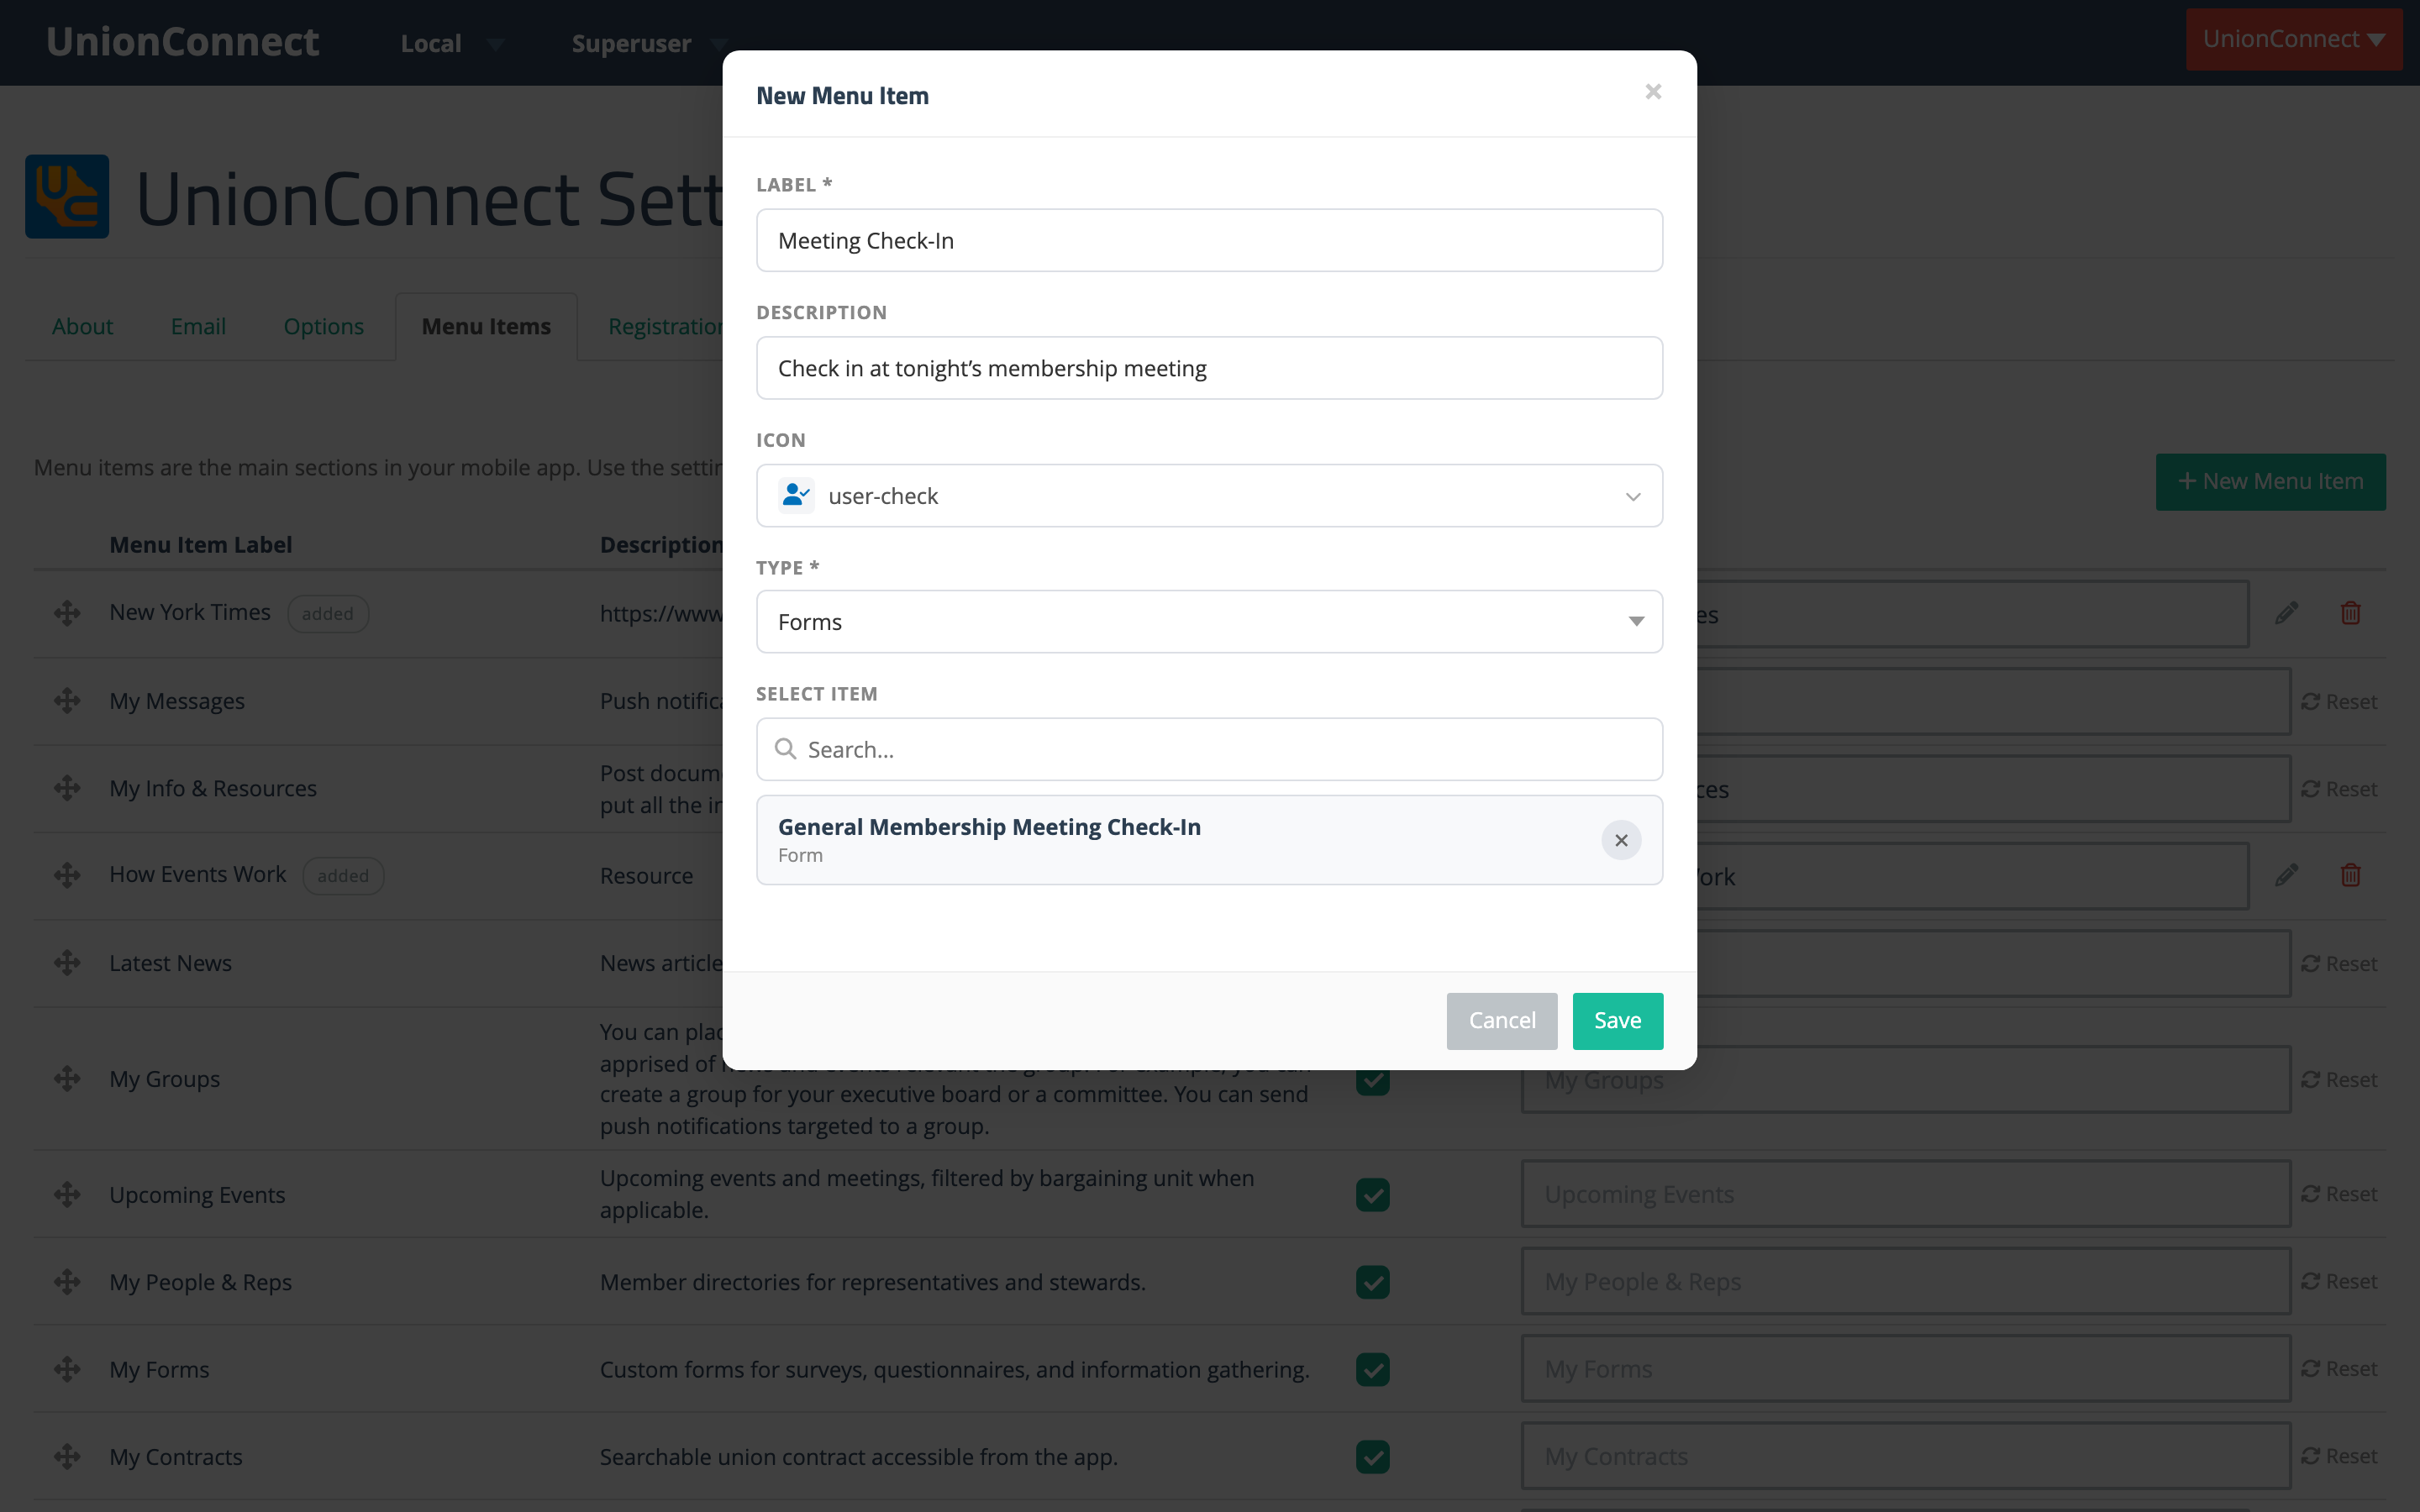
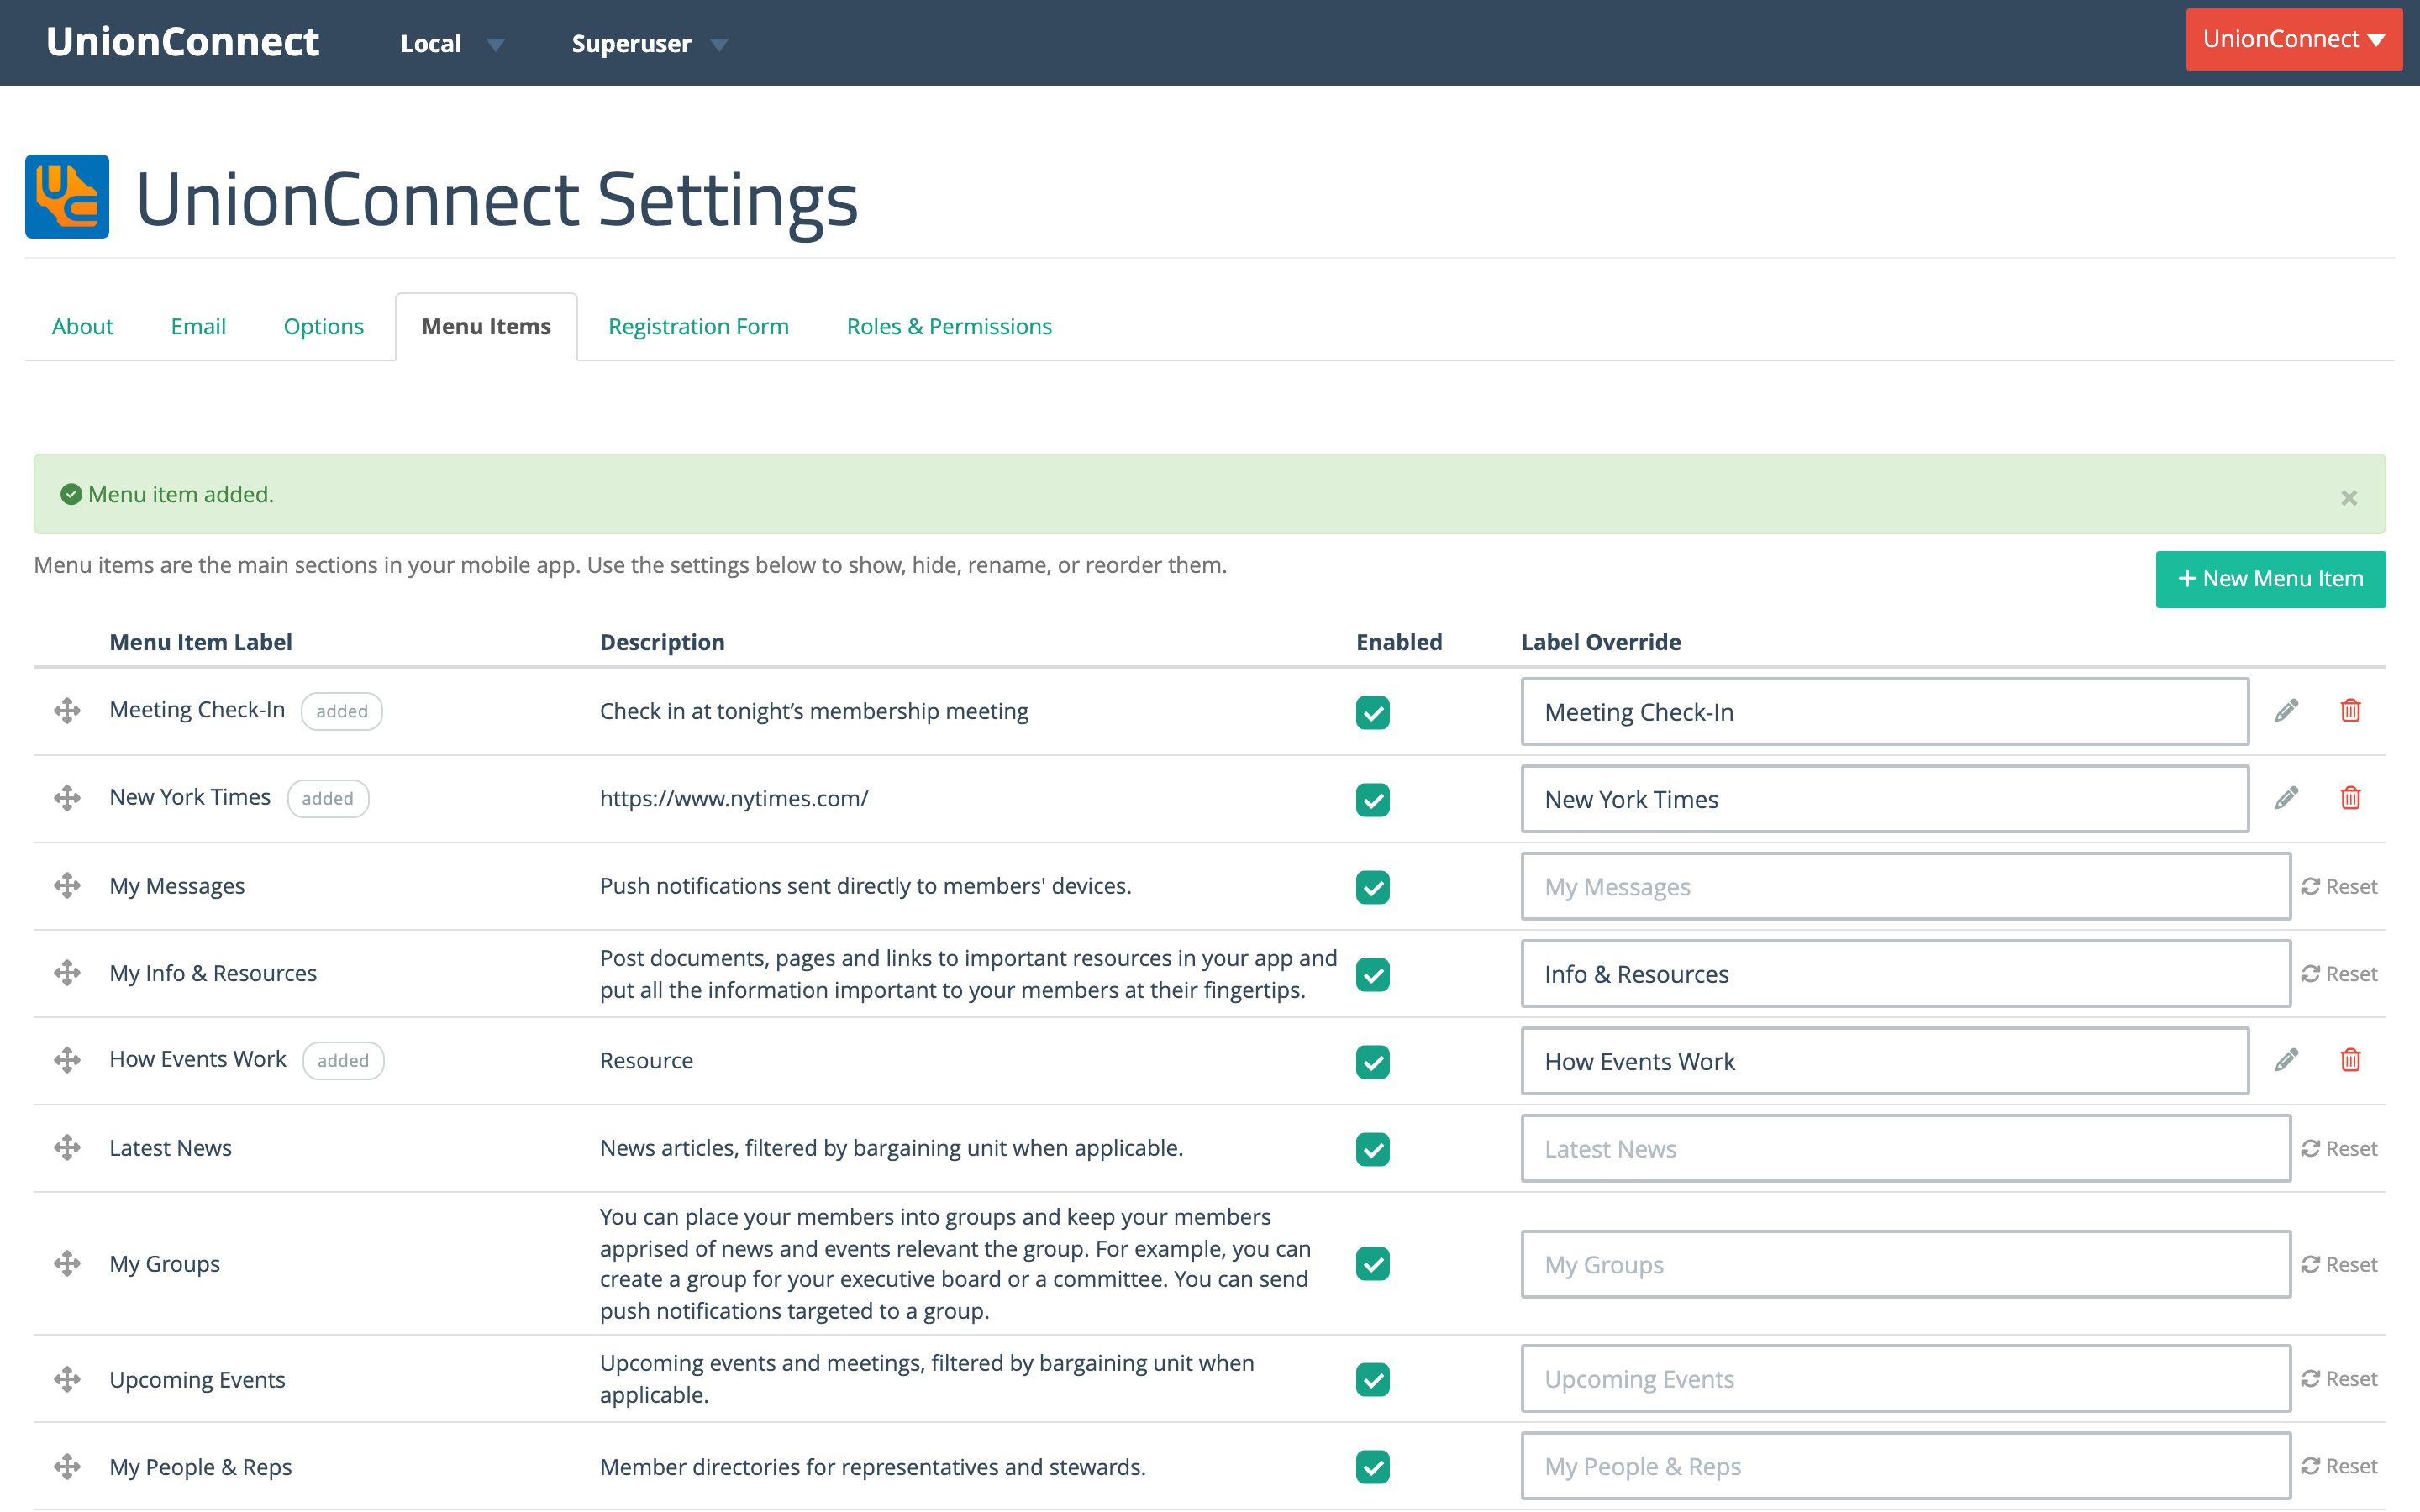
Click Save. The item appears at the top of the menu table with an added tag and its Enabled box ticked. Drag the move icon on the left if you’d rather it sat further down the list, then scroll to the bottom of the page and click Update.
Tip: add the menu item on the morning of the event, not a week ahead. It only takes a minute, and members won’t tap a check-in button for a meeting that hasn’t happened yet.
Step 3 — Members check in
Members open the app, tap Meeting Check-In on the home screen, fill out the form, and submit. Because the form is Protected, they have to be logged in and verified, so each entry is tied to a real member account.
To nudge people who are already in the room, send a push notification with the form attached. On the Custom Forms list, click the bell icon next to your form — see Send a Push Notification from Content.
Step 4 — Read your attendance roster
Go back to Custom Forms, click the dropdown arrow next to your form’s Edit button, and choose View Submissions. Every check-in is listed newest first, with the member’s name, their email address, and the exact time they checked in.
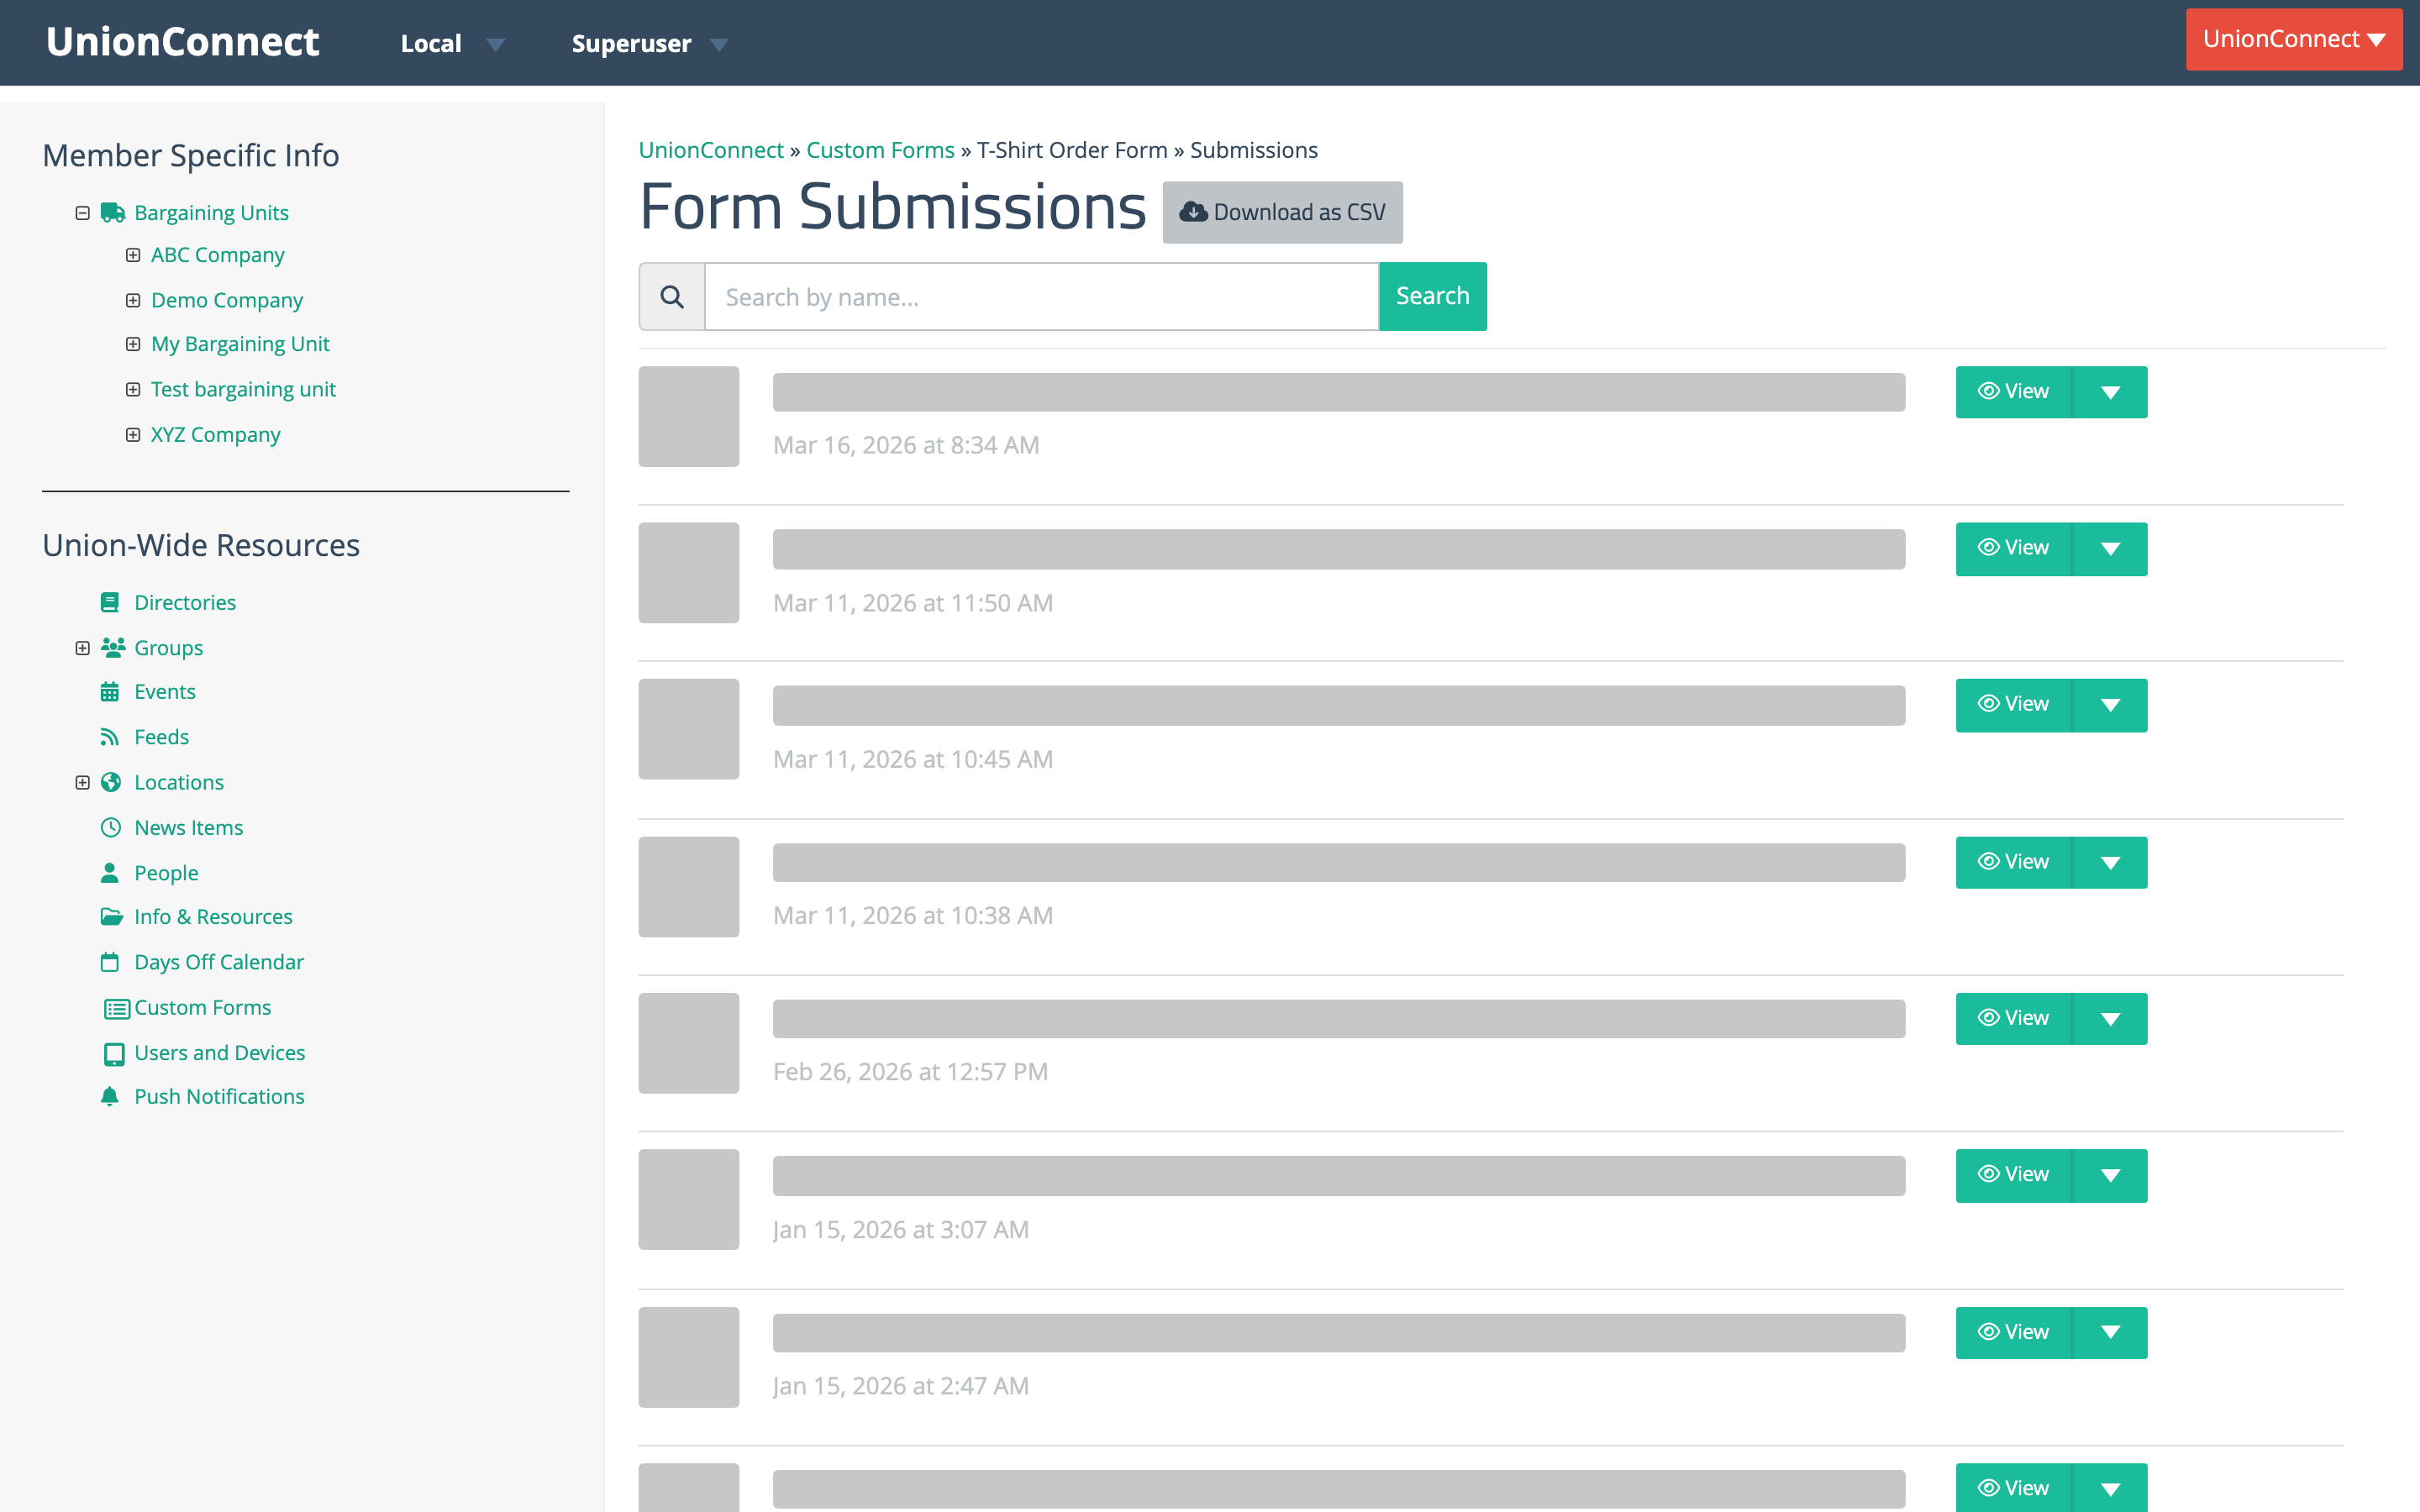
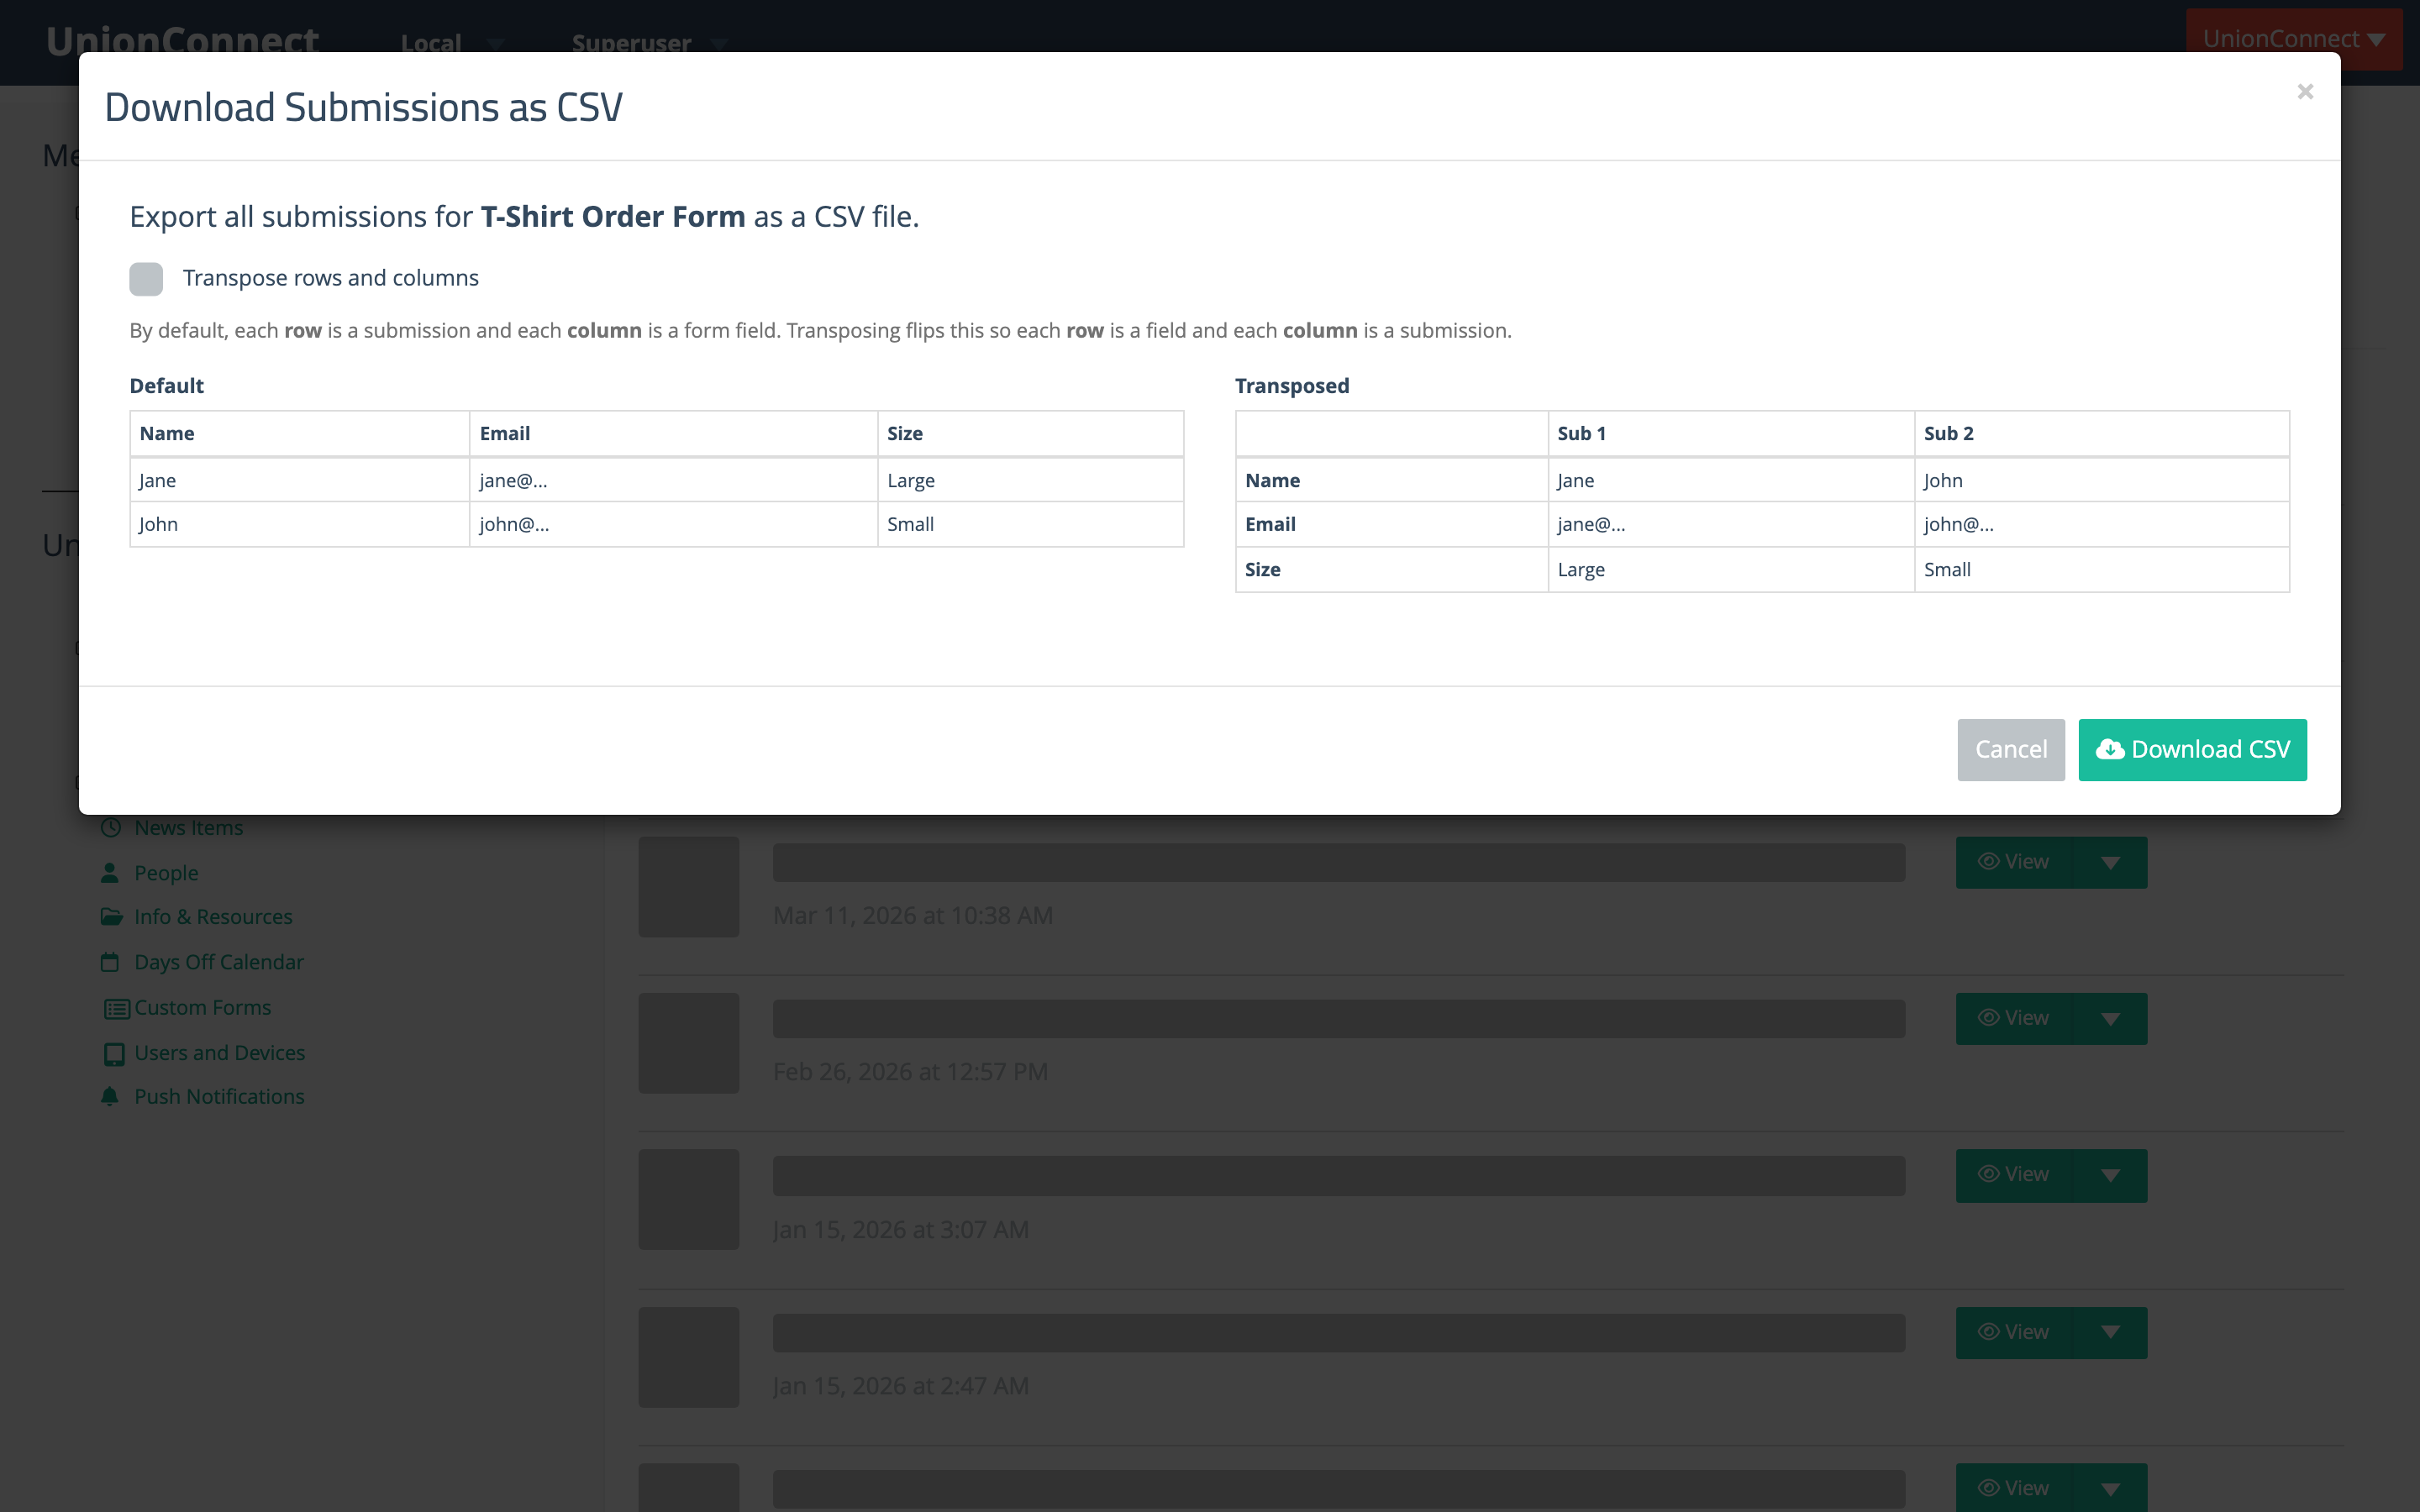
Use Search by name… to answer “was so-and-so there?” on the spot. For minutes, quorum records, or anything you need to keep, click Download as CSV — you’ll get a spreadsheet with a Date and Name column followed by every question on your form.
Step 5 — Close check-in when the event is over
This is the part that makes the whole thing worth doing. Open the form (Custom Forms → Edit), untick Active at the top, and click Update Form.
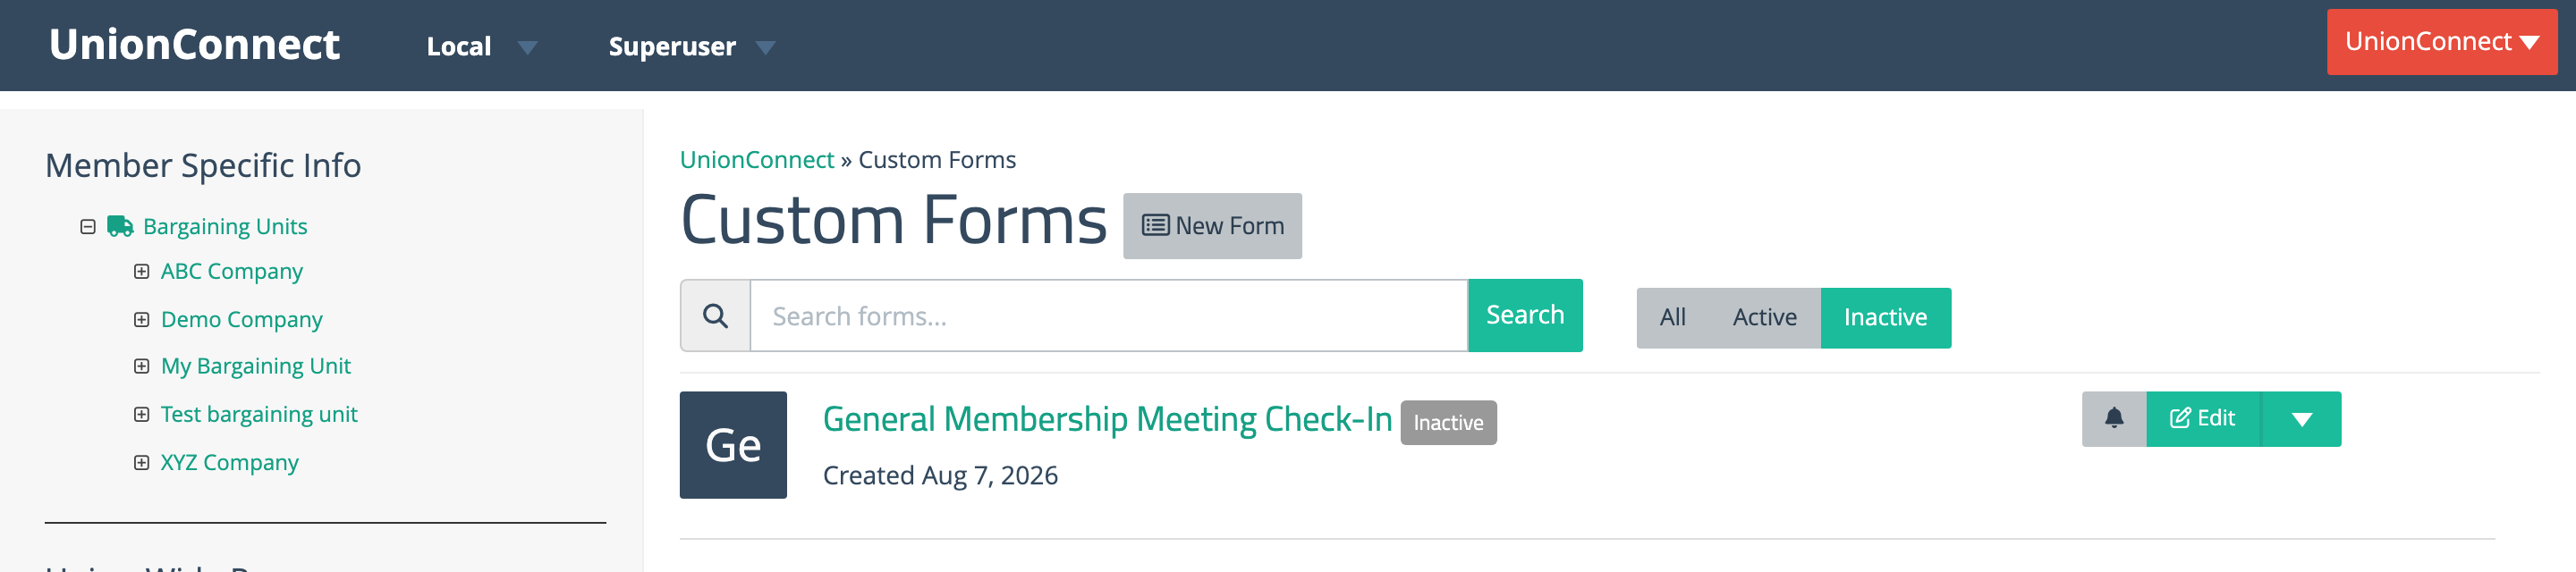
That one checkbox does three things at once:
- The Meeting Check-In item disappears from the app’s main menu.
- The form disappears from the app’s My Forms list.
- Every submission you already collected is kept, untouched.
You don’t delete the menu item and you don’t edit the menu at all. Members simply stop seeing it the next time the app refreshes — usually the next time they open it.
What you’ll see in the app manager
The menu item does not vanish from your Menu Items tab — that would leave you with no way to bring it back. Instead the row is highlighted and flagged with an amber Broken link tag, so you can see at a glance that it isn’t reaching members:
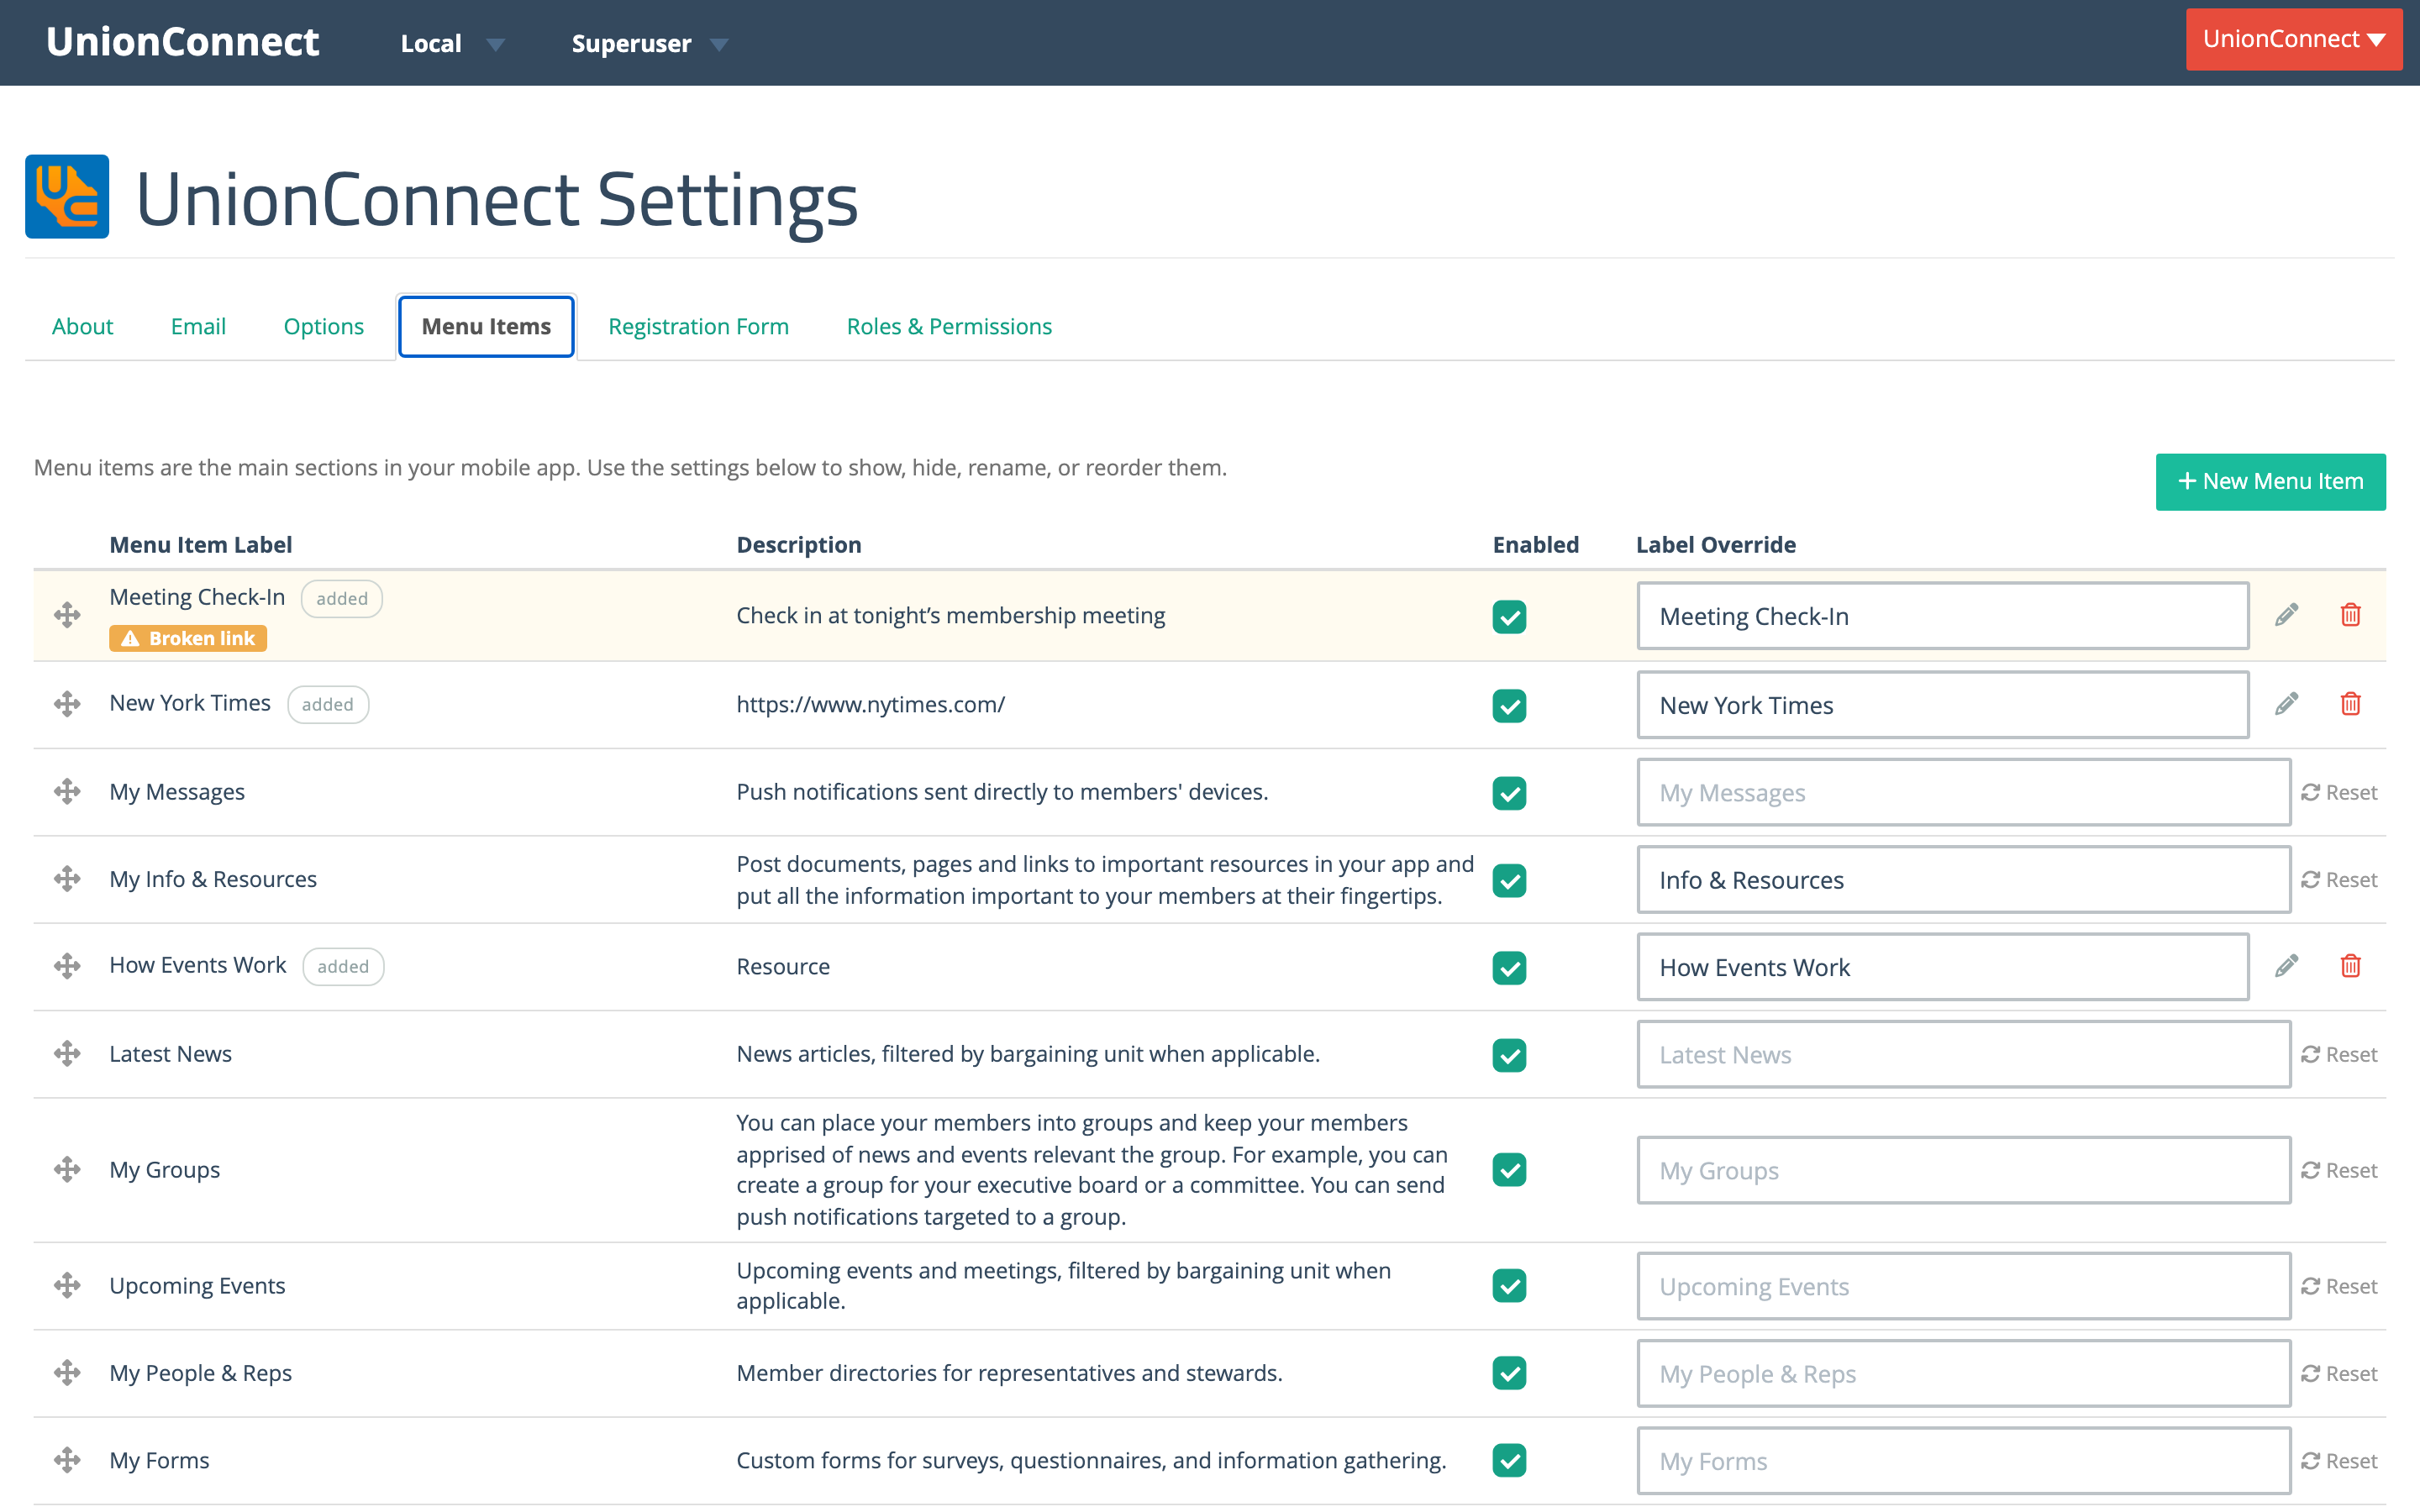
Click the pencil icon and the dialog tells you exactly why: The linked form is currently inactive.
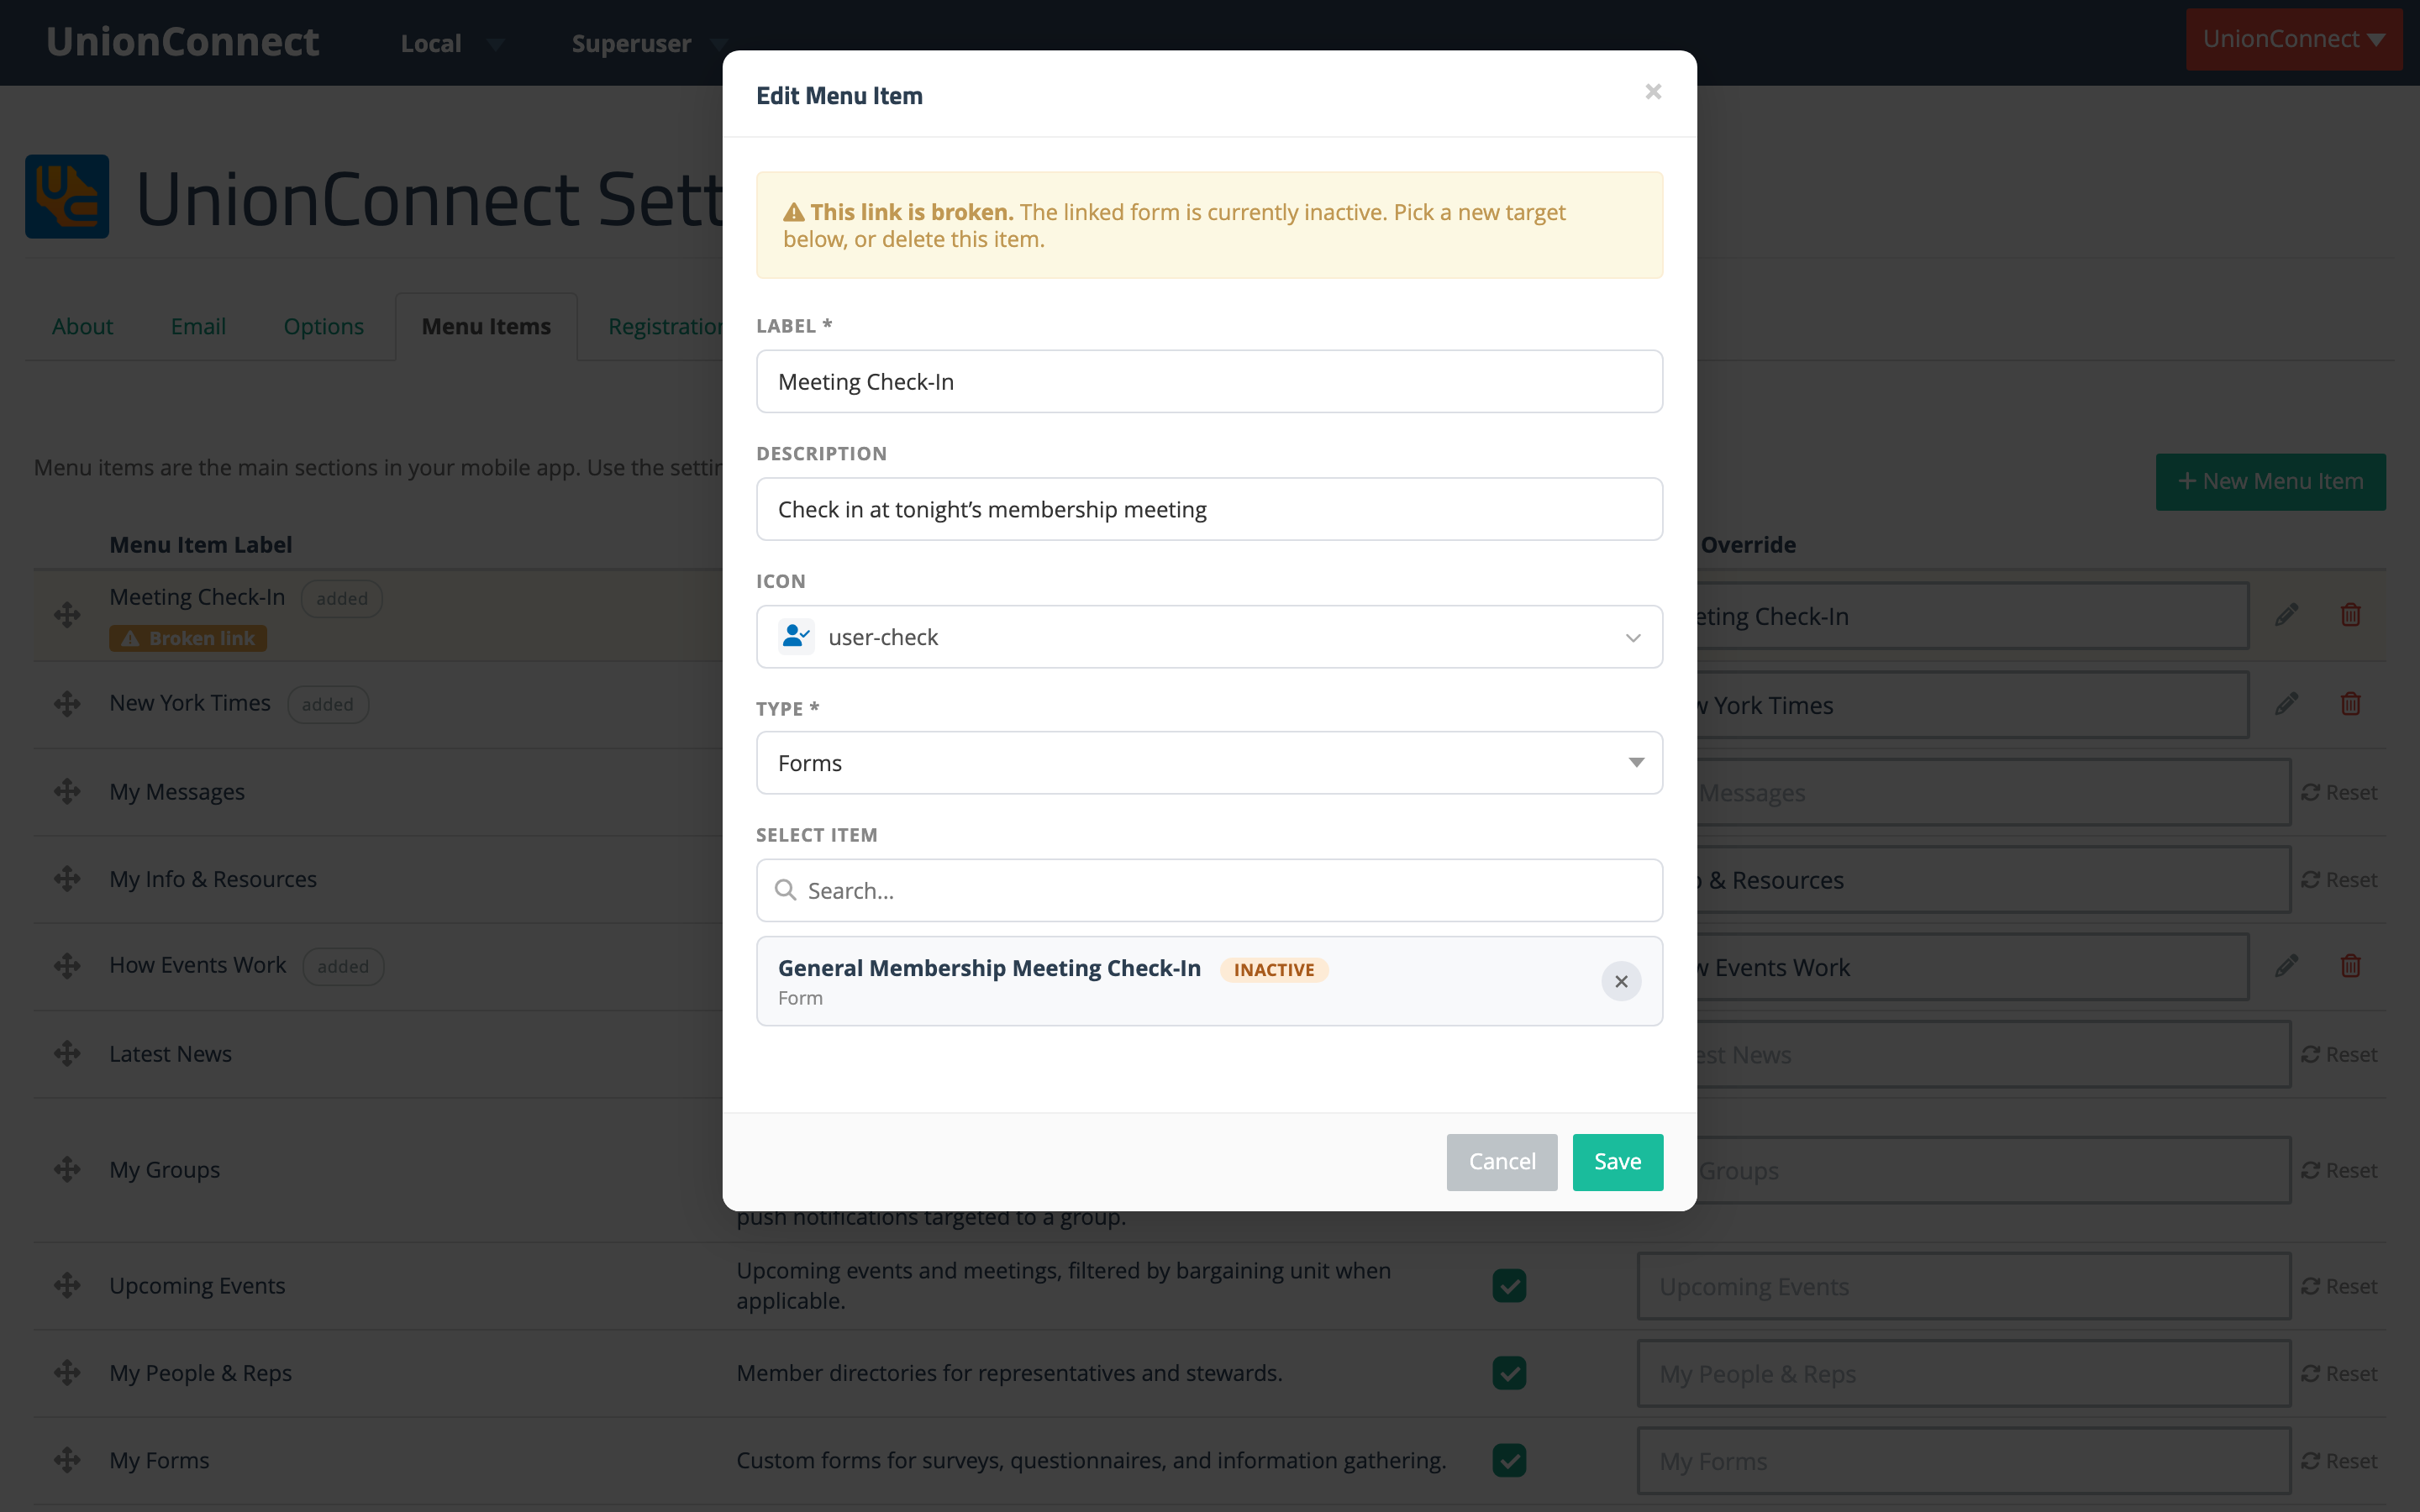
This is expected, and you can ignore it. Leave the row alone and it costs you nothing.
Running it again next month
Reopen the form, edit the heading to the new date, tick Active, and click Update Form. The menu item comes straight back — same label, same icon, same position. You never have to rebuild it or re-pick the form.
One thing to decide before you do: submissions from last month are still on the form. There is no button that clears them all at once: in View Submissions, each submission has its own Delete option in the dropdown on its row, so clearing a long roster means deleting entries one by one — after you’ve downloaded the CSV you want to keep. For most meetings it is simpler to keep a running history and sort the CSV by date.
Things to know
- Deactivating hides the form; it doesn’t lock it. Anyone still holding the form’s direct link can submit to it after you untick Active. For an attendance roster that’s rarely a problem, but if you need a hard cutoff, delete the menu item and note the time you closed check-in.
- The form must be Active when you create the menu item. The Select Item picker only lists active forms, so build and activate the form first, then add it to the menu.
- The change reaches members on the app’s next refresh, not instantly. A member staring at the menu when you untick the box will still see it until they reopen the app.
- The same recipe works for anything time-boxed — a strike-vote sign-up, a picket shift roster, a conference RSVP, a one-week straw poll. Build the form, menu it, unmenu it by unticking Active.