If you have a list of people in a spreadsheet (CSV, XLS, or XLSX file), you can import them all at once instead of adding them one by one. The import wizard walks you through each step.
Starting the Import
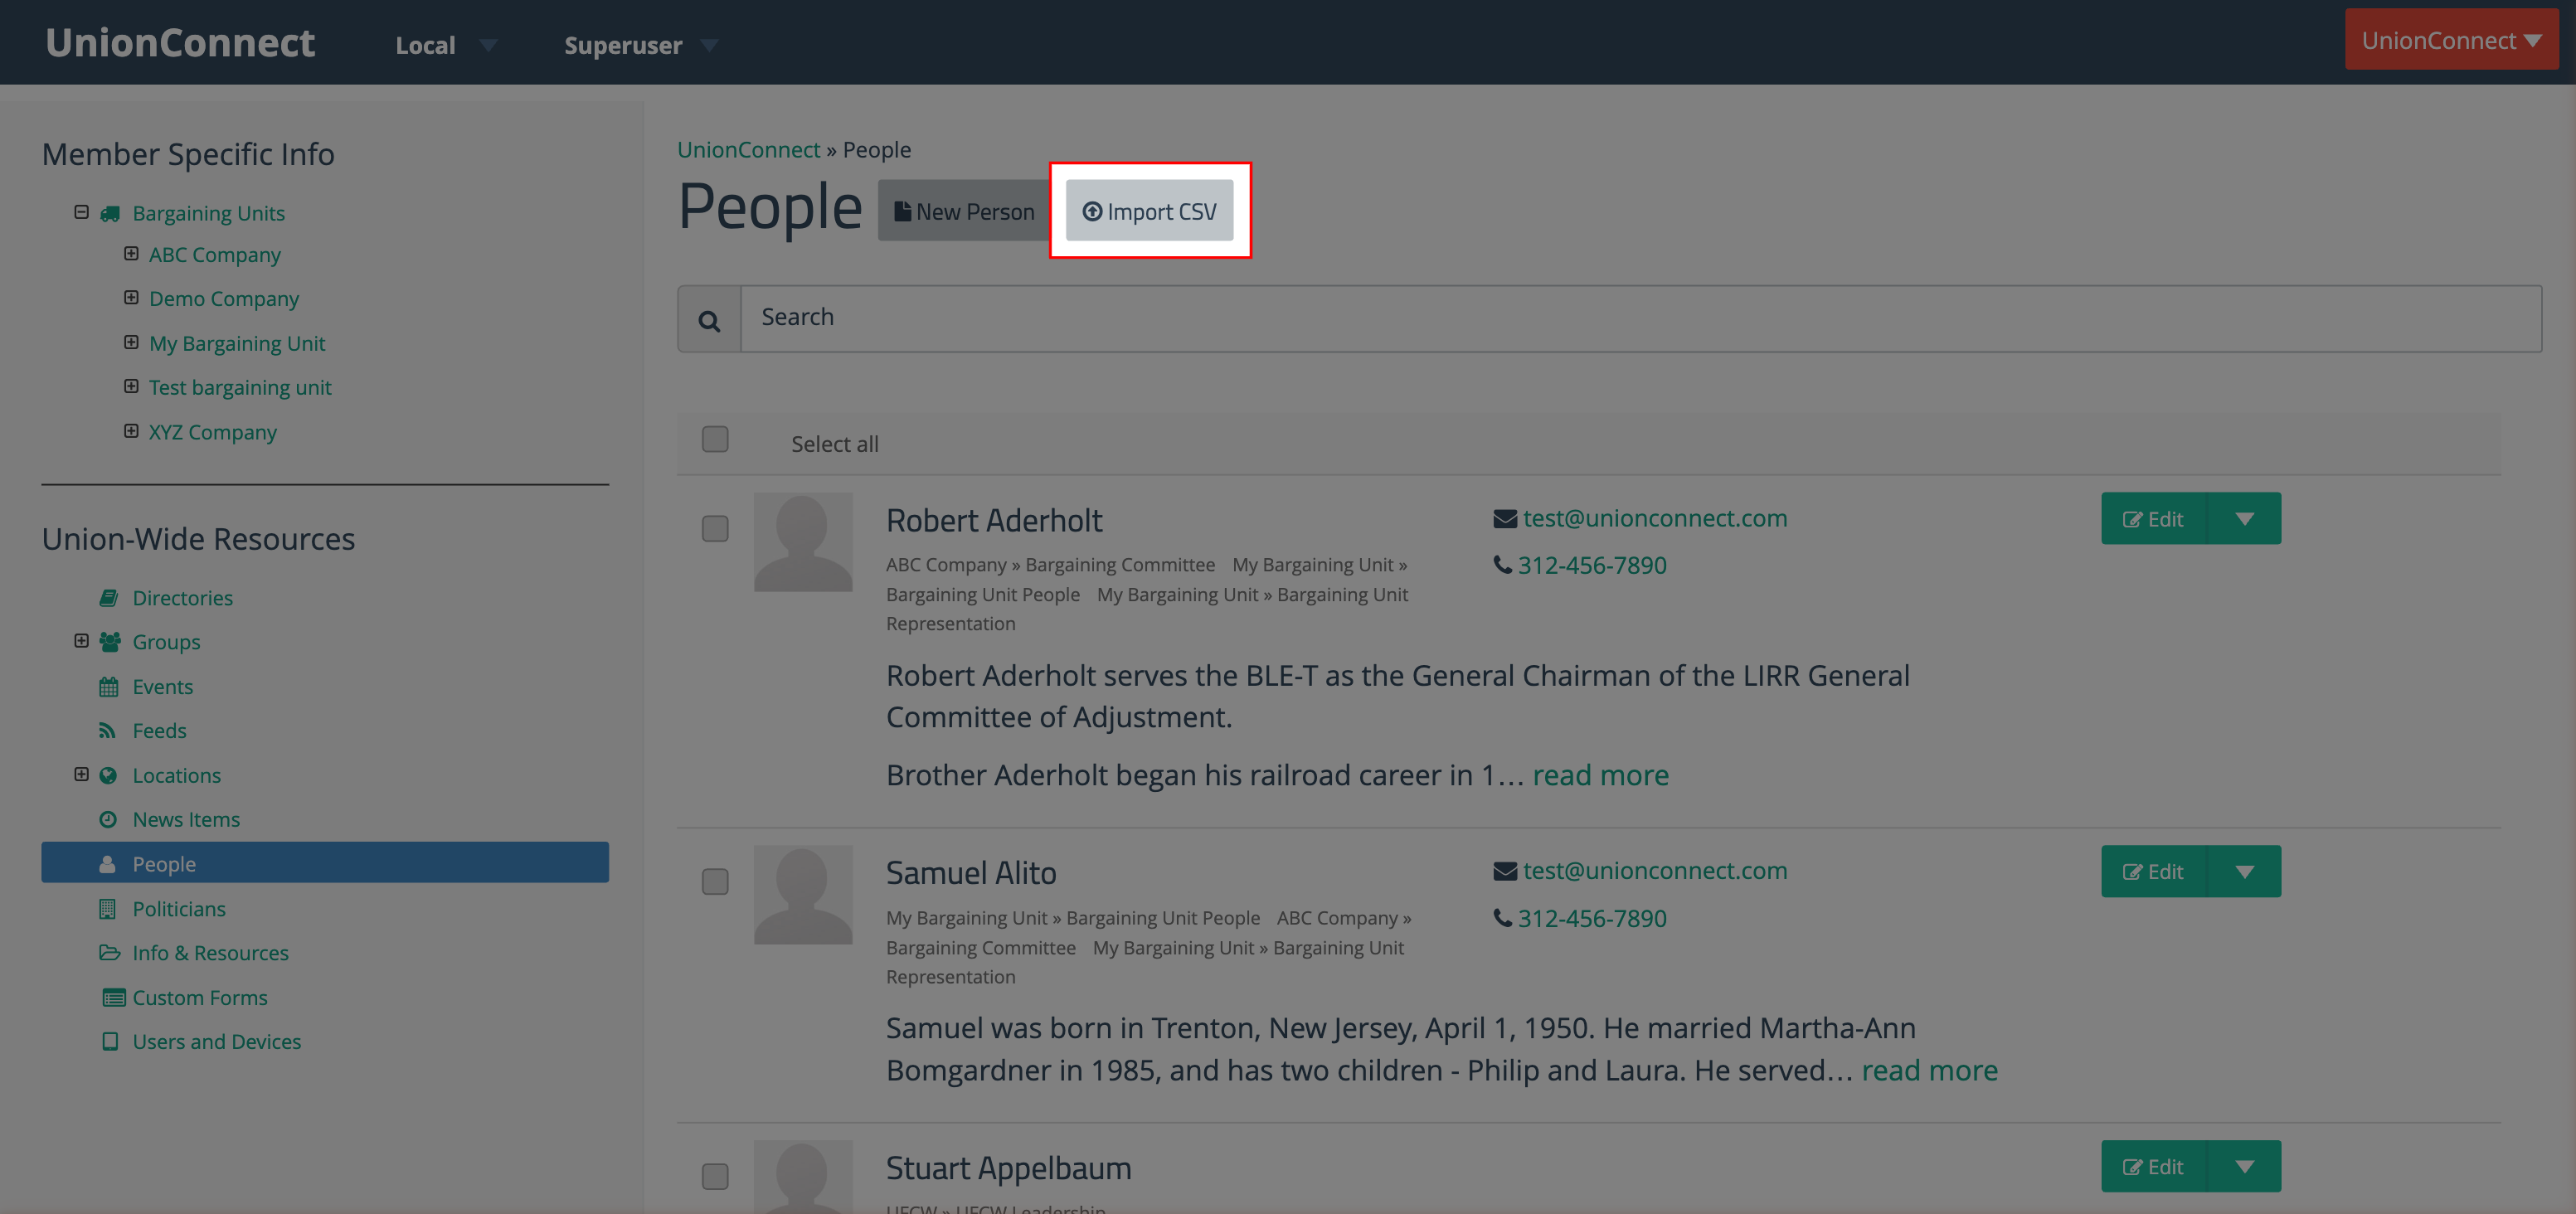
- Log in to the app manager.
- On the menu on the left, under Union-Wide Resources, click People.
- Click the Import CSV button at the top of the page, next to New Person.
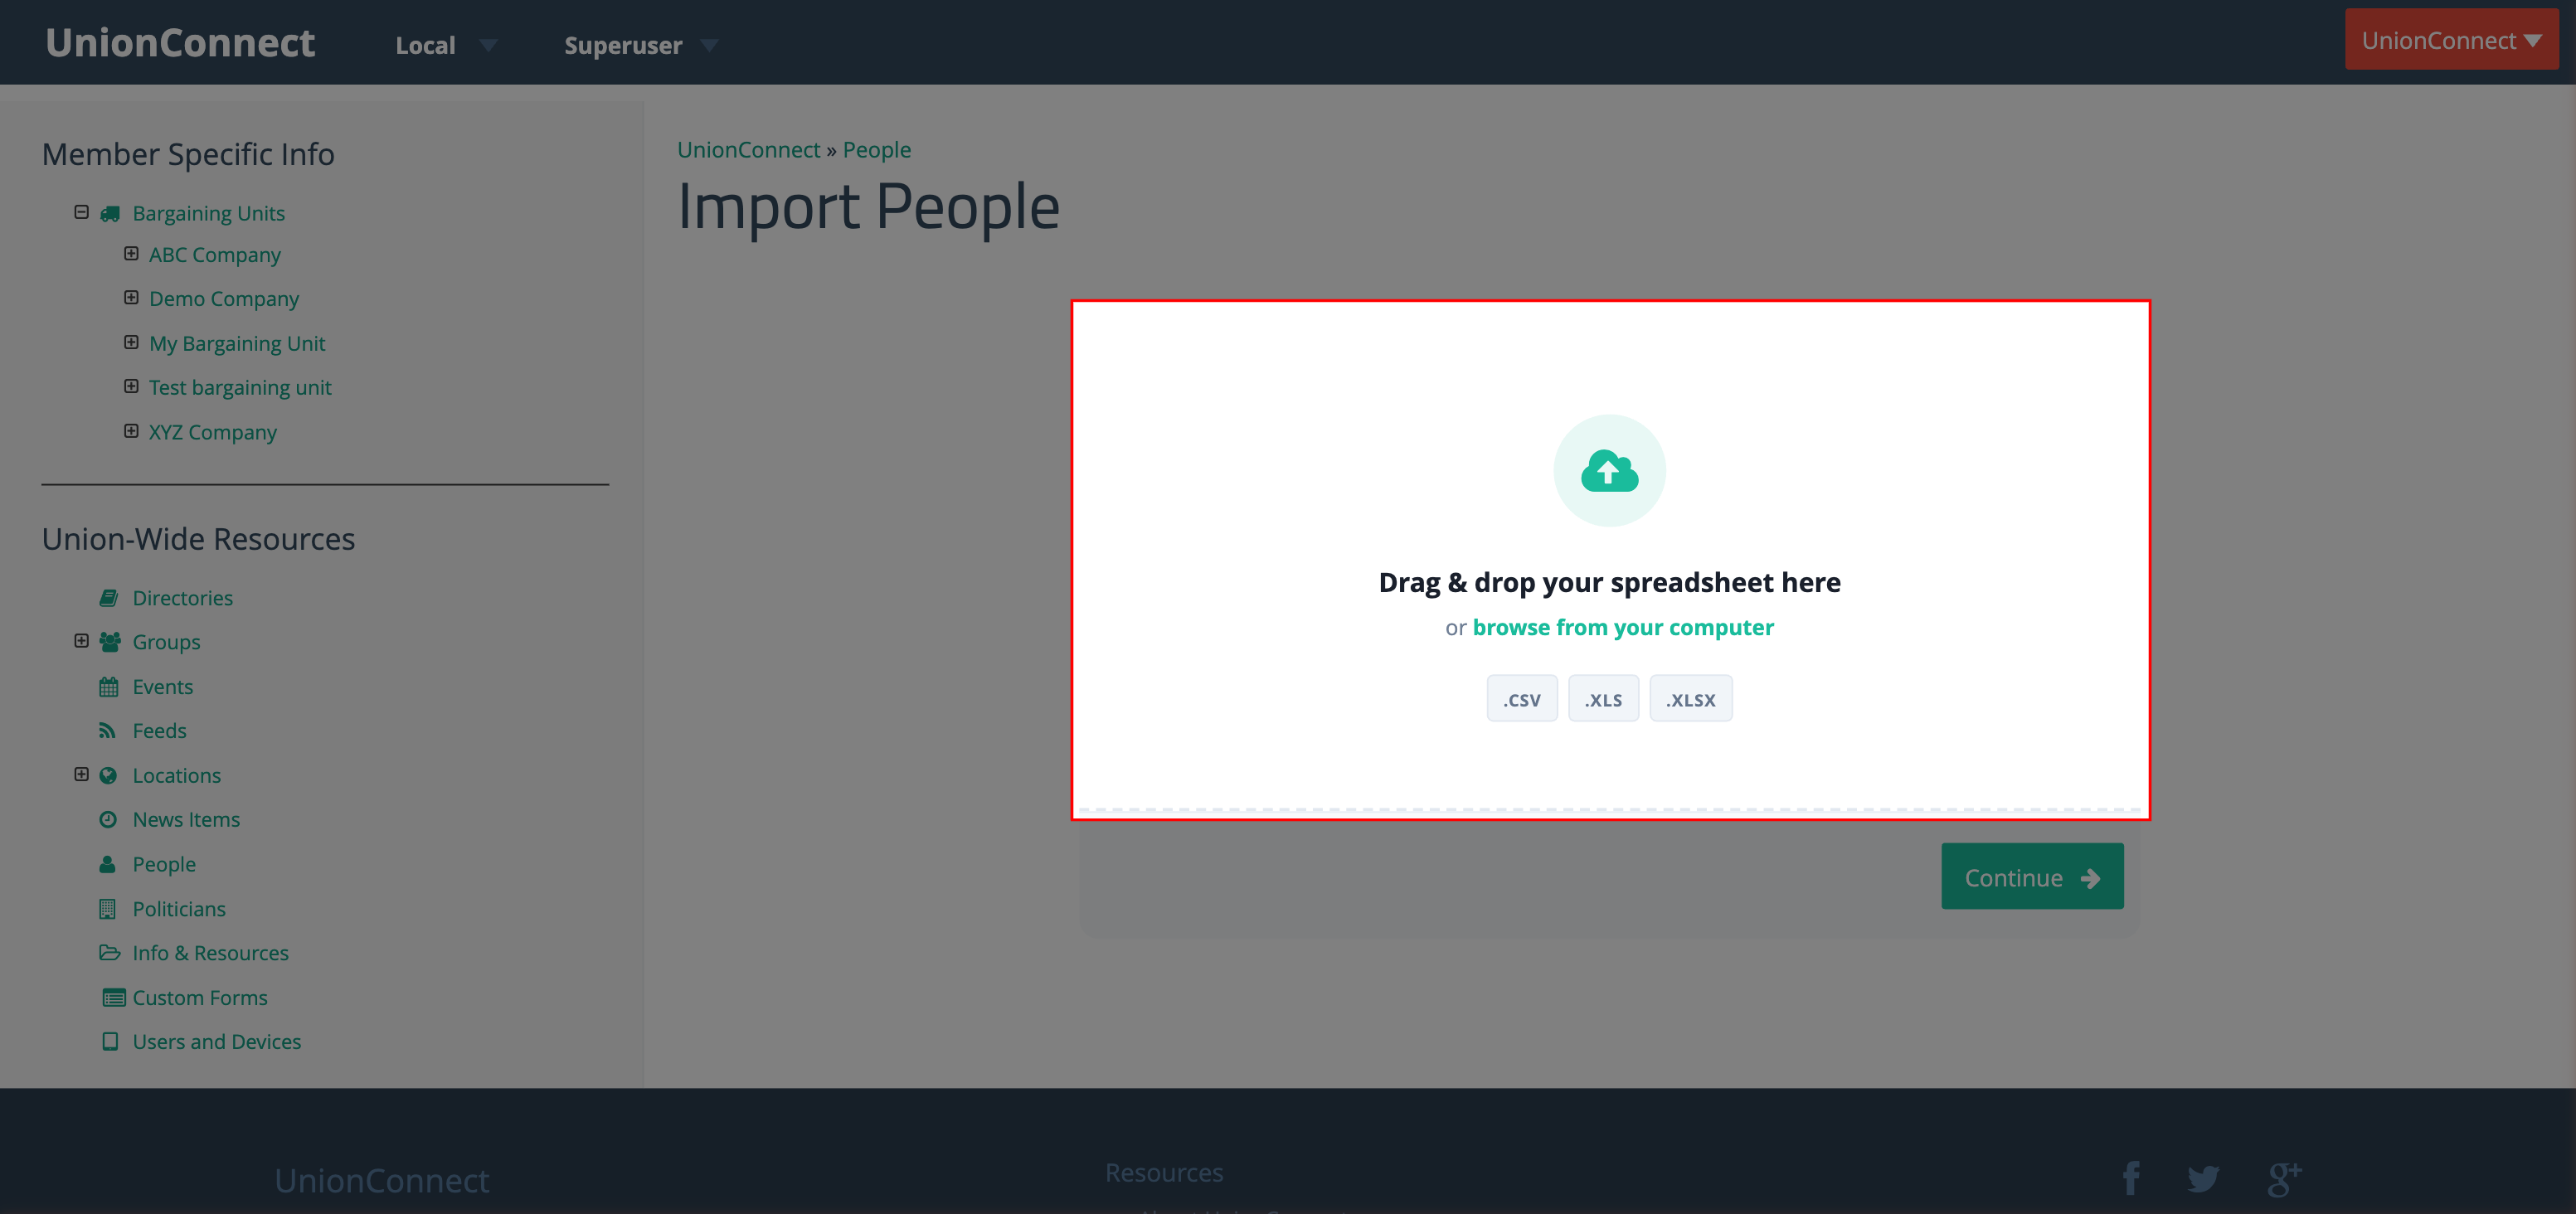
Step 1: Upload Your File
You will see a drag-and-drop area where you can upload your spreadsheet. You can either drag your file onto the upload area or click browse from your computer to select it. Accepted file formats are .CSV, .XLS, and .XLSX.
After selecting a file, you will see the filename and file size displayed. If you picked the wrong file, click Choose a different file to select another one.
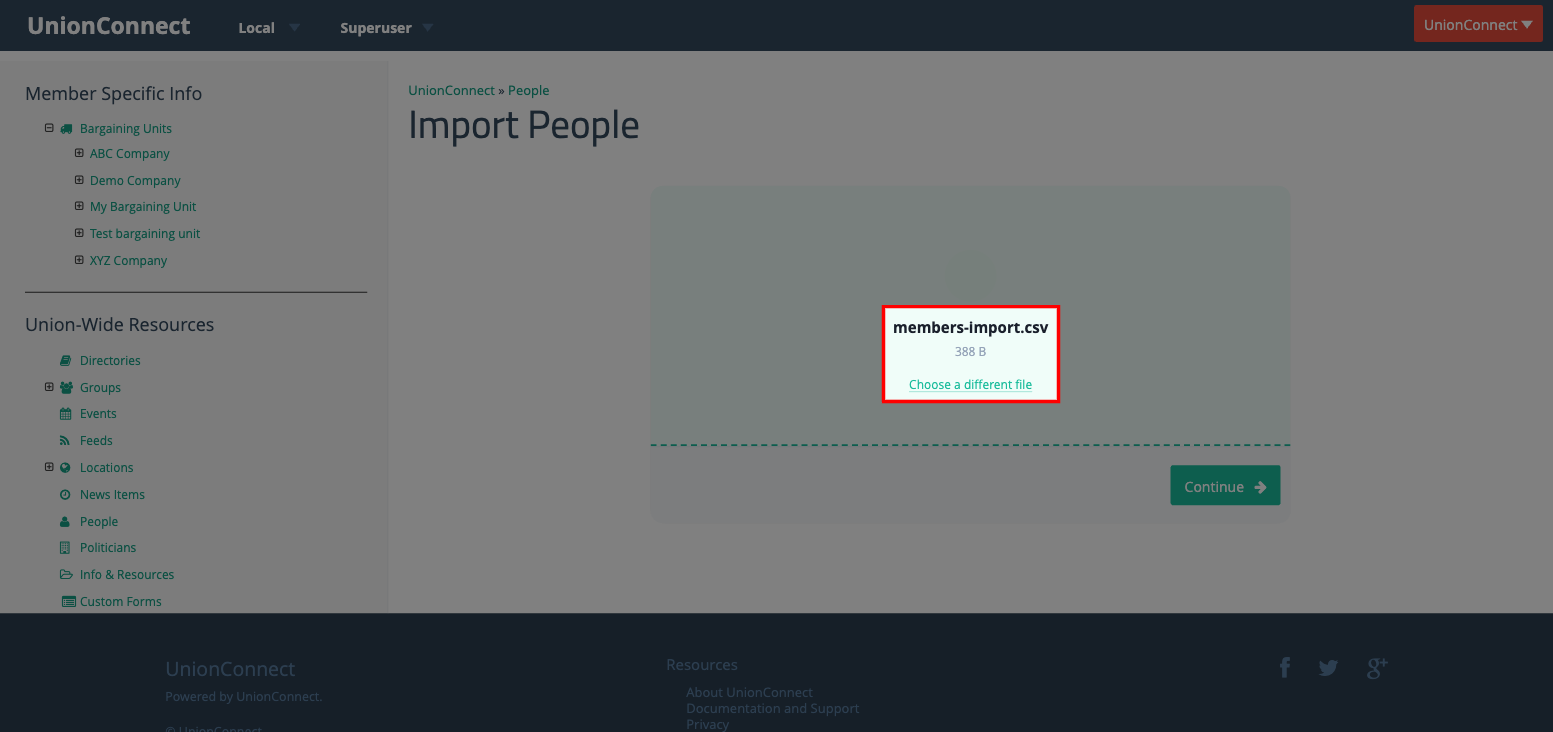
Click Continue to proceed to the next step.
Step 2: Map Columns
The wizard will read your spreadsheet and show you a table with each column from your file. It tries to automatically match your column names to the right fields (for example, a column called “email” will be mapped to the Email field).
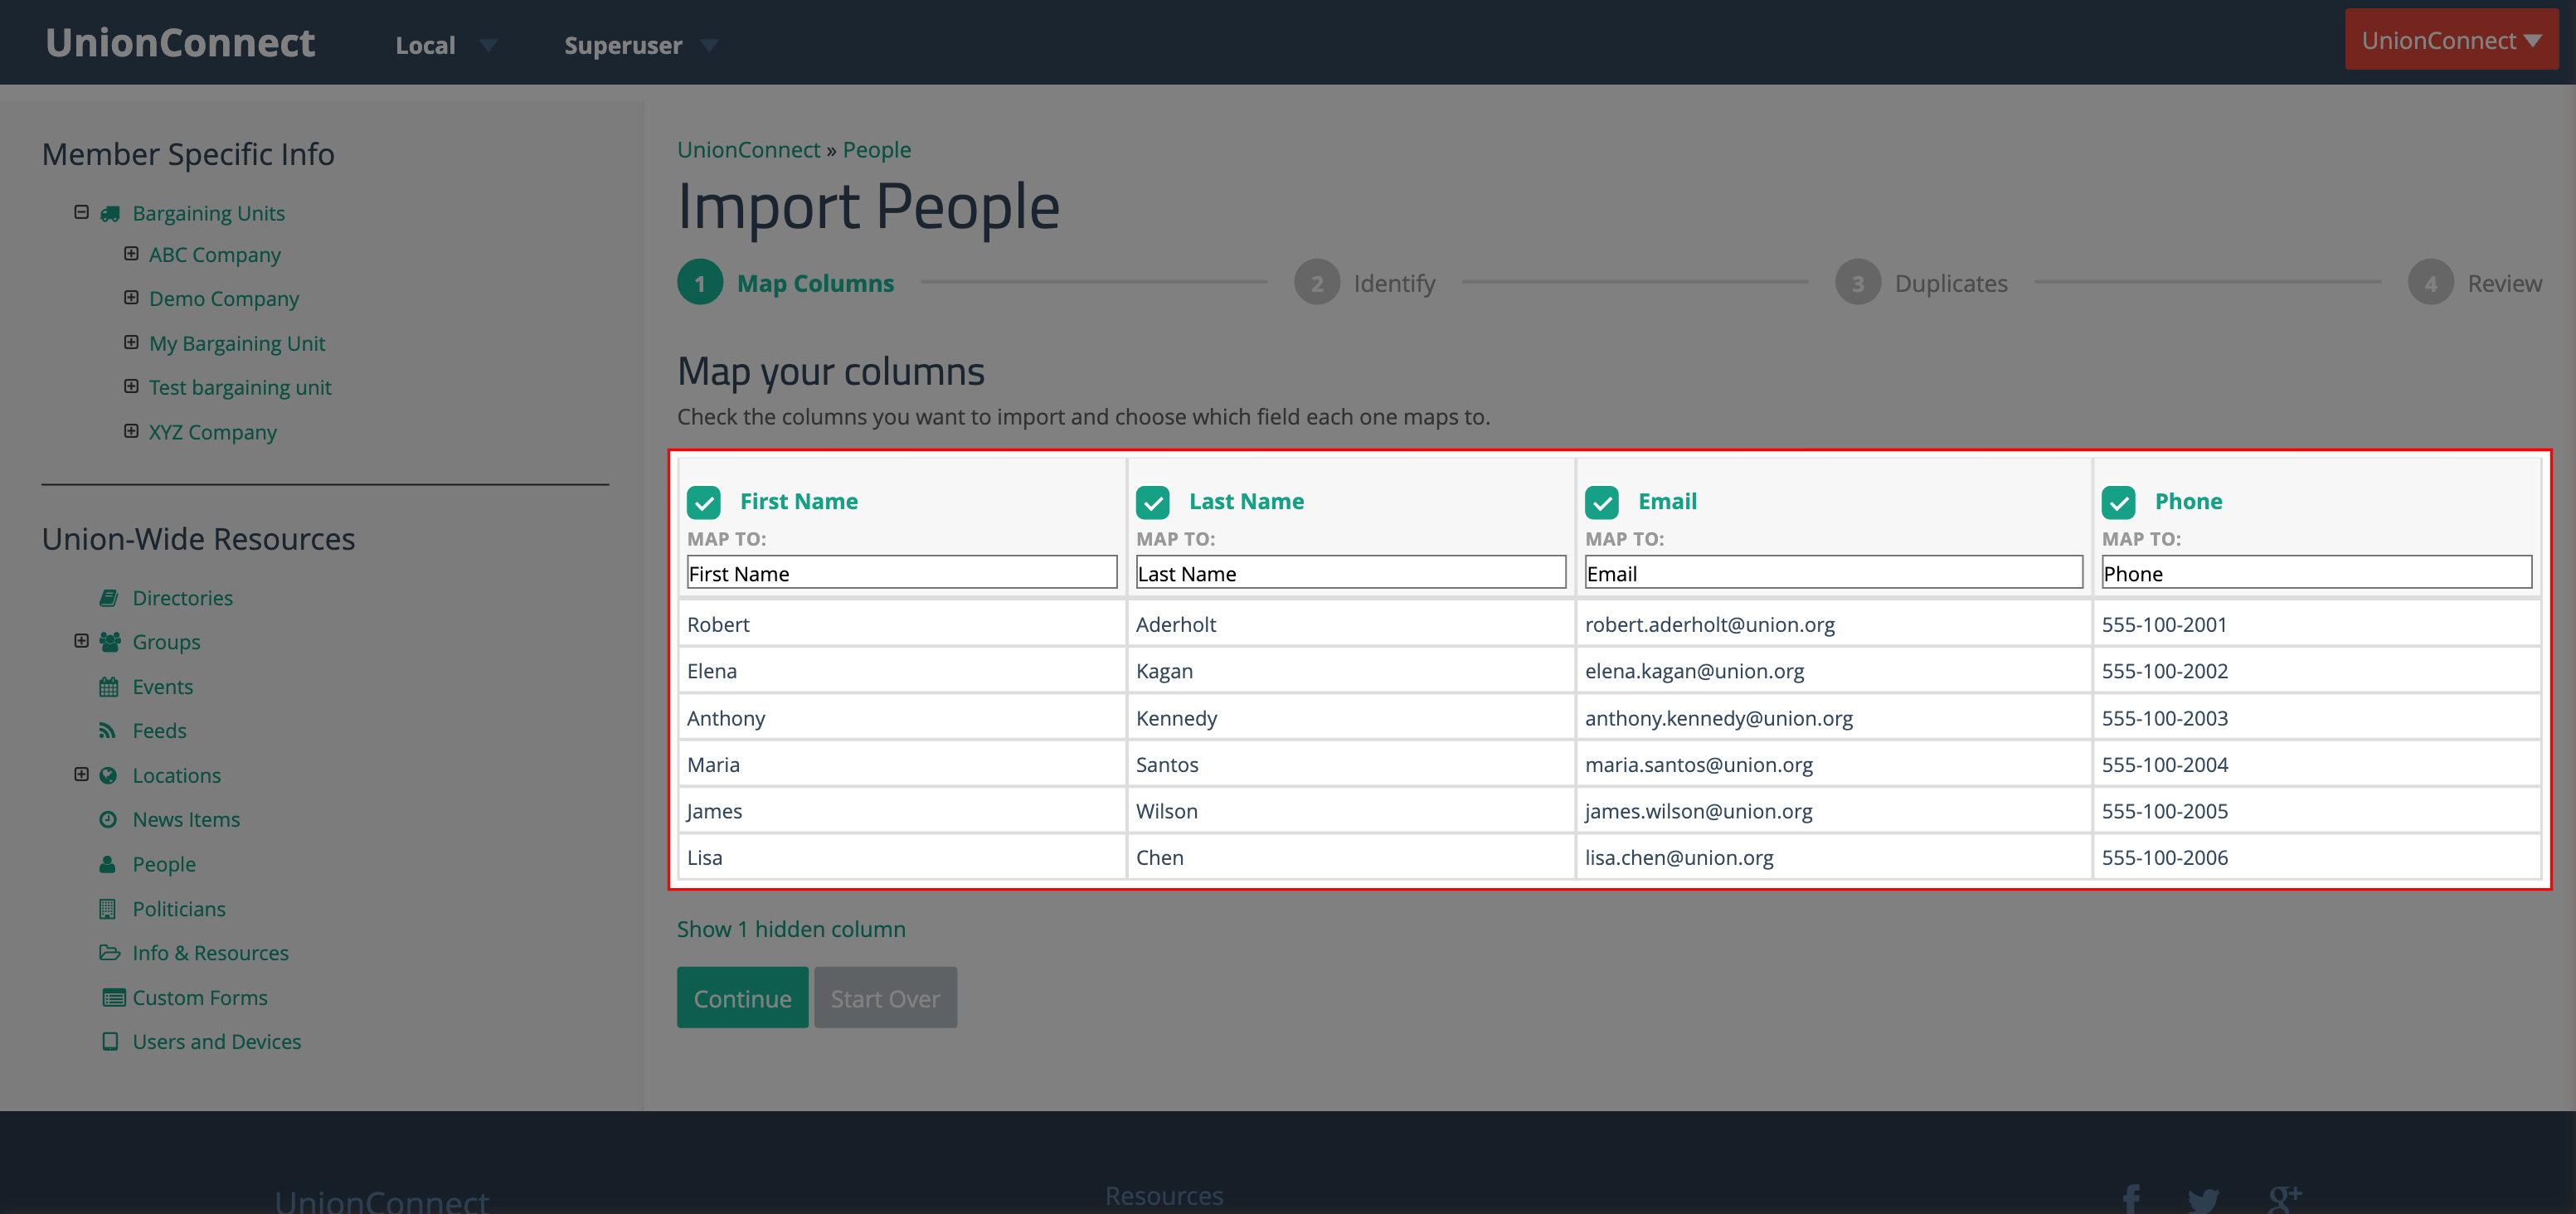
For each column:
- The checkbox controls whether the column is included in the import. Uncheck it to skip a column.
- The MAP TO dropdown lets you choose which person field the column maps to: First Name, Last Name, Title, Email, Phone, Phone Ext, Bio, or Area Code.
If your file has columns that were not automatically recognized, they will be hidden by default. Click the Show hidden columns link to reveal them. Hidden columns appear dimmed and are set to “Skip” by default. You can check them and assign a mapping if you want to include them.
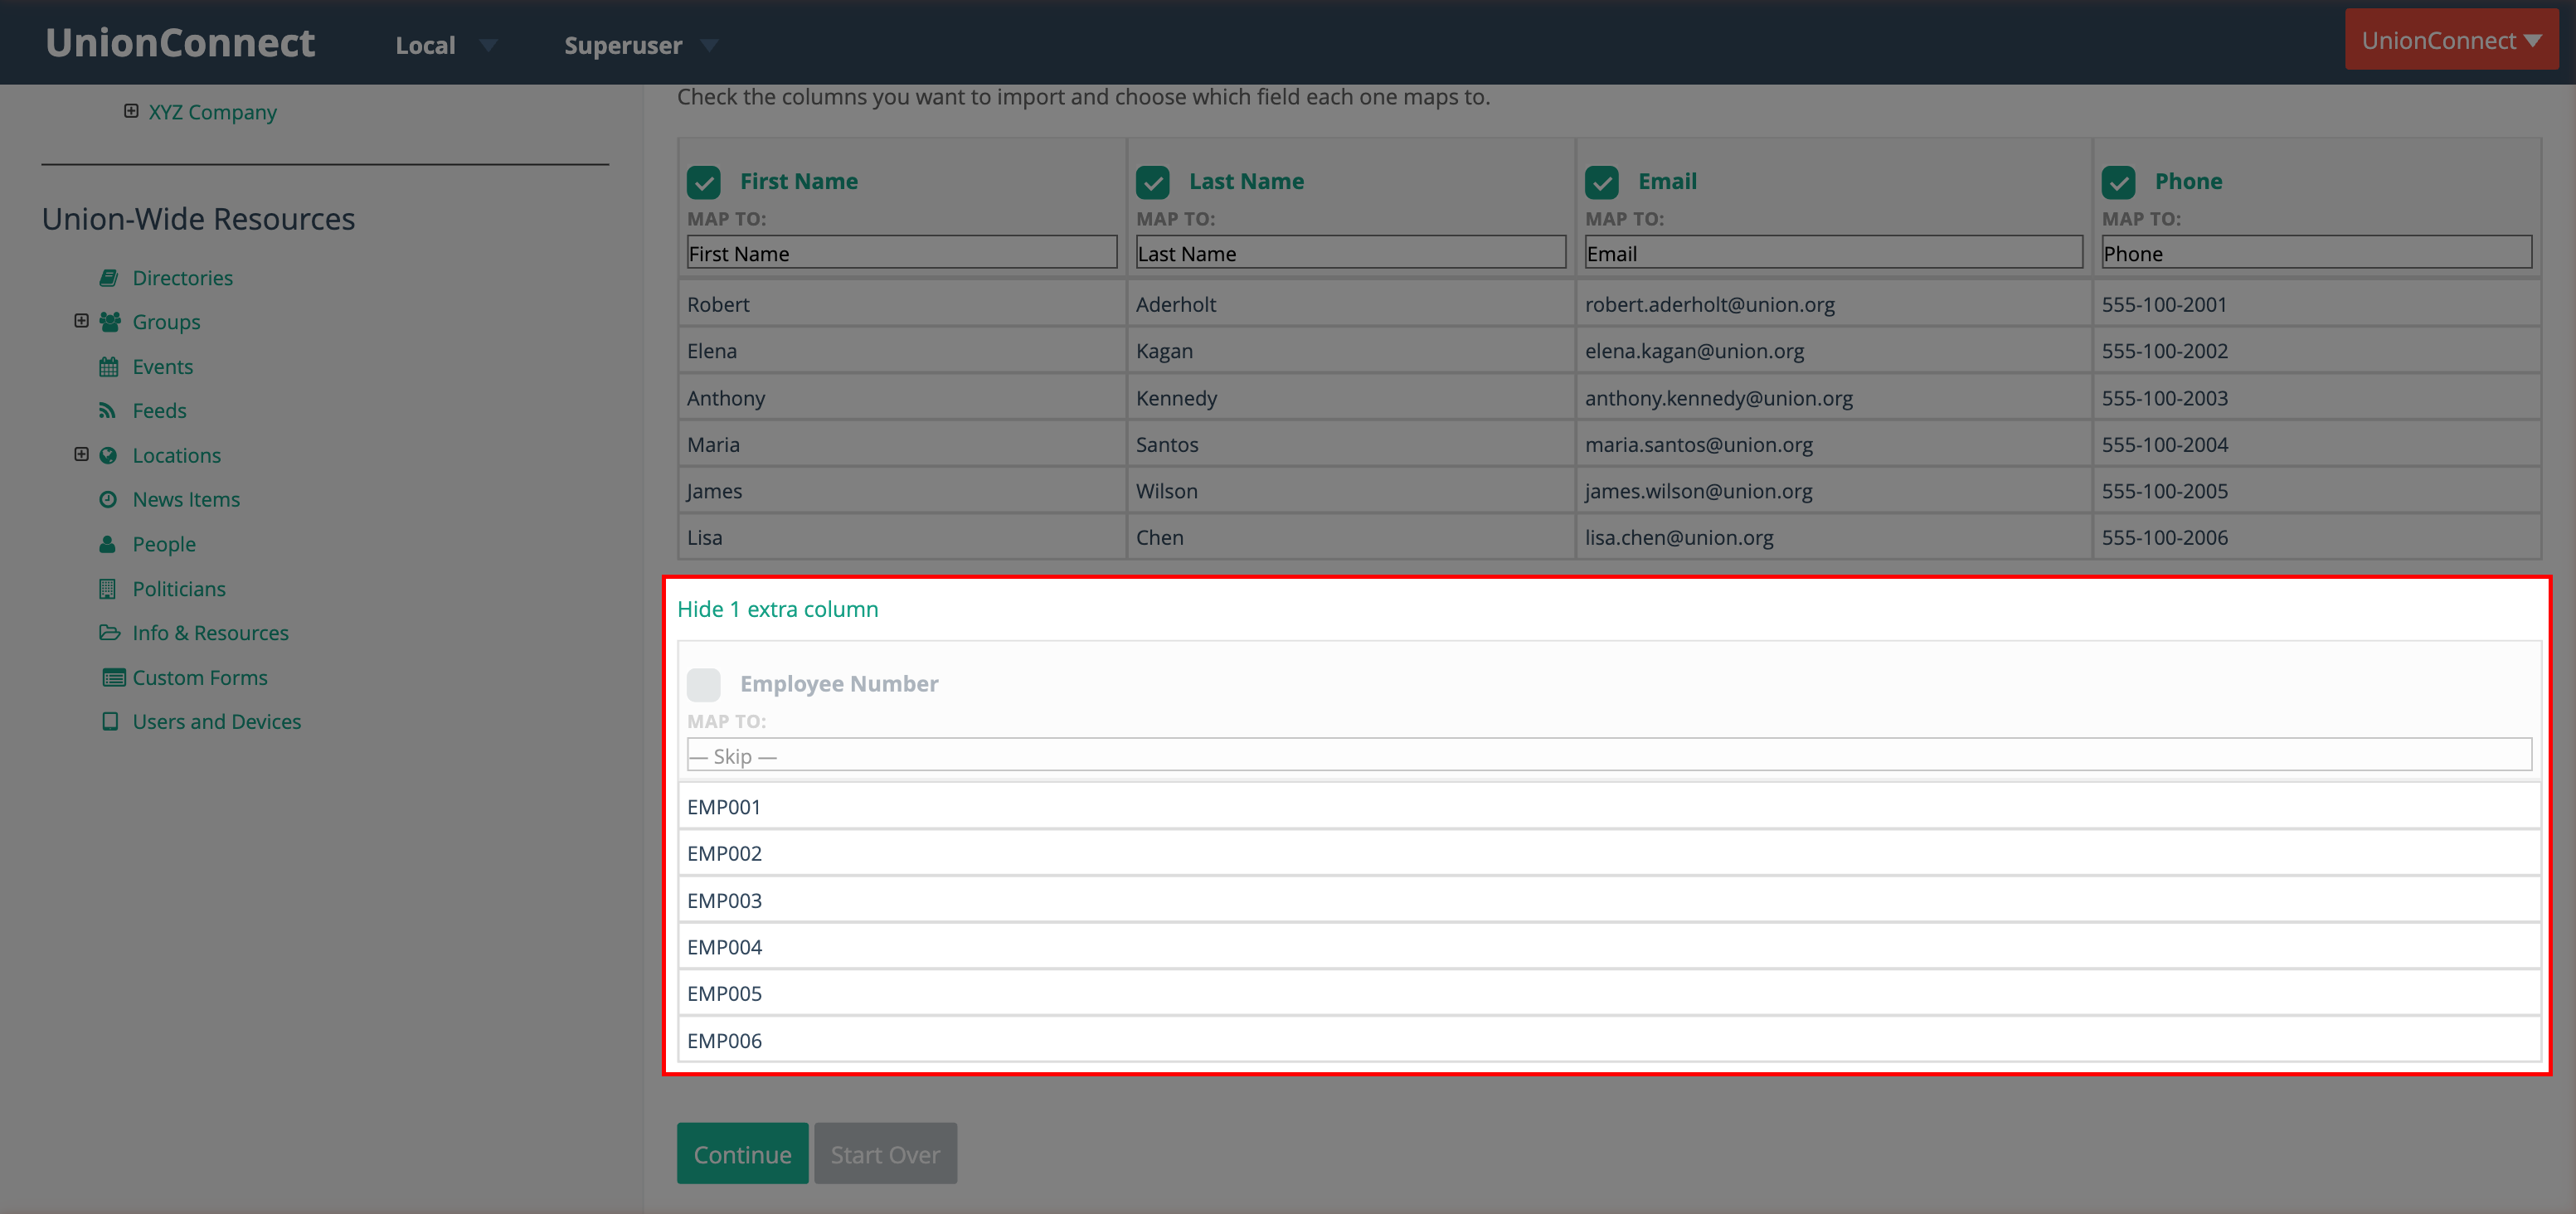
Click Continue when your columns are mapped correctly, or Start Over to go back to the beginning.
Step 3: Identify
This step asks how the system should recognize each person. If your spreadsheet has a unique identifier column (like an Employee Number or Member ID), select it from the dropdown. This helps the system recognize returning people on future imports so their info gets updated instead of duplicated.
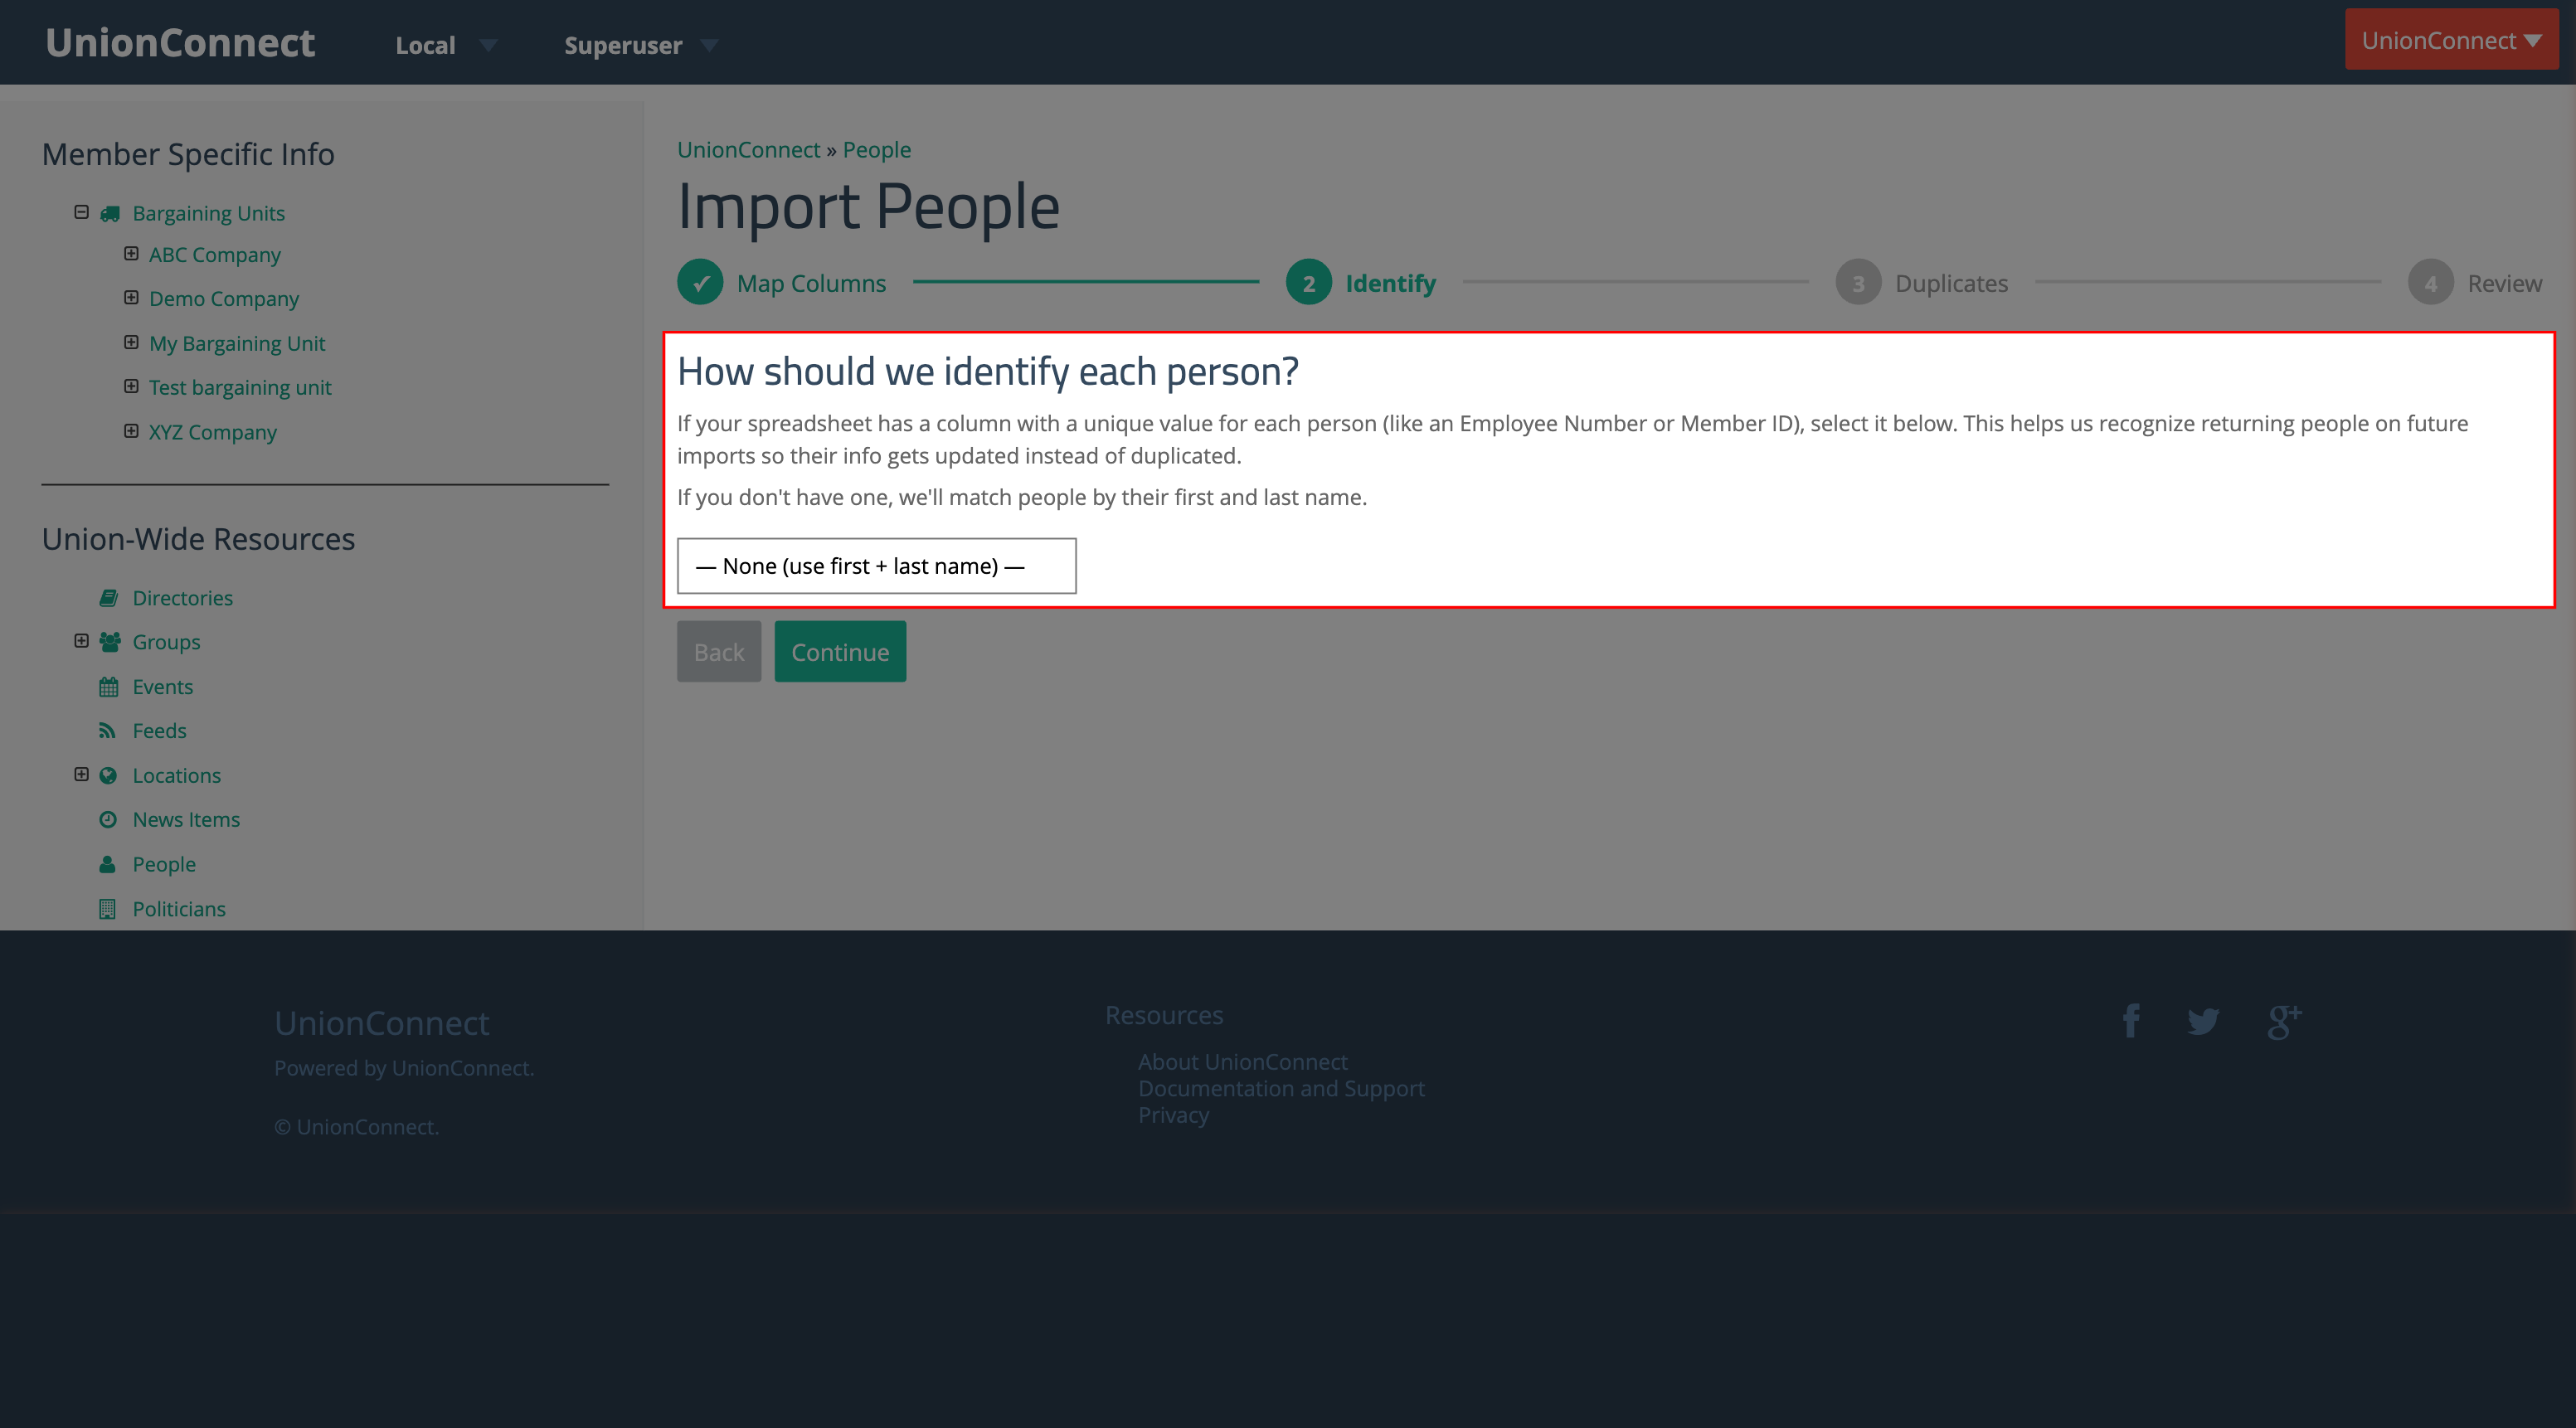
If you do not have a unique identifier column, leave it set to None (use first + last name) and the system will match people by their first and last name.
Click Continue to proceed. The system will check for duplicates, which may take a moment.
Step 4: Duplicates
If your local already has people, the wizard will check whether anyone in your file already exists. You will see three options for how to handle duplicates:
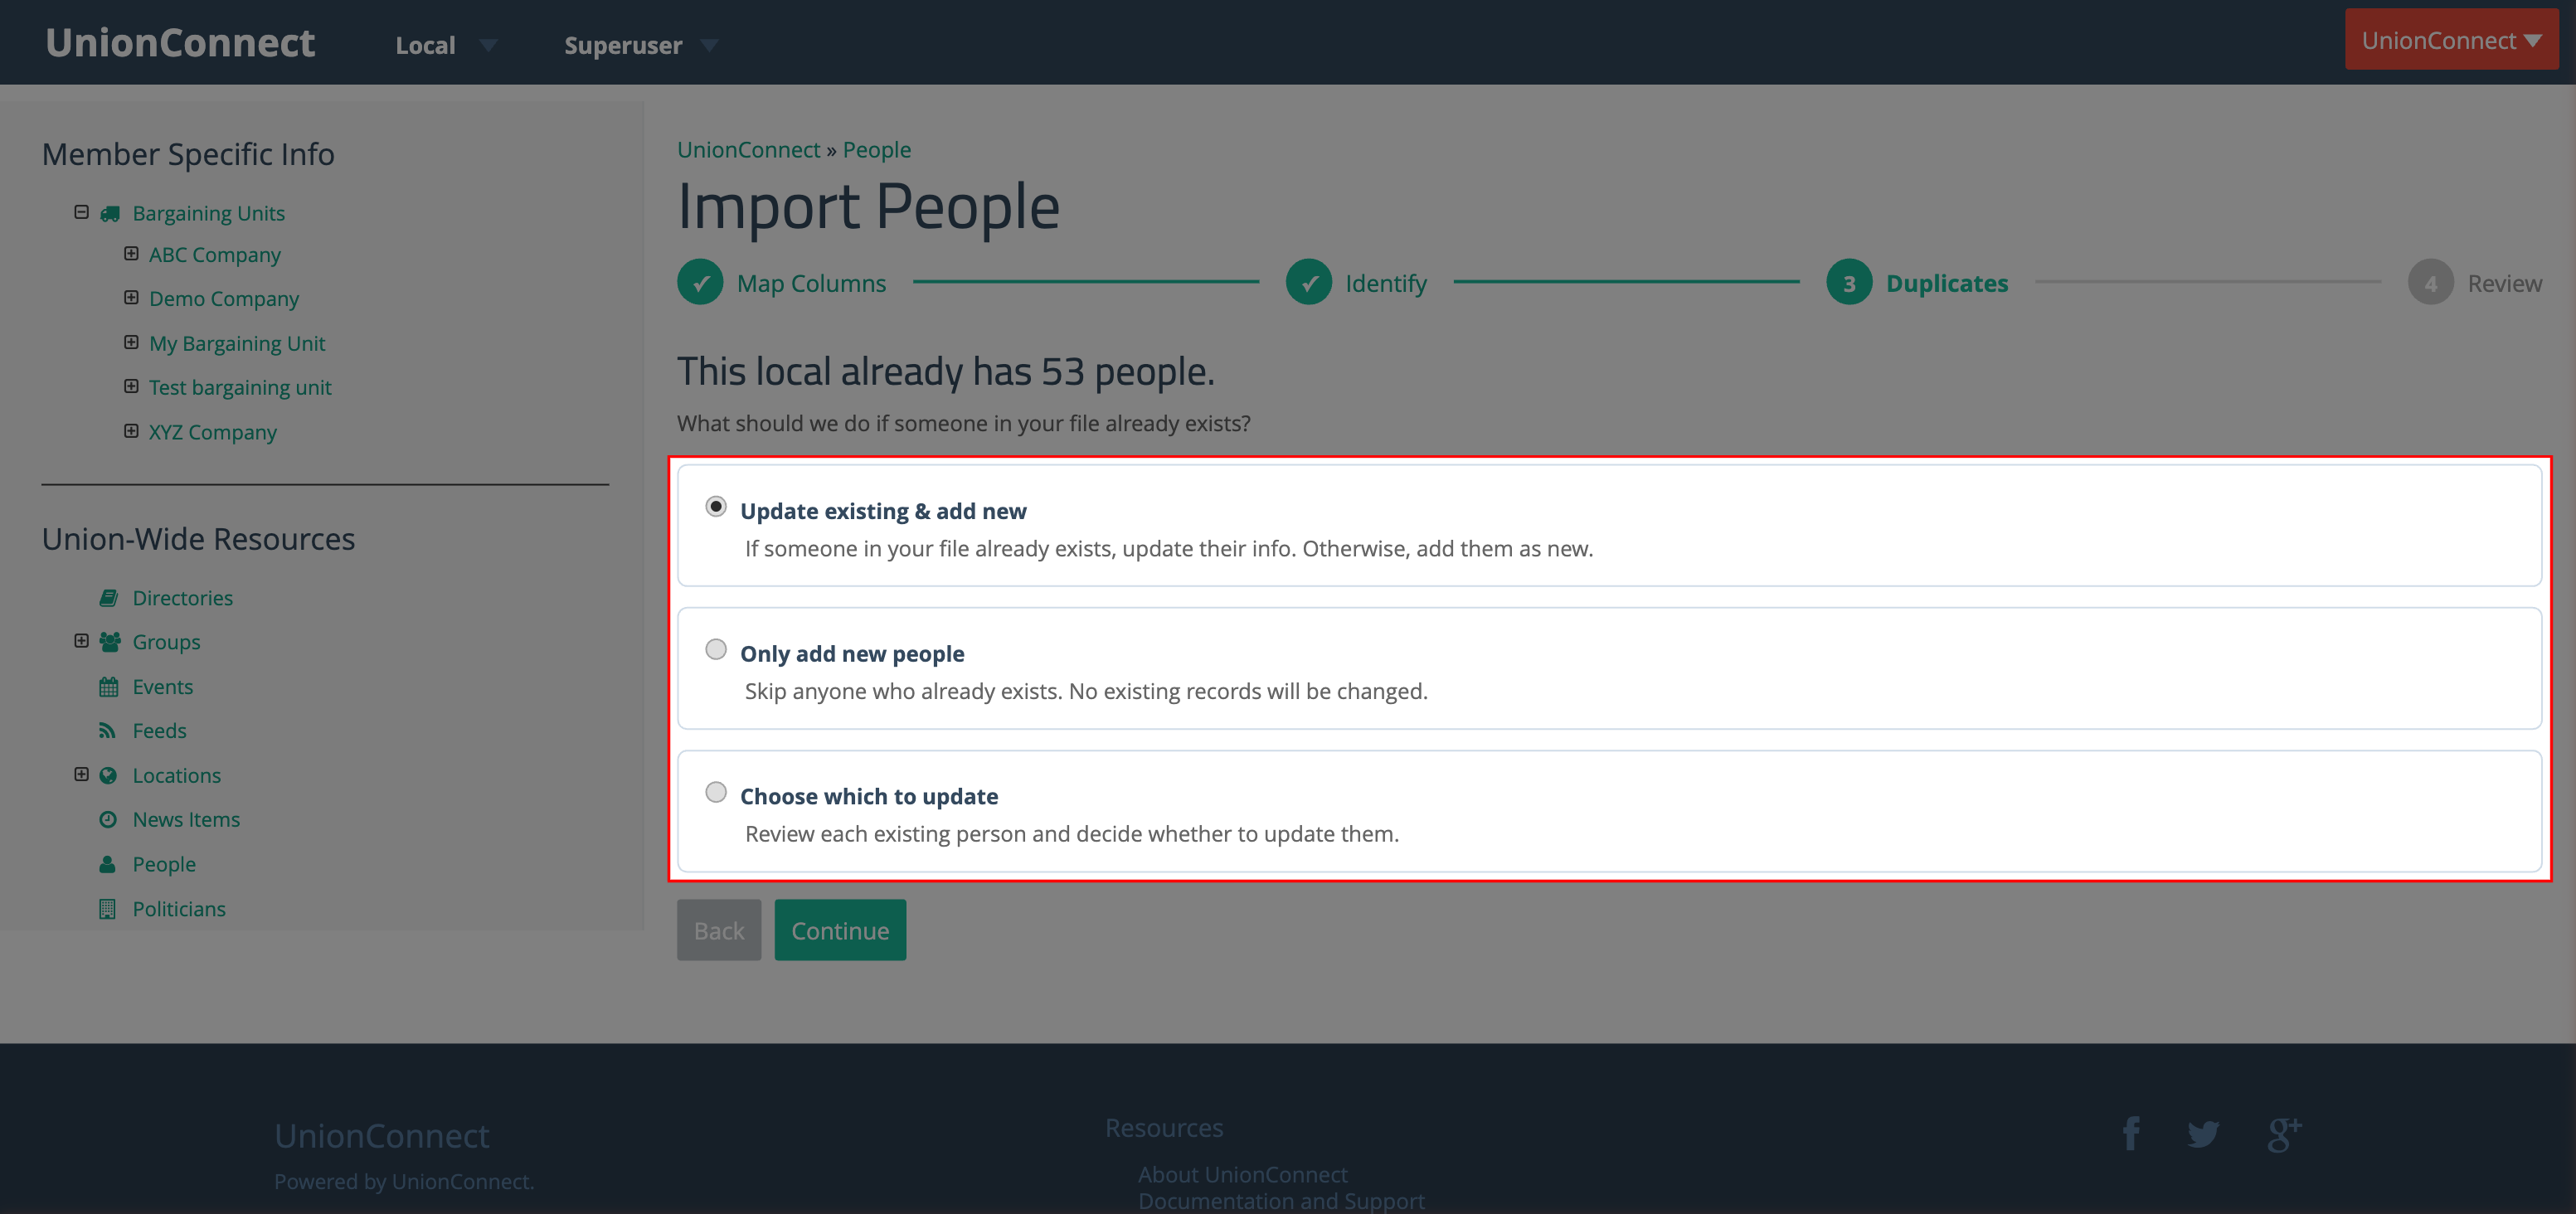
- Update existing & add new (recommended) — If someone in your file already exists, their info will be updated with the new data. New people will be added. This is the default option.
- Only add new people — Anyone who already exists will be skipped. No existing records will be changed.
- Choose which to update — Review each matching person individually and decide whether to update them.
Reviewing Individual Duplicates
If you choose Choose which to update, a section will appear showing a card for each person found in both your file and the existing records. Each card shows:
- A checkbox next to the person’s name — check it to update their info, uncheck it to skip them.
- How the person was matched (for example, “Matched by: First + last name”).
- A side-by-side comparison of CURRENT values (what is already in the system) and INCOMING values (what is in your file). Only fields that are different are shown.
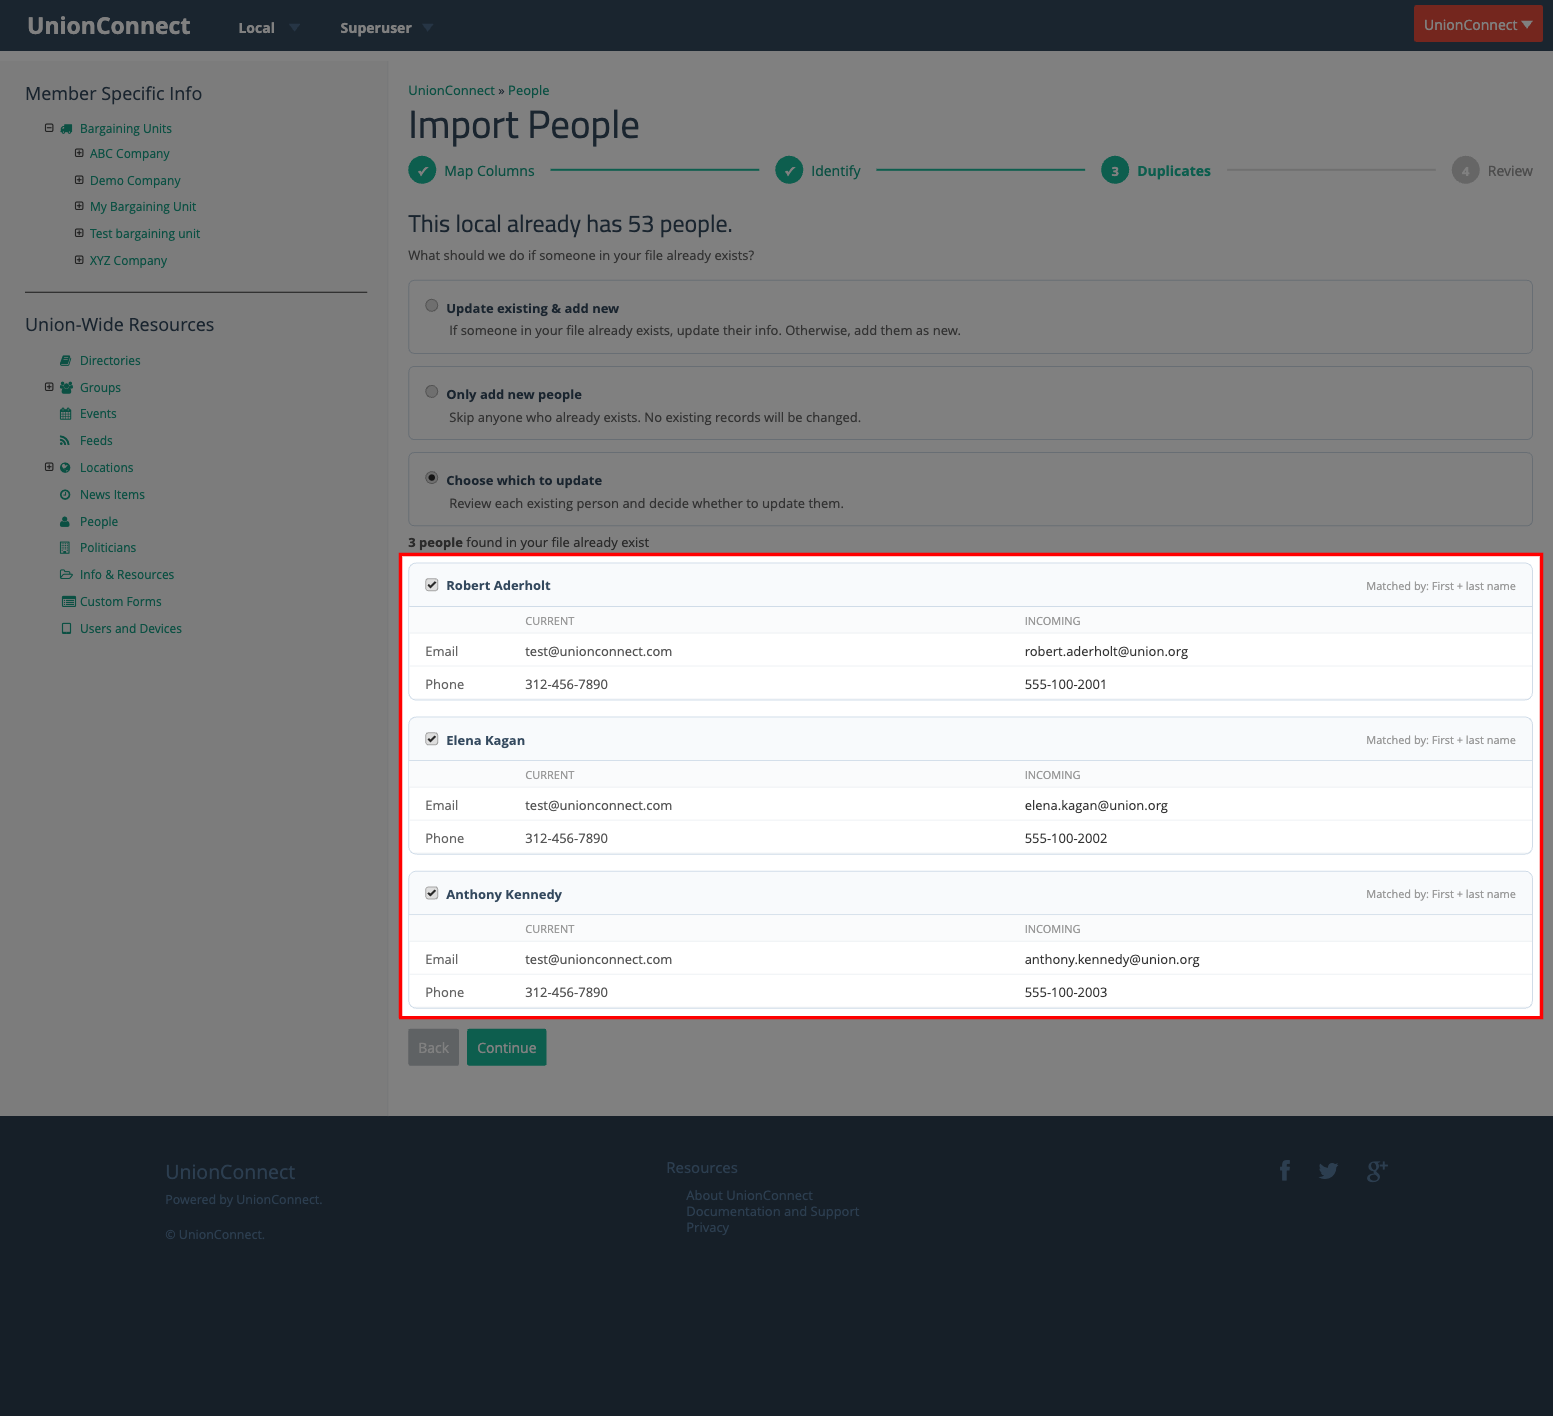
Click Continue when you have made your selections.
Step 5: Review
Before importing, you will see a summary of what will happen:
- The number of new people that will be added.
- The number of people that will be updated (if applicable).
- Which fields are being imported.
- How people are being matched (by identifier column or first + last name).
- A preview table showing the first few rows from your file.
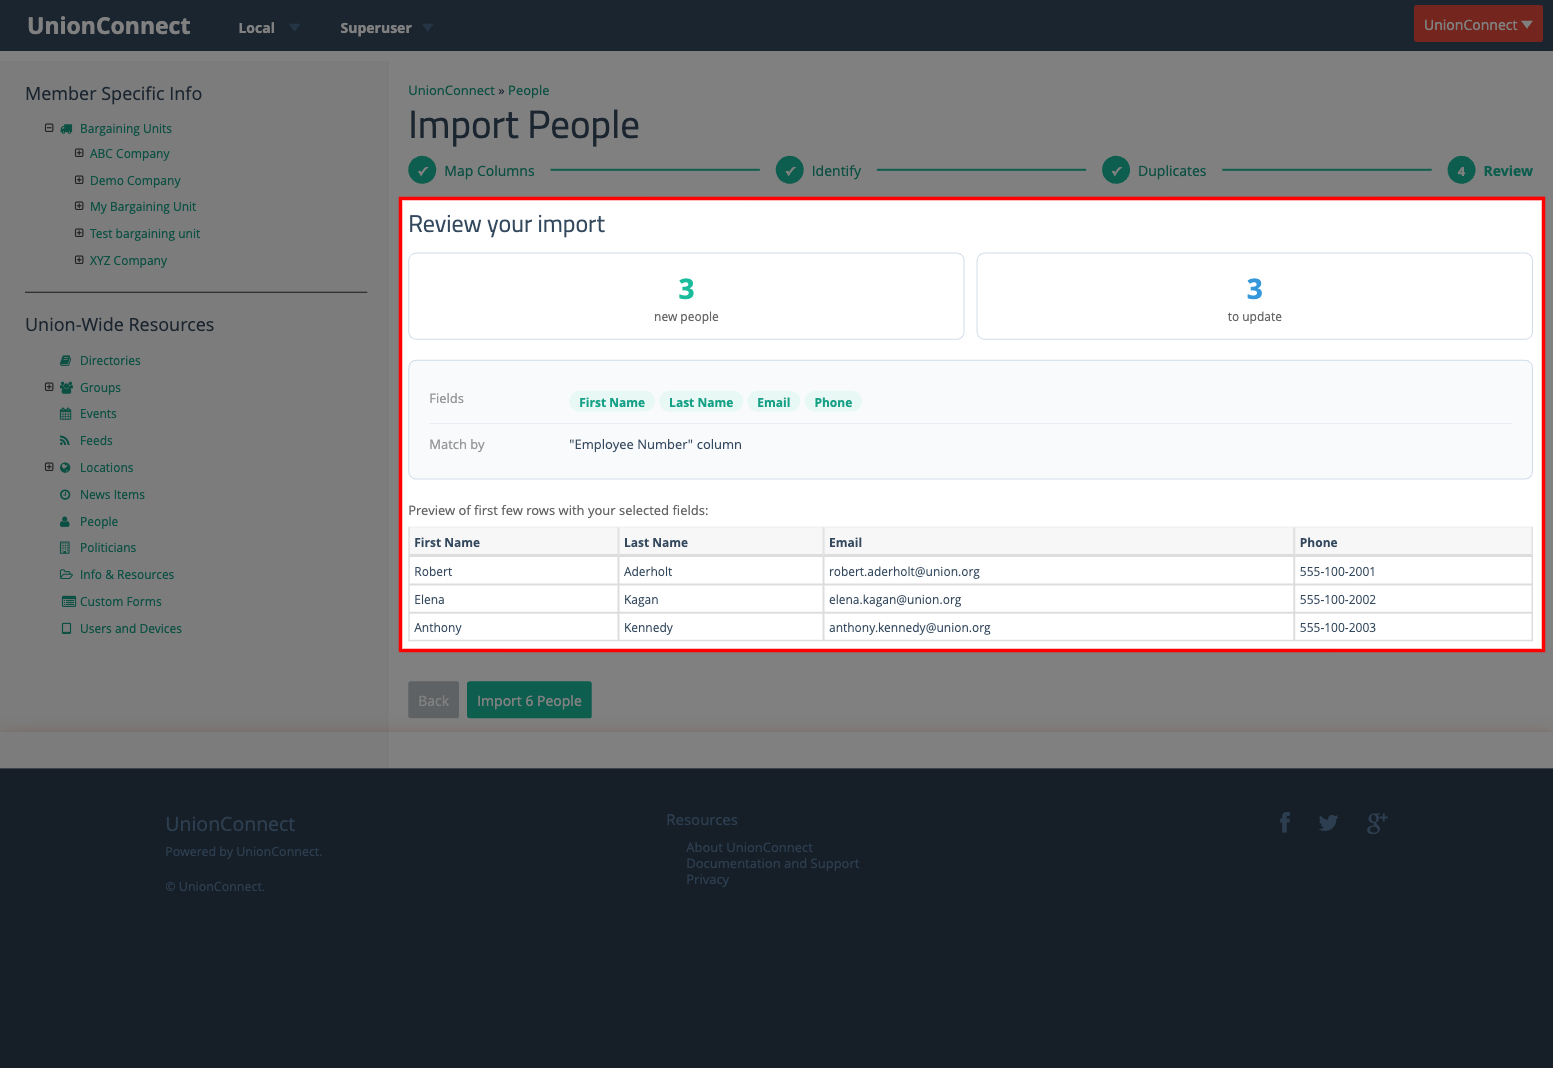
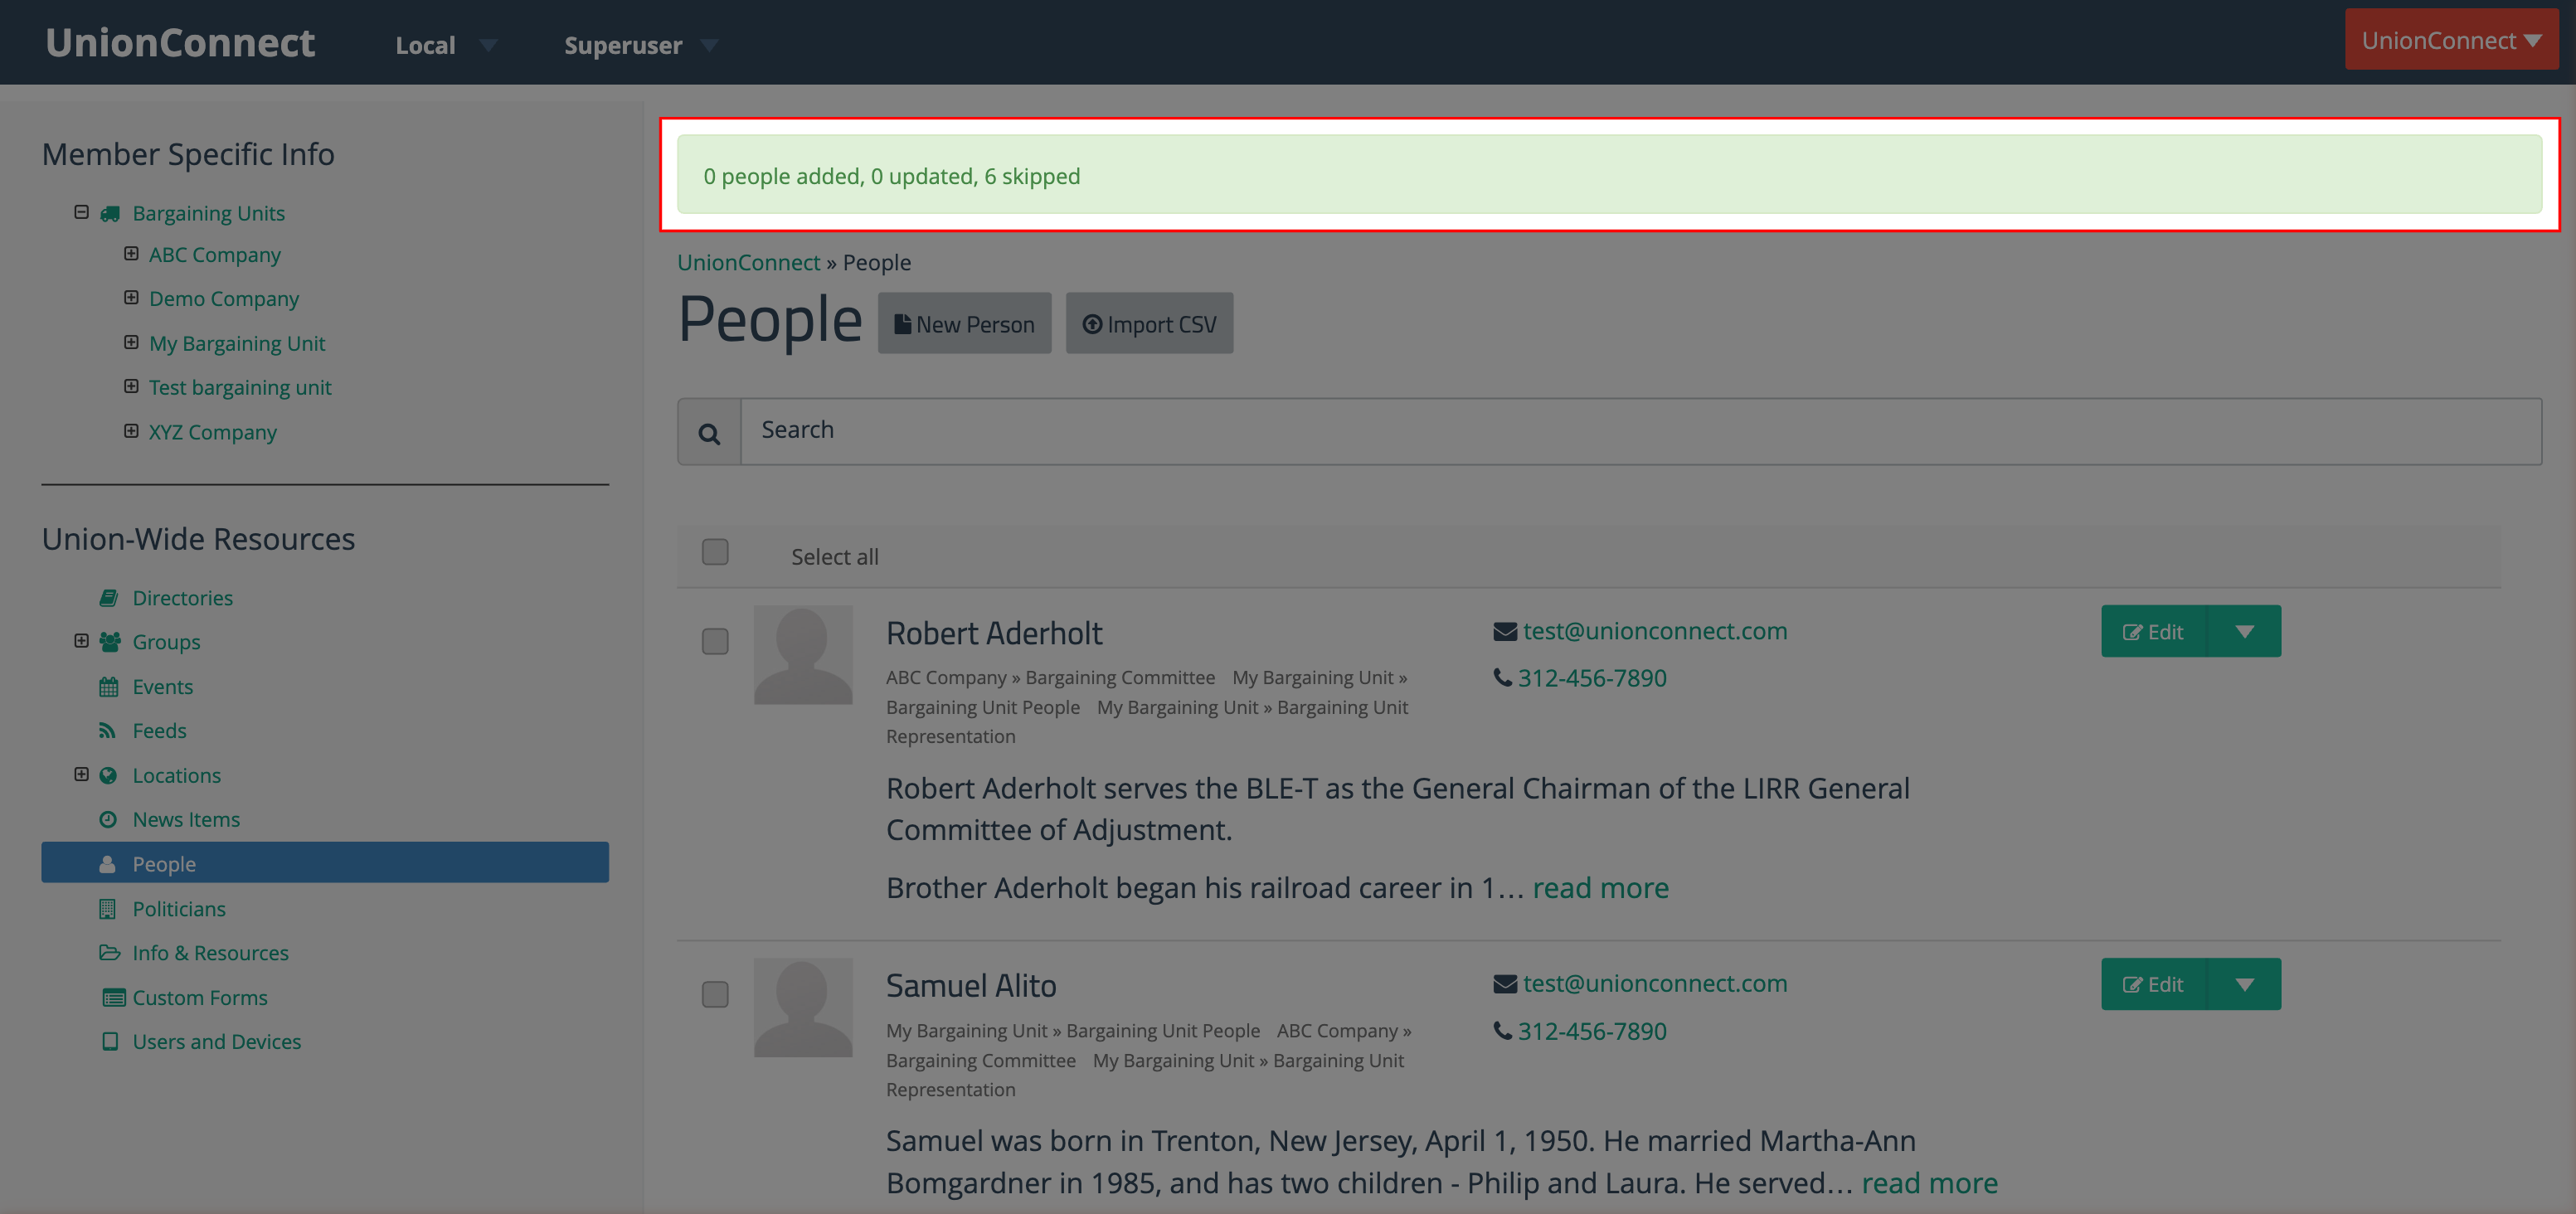
Click Import N People to complete the import. You will be taken back to the People page and a green confirmation message will appear at the top showing how many people were added, updated, or skipped.
Tips
- File size limit: Imports are capped at 500 rows. If your file has more than 500 rows, only the first 500 will be imported.
- Identical records are not counted as updates. If you import the same file twice with no changes, the second import will show “0 updated” because nothing actually changed.
- Email addresses are automatically lowercased during import.
- Phone numbers: If your file includes an Area Code column, it will be prepended to phone numbers. Extensions like “ext 123” in phone numbers are automatically extracted into the Phone Ext field.